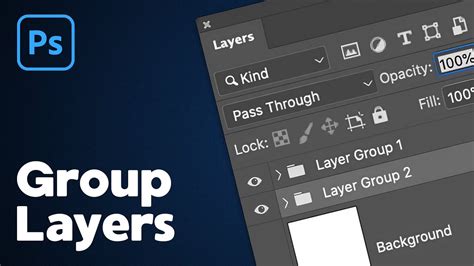
In the complex world of digital art and photo manipulation, Adobe Photoshop stands as a cornerstone application. As projects grow in scope and complexity, the sheer number of layers in the Layers panel can quickly become overwhelming. This is where the power of layer groups becomes indispensable. Layer groups, akin to folders within your digital workspace, allow you to meticulously organize related layers, streamlining your workflow, enhancing collaboration, and ultimately leading to more efficient and manageable projects. This tutorial will delve deep into the functionalities of layer groups, from their creation and organization to their advanced applications, ensuring your Photoshop experience is as smooth and organized as possible.
The Foundation of Organization: Understanding Layers and the Need for Grouping
Before diving into layer groups, it's crucial to grasp the fundamental concept of layers in Photoshop. Layers are like transparent sheets stacked on top of each other, each containing a different element of your image. This non-destructive editing approach is what makes Photoshop so powerful, allowing you to modify individual elements without affecting others. However, as you add more layers - be it for different adjustments, text elements, shapes, or imported assets - the Layers panel can transform from a helpful tool into a chaotic labyrinth.
Consider a project involving a complex illustration or a composite photograph. You might have layers for background elements, subject details, lighting effects, text overlays, and various adjustment layers. Without proper organization, finding a specific layer to make a minor edit can become a time-consuming and frustrating endeavor. This is precisely why layer groups were introduced. They provide a hierarchical structure, allowing you to bundle related layers together, creating a more logical and navigable Layers panel.
Creating and Naming Your Layer Groups: The First Steps to Order
The process of creating a layer group in Photoshop is straightforward and can be achieved through several intuitive methods.
Method 1: The Folder Icon Approach
The most visually direct method is to utilize the "Create New Group" icon, which resembles a folder, located at the bottom of the Layers panel.
- Select a Target Layer (Optional but Recommended): While not strictly necessary, selecting a layer or group before creating a new group can influence where the new group is initially placed. The new group will typically be created above the currently targeted layer.
- Click the Folder Icon: Click on the folder icon at the bottom of the Layers panel.
- Automatic Group Creation: Photoshop will instantly create a new, empty layer group, usually named "Group 1" by default. This group will appear in the Layers panel.
Method 2: Keyboard Shortcuts for Efficiency
For those who prefer keyboard-driven workflows, Photoshop offers convenient shortcuts:
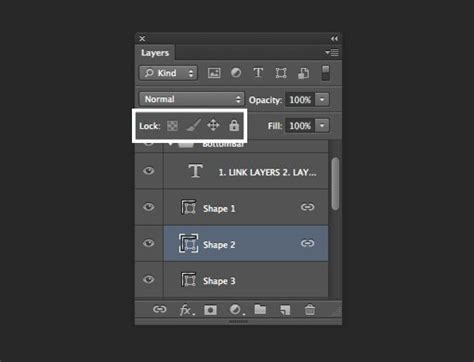
- Command + G (macOS) | Control + G (Windows): This shortcut is a powerful tool. If you have one or more layers already selected in the Layers panel, pressing this shortcut will not only create a new layer group but will also automatically place the selected layers into that newly created group. This is an incredibly efficient way to start organizing. If no layers are selected, it will create an empty group.
Method 3: Menu Command
You can also create a layer group via the menu:
- Select Layers (Optional): As with the folder icon method, selecting layers beforehand will place them into the new group.
- Navigate the Menu: Go to
Layer > New > Group...
Naming Your Groups: The Key to Understanding
Once a group is created, its default name (e.g., "Group 1") is rarely descriptive. Giving your groups meaningful names is paramount for effective organization.
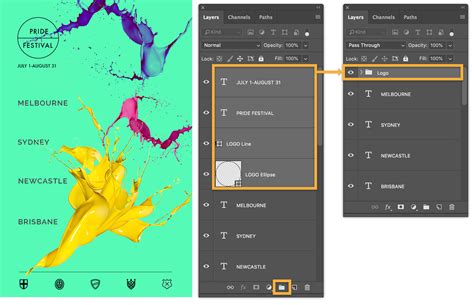
- Double-Click and Type: The simplest way to rename a layer group is to double-click directly on its name in the Layers panel. This will allow you to type in a new, descriptive name. For instance, if the group contains all elements related to a logo, you might name it "Logo Elements" or simply "Logo."
- Press Enter/Return: After typing the new name, press
EnterorReturnto confirm the change.
By giving your groups clear and concise names, you create a visual roadmap within your Layers panel, making it significantly easier to locate and manage specific sets of elements.
Organizing and Managing Layers Within Groups
Layer groups are not just containers; they offer a range of functionalities that enhance your ability to manage the layers within them.
Adding Layers to Existing Groups
There are several ways to add layers to an existing group:
- Drag and Drop: The most intuitive method is to click and drag individual layers or multiple selected layers from their current position in the Layers panel directly into the desired layer group. As you drag, you'll notice the cursor change, and a visual indicator will show where the layers will be placed.
- Using the Group Icon: You can drag selected layers down to the "Create New Group" (folder) icon. If you already have a group, dragging layers onto the group's name or its folder icon will place them inside.
Moving and Reordering Layers Within Groups
The stacking order of layers is critical in Photoshop, determining which elements appear in front of or behind others. This principle extends to layers within groups.
- Drag and Drop Reordering: You can reorder layers within a group by clicking and dragging them to their new position inside the group.
- Predicting Placement: When dragging layers into or out of groups, pay close attention to the blue line indicator. This line shows precisely where the layer will be placed. If the line appears within the indented list of layers belonging to a group, the layer will be placed inside that group. If the line appears outside the group's indentation, the layer will remain outside or be placed in a different location.
Expanding and Collapsing Groups
To manage the visual clutter of a busy Layers panel, layer groups can be expanded or collapsed using a small disclosure triangle (or arrow) next to the group's name.
- Click the Triangle: Clicking this triangle will either reveal the layers contained within the group (expanding it) or hide them (collapsing it). This is an invaluable feature for focusing on specific sections of your project without being distracted by unrelated layers.
- Visibility Control: When a group is collapsed, its visibility icon (the "eyeball") controls the visibility of all layers within it simultaneously. This allows you to quickly show or hide entire sets of elements with a single click.
Deleting Layer Groups
Deleting a layer group can be done in a few ways, with an important distinction to be aware of:
- Delete Group and its Contents:
- Select the layer group you wish to delete.
- Click the trash can icon at the bottom of the Layers panel.
- Alternatively, go to
Layer > Delete > Group. - This action will remove the group and all the layers contained within it.
- Delete Group but Keep Layers:
- Select the layer group.
- Go to
Layer > Delete > Group. - This option, when available, will remove the group itself but leave its constituent layers in the main Layers panel, ungrouped.
Advanced Layer Group Functionalities
Beyond basic organization, layer groups offer powerful features that can significantly enhance your creative process.
Applying Layer Styles and Effects to Groups
One of the most compelling advantages of layer groups is the ability to apply layer styles and effects to the entire group as a single unit.
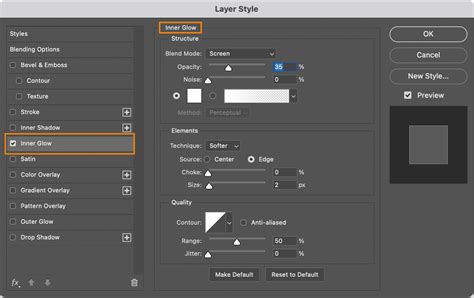
- Applying Styles to a Group: You can add effects like drop shadows, bevels, or strokes directly to a layer group. This is done by double-clicking the group name (similar to how you'd access layer styles on an individual layer) or by going to
Layer > Layer Style. - Efficiency: This is incredibly efficient, as you only need to define the style once, and it will be applied to all layers within the group. If you need to adjust the style, you only modify it on the group itself, and all layers update accordingly.
- Important Consideration: Merged Appearance: It's crucial to understand that when a layer style is applied to a group, Photoshop essentially treats the contents of the group as if they were merged or flattened before applying the style.
- When it works best: This is not an issue if the layers within the group do not overlap, or if you intend for the effect to appear as if applied to a single, merged object.
- When to be cautious: If layers within the group do overlap and you don't want the effect to appear as if the layers are merged (e.g., you want a drop shadow to appear around each individual element), applying the style to the group might not produce the desired result. In such cases, you would need to apply the style to individual layers and then copy/paste that style to other layers within the group.
- Copying Layer Styles: To copy a style from one layer to others (or to apply it to a group if direct group styling isn't ideal):
- Right-click (Windows) or Control-click (macOS) on the layer with the desired style.
- Choose "Copy Layer Style."
- Select the target layers or the group.
- Right-click (Windows) or Control-click (macOS) on the target and choose "Paste Layer Style."
Blending Modes and Opacity for Groups
Layer groups also respect blending modes and opacity settings, just like individual layers.
- Default Behavior: By default, a layer group inherits the blending mode and opacity of the layers within it. If a layer inside the group has a blend mode set to "Multiply," it will blend with all layers below it, both inside and outside the group.
- Controlling Group Blending: You can change this behavior by targeting the layer group itself and setting its blend mode to "Normal." This confines the blending effects to only occur between layers within that specific group, providing more granular control over how elements interact.
Nesting Layer Groups: Deeper Levels of Organization
Photoshop allows you to create nested layer groups, meaning you can place layer groups inside other layer groups.
- Creating Nested Groups: The process is the same as creating regular layer groups. You can select existing groups and use
Command + G/Control + G, or drag groups into other groups. - Depth Limit: You can nest layer groups up to 10 levels deep. This allows for extremely intricate organizational structures, perfect for very complex projects. For example, you might have a main "Characters" group, containing nested groups for "Protagonist," "Antagonist," and "Supporting Cast," each with their own internal layer organization.
Photoshop Layers: Become a Layer Master (Advanced)
Masking Entire Groups
Just as you can apply a layer mask to an individual layer, you can also apply a mask to an entire layer group.
- Applying a Group Mask: Select the layer group and click the "Add layer mask" icon at the bottom of the Layers panel.
- Masking Multiple Layers: This mask will then affect all layers within the group simultaneously. Painting with black on the group mask will hide parts of all layers within the group, while painting with white will reveal them. This is incredibly useful for applying complex masking effects to a collection of related elements in one go.
Working with Vector Data and Rasterization
It's important to note that layer groups, like individual layers, have certain limitations when dealing with specific types of content.
- Vector vs. Pixel Data: You cannot directly use painting tools or filters on layers that contain vector data (such as type layers, shape layers, vector masks, or Smart Objects) or generated data (like fill layers). These layers are resolution-independent and defined by mathematical equations rather than pixels.
- Rasterization: To apply pixel-based editing techniques to these layers, you must first "rasterize" them.
- Rasterize Type: For type layers, you can right-click the layer and choose "Rasterize Type."
- Rasterizing Smart Objects: For Smart Objects, you can right-click and select "Rasterize Layer."
- Recommendation: It is strongly recommended to duplicate a layer before rasterizing it. This ensures you always have the original vector or Smart Object version to fall back on if you need to make non-destructive edits or changes later. Once rasterized, the layer is converted to pixel-based data, and its original editable properties are lost.
Merging and Flattening Layers: When Organization is Complete
Once your project is finalized and you're ready to reduce file size or prepare for output, merging and flattening become relevant. Layer groups can facilitate these processes.
Merging Layers
Merging layers combines multiple layers into a single layer.
- Merge Down (
Cmd+E/Ctrl+E): Merges the selected layer with the layer directly below it, provided the bottom layer is a pixel layer. - Merge Visible: This option allows you to merge only the currently visible layers. You would typically hide layers you don't want to merge, select a base pixel layer, and then choose
Layer > Merge Visible. - Merging within Groups: You can select multiple layers within a group and merge them, or even select an entire group and merge it down with layers below it.
Stamping Layers
Stamping is similar to merging but creates a new, merged layer on top of the existing ones, leaving the original layers intact.
- Stamp Visible (
Shift+Opt+Cmd+E/Shift+Alt+Ctrl+E): This shortcut creates a new layer containing a merged version of all currently visible layers. This is a non-destructive way to create a composite of your visible work.
Flattening the Image
Flattening is the most aggressive form of merging, combining all visible layers into a single background layer and discarding any hidden layers.
- Flattening:
Layer > Flatten Image. - Consequences: Any transparent areas in the original image will typically be filled with white. Flattening significantly reduces file size but makes further non-destructive editing impossible.
- Flatten All Layer Effects: Photoshop also offers
File > Scripts > Flatten All Layer Effects, which can be useful for specific output scenarios.
Deleting Hidden Layers
To further manage file size and reduce clutter, Photoshop provides an option to delete all hidden layers:
- Delete Hidden Layers:
Edit > Delete > Hidden Layers. This action is irreversible, so it's wise to ensure you have saved your work or have duplicated important elements before proceeding.
Smart Objects and Layer Groups: A Note on Copying
When working with Smart Objects, there are specific behaviors to be aware of when copying and pasting between documents, especially in conjunction with layer groups.
- Smart Object Copy Limitation: If you copy a Smart Object layer and paste it into another document, any edits made to the pasted Smart Object will not update the original Smart Object layer, and vice versa. This is a known limitation.
- Paste Options:
- Paste (
Cmd/Ctrl+V): Pastes copied layers into the center of the target document. - Paste Special > Paste In Place (
Cmd/Ctrl+Shift+V): Pastes copied layers into the target document at a position relative to their original location. This is extremely useful for maintaining layout integrity when working with multiple documents. - New Document from Clipboard: When creating a new document, the "Clipboard" option in the New Document dialog will create a document sized to match the copied layers.
- Paste (
Conclusion: Embracing Layer Groups for a Superior Photoshop Workflow
Mastering layer groups in Photoshop is not merely about tidiness; it's about fundamentally improving your efficiency, control, and overall creative output. By consistently employing naming conventions, logical grouping, and leveraging the advanced functionalities like group-based effects and masks, you transform your Photoshop experience from potentially chaotic to systematically organized. As you become more adept with layers and their grouping capabilities, you'll find that complex projects become more manageable, collaboration smoother, and your creative vision can be executed with greater precision and less friction. The Layers panel, when managed effectively with layer groups, becomes a powerful ally in your digital artistry.