Creating a halftone pattern in Adobe Illustrator has evolved from a time-consuming, multi-software process into a streamlined, built-in capability. Historically, achieving this retro aesthetic involved a circuitous route: opening an image in Photoshop, converting it to grayscale, applying a halftone effect, then importing it into Illustrator, tracing it, and hoping for a clean vector conversion. This often led to frustration and compromised results. Fortunately, Illustrator now offers direct methods to generate high-quality halftone effects, allowing designers to simulate continuous tones with varying dot sizes to create smooth tonal transitions and rich color depth.
Understanding Halftone Patterns
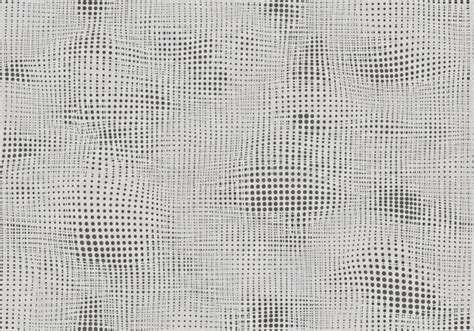
Before diving into the practical application, it's beneficial to grasp the fundamental principle of halftone patterns. Essentially, halftones simulate continuous tones, such as those found in photographs or gradients, by employing a series of equally spaced dots of varying sizes. The human eye, when viewing these finely rendered dots from a distance, blends them together, perceiving smooth gradations of tone and color. This principle applies not only to grayscale images but also to elements containing continuous tone, including gradients, blends, and gradient meshes within Illustrator.
The human eye also plays a crucial role in blending limited palettes of colors to create a broader spectrum of hues in a halftone. This process is akin to a color mixer; for instance, a halftone pattern can mix dots of Cyan and Yellow to produce a green color, mirroring the process of mixing these inks. However, when using processed colors (combinations like the Cyan and Yellow mixture for green) directly in the creation of a halftone pattern, it might not convert to vector gracefully. To ensure a smoother conversion and better control, it is initially recommended to use black for dark tones and white for light tones, especially when working with gradients, blends, and gradient meshes.
Direct Halftone Effect in Illustrator
Illustrator provides a direct method to apply a halftone effect, eliminating the need for external software. With your gradient, blend, or gradient mesh selected, navigate to the "Effect" menu, then choose "Pixelate" and subsequently "Color Halftone." Within the Color Halftone dialog box, adjusting the "Max Radius" is key to controlling the size of the dots. A setting of 20 is often a good starting point, but this can be modified to achieve the desired dot density. Keeping the other settings at their defaults is generally advisable for initial attempts, but experimentation with "Screen Angles" can yield different visual textures.
This direct effect generates a rasterized pattern. To transform this into a scalable vector graphic, the next crucial step is to "Expand Appearance" via the "Object" menu. Once expanded, the image becomes vector artwork, allowing for precise manipulation. With the expanded image selected, the "Control Panel" will typically default to "Live Trace" options. By clicking the arrow next to the "Live Trace" button and selecting "Tracing Options," you can fine-tune the vectorization process. It's a good practice to save your preferred "Tracing Options" as a preset. This not only streamlines future projects but also ensures consistency in your vector tracing results.
3 Ways to Add a Halftone Effect in Illustrator
Tracing and Vectorization
The "Live Trace" function is instrumental in converting the rasterized halftone effect into editable vector paths. When tracing, consider the quality of the original rasterized halftone. If the dots appear distorted or if there are unwanted shades, adjusting the "Tracing Options" is necessary. Parameters like "Paths," "Corners," and "Strokes" can be tweaked to achieve cleaner vector lines. For instance, setting "Paths" to a lower value might reduce unnecessary detail, while adjusting "Corners" can smooth out jagged edges.
It's important to note that the "Live Trace" process can sometimes introduce artifacts or slightly distort the intended dot shapes. This is particularly true if the initial halftone effect was applied to a complex image or if the "Max Radius" was set too high, resulting in very large or overlapping dots. Saving a preset in the "Tracing Options" is highly recommended, as it allows for quick recall of settings that have proven effective for similar halftones. This makes the process repeatable and less prone to errors.
Working with Photos and Grayscale Images
The halftone effect can also be applied to photographs. The process begins by placing your chosen photo into the Illustrator document using "File > Place." Once the image is on the artboard, it's essential to "Embed" it by clicking the "Embed" button in the "Control Panel." This ensures that the image data is contained within the Illustrator file. Following this, convert the embedded image to grayscale by navigating to "Edit > Edit Colors > Convert to Grayscale."
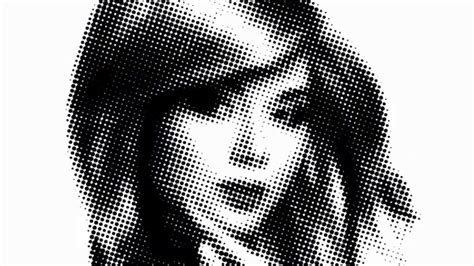
Once the image is in grayscale, you can then apply the "Color Halftone" effect as described previously. The "Max Radius" and "Screen Angles" settings will dictate the appearance of the halftone dots. Remember that the goal is to simulate the continuous tones of the photograph with varying dot sizes. After applying the effect, you'll need to "Expand Appearance" and then use "Live Trace" to convert the rasterized halftone into vector art. Again, experimenting with "Tracing Options" is crucial for achieving the best possible vector conversion from the photographic halftone.
Considerations for Color and Spot Colors
When initially creating halftone patterns, using black and white is generally the most reliable approach for a clean conversion to vector. If you intend to use color, it's advisable to work with spot colors rather than process colors (CMYK). This is because spot colors are typically solid, single inks, which translate more predictably into vector halftone patterns. If you apply the Color Halftone effect to a gradient that relies on process color mixing, the resulting vectorization might not be as clean, potentially leading to unexpected color shifts or artifacts.
If you find yourself needing to use color, consider applying the halftone effect to a grayscale image that has been converted to a duotone or tritone using spot colors. This approach allows for more controlled color application within the halftone structure. Alternatively, after vectorizing a black and white halftone, you can manually re-color the resulting vector shapes using spot color swatches. This provides a high degree of control over the final color output.
Exploring Illustrator's Built-in Swatches
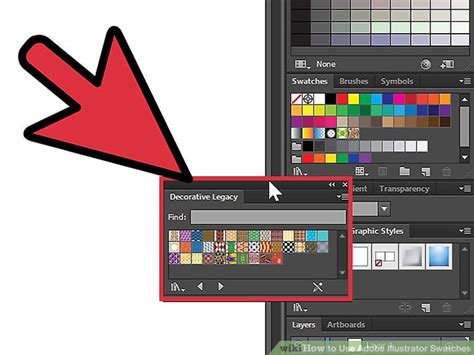
Beyond the direct "Color Halftone" effect, Illustrator offers a library of pre-made halftone patterns. To access these, open the "Swatch Panel" and click the pop-up menu. Navigate to "Open Swatch Library > Patterns > Basic Graphics > Basic Graphics_Dots." While these swatches provide a quick way to add halftone elements, they are often less versatile than patterns created through the "Color Halftone" effect and subsequent expansion and tracing. Nevertheless, they are a valuable resource for quick applications or for inspiration.
These pre-made swatches can be applied to shapes or objects, and their scale and rotation can be adjusted within the "Swatch Options." However, the underlying structure of these patterns is fixed, limiting the ability to fine-tune individual dot sizes or their distribution in the same way as with the effect-based method. For highly customized halftone designs, the direct effect combined with vectorization remains the preferred approach.
Advanced Techniques and Third-Party Plugins
For those seeking perfect circles within their halftone patterns, the direct "Color Halftone" effect and subsequent tracing might not yield consistently perfect results. The rasterization process inherently creates pixels, and vectorization can sometimes introduce slight imperfections. However, there are specialized tools that can address this.
The "Phantasm CS" plugin, for instance, is renowned for its advanced color adjustment capabilities and now includes a powerful halftone tool. This plugin allows for the creation of mathematically precise halftone patterns with perfect circular dots, offering a high degree of control over frequency, angle, and dot shape. For designers who require absolute precision or are frequently working with halftone effects, investing in such a plugin can be highly beneficial. While the plugin offers many features, its halftone tool alone can justify the purchase for many Illustrator users.
Creating Halftone Effects from Scratch
While effects and plugins offer streamlined workflows, it's also possible to construct halftone patterns manually using basic vector shapes. This method involves creating a series of circles (or other shapes) of varying sizes and arranging them. To achieve a consistent density and distribution, you can utilize Illustrator's "Blend" tool or scripting.
For instance, you could create a rectangle filled with a black and white gradient. Then, by applying the "Color Halftone" effect to this gradient object, you generate a rasterized halftone. Expanding this appearance and then using "Live Trace" converts it into vector shapes. Alternatively, for a more controlled, manual approach, you could create a single circle, then use "Object > Repeat > Grid" or "Object > Repeat > Radial" to duplicate and arrange it. By varying the size of these circles and potentially using a gradient fill on the background, you can build up a halftone effect.
Another approach involves using stroke settings. Open the stroke settings and ensure that the "cap" and "corner" settings are set to "round." In the stroke settings, make sure a "profile" is selected for the stroke. Then, in a pop-up window, play with the horizontal and vertical size values. This method can be used to create patterns where the "dots" are actually the result of thick strokes with rounded ends. The general steps for creating these patterns can be applied to various geometric shapes.
Halftone Patterns for Specific Styles
The retro aesthetic, often characterized by its use of halftone patterns, continues to be a popular design trend. Creating these effects in Illustrator avoids the tedious task of manually duplicating hundreds of circles. The "Color Halftone" effect, when applied thoughtfully, can replicate the look of vintage comic books and pop art.
When applying the halftone effect to an image or graphic element, it's crucial to consider the intended final size and resolution. Applying the effect to an image that is already at its final dimensions ensures that the dot density and size are appropriate. Tweaking the "Max Radius" and "Screen Angles" will allow you to achieve the perfect density of dots for your specific artwork. This can be a good way to add visual interest and a unique texture to grayscale artwork.
Utilizing Illustrator Assets
For those looking for ready-made solutions, a wealth of halftone resources is available for Adobe Illustrator. These can range from brushes and patterns to complete vector packs. For example, Envato Elements offers unlimited downloads of Illustrator resources, including halftone brushes and patterns, for a monthly subscription.
Specific asset packs include:
- Illustrator Halftone Vector Succulents: This pack offers beautifully designed plant graphics with built-in halftone patterns, ideal for styling projects with a natural yet retro feel.
- Vector Paper Textures: Illustrator Halftone Effect: This collection provides a variety of textures that incorporate halftone effects, giving designs a tactile, paper-like quality.
- Halftone Heat: Halftone Pattern Illustrator: This pack features colored halftone patterns, adding a vibrant and appealing dimension to projects. The pixelated nature of these patterns enhances their visual impact.
- Clean Vector Halftones: For users short on time, these pre-made halftone effect options can be quickly applied to photos or graphics to achieve a retro look.
- Seamless Halftone Pattern Illustrator Pack: These patterns are designed to tile seamlessly, making them perfect for creating backgrounds for comic strips, pop art, and other graphic elements.
These pre-made assets can significantly speed up the design process, allowing creators to incorporate sophisticated halftone effects without extensive manual creation or complex effect manipulation. They serve as excellent starting points or finishing touches for a wide array of design applications.
tags: #halftone #effect #illustrator