Adobe Photoshop stands as a monumental piece of software within the creative industry, its depth and breadth making complete mastery an almost insurmountable goal. Regardless of your primary application for Photoshop, it's common to develop a focused approach, utilizing specific tools and techniques for particular projects. When first venturing into Photoshop during my teenage years, my aim was to create digital art, which led me to explore numerous techniques for generating niche, singular effects suited for specific endeavors. This comprehensive guide, drawing inspiration from various expert tutorials and resources, will walk you through the process of transforming an ordinary image into a captivating hologram effect.

Understanding the Hologram Effect
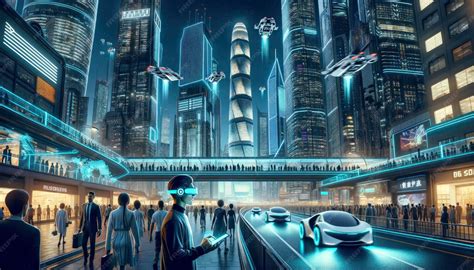
At its core, a hologram effect is a visual phenomenon that creates the perception of a three-dimensional image. The most commonly encountered type is the rainbow hologram, characterized by its iridescent, spectral qualities. In the realm of digital art and graphic design, achieving this effect in Photoshop can be an enjoyable process. More importantly, integrating this graphic design technique into your business can translate into tangible profits. For startups, it's not uncommon for clients to request holographic effects for their marketing materials and branding. While it may seem like a straightforward graphic design task in Photoshop, lacking the knowledge to create a convincing holographic effect can pose challenges and potentially lead to lost business opportunities. This tutorial aims to demystify the process and equip you with the skills to create these sought-after iridescent visuals.
Foundational Steps: Setting Up Your Canvas and Subject
Before diving into the intricate details of the hologram effect, it's crucial to establish a solid foundation within Photoshop.
New Canvas Creation: Begin by opening Photoshop and creating a new canvas. For this tutorial, a canvas size of 3000 pixels in both width and height, with a resolution of 72 pixels per inch, is recommended to accommodate detailed work. Navigate to
File > Newand input these dimensions.Color Palette: Define your foreground and background colors. These initial colors can influence subsequent steps and contribute to the overall mood of your hologram.
Importing Your Subject: Go to
File > Place Embeddedand select the primary image you wish to transform into a hologram. Once placed, set the Width and Height of this layer to 100.03% and position it precisely as desired on the canvas.Rasterizing and Cropping: To enable further manipulation, right-click on the image layer and choose
Rasterize Layer. Subsequently, pressControl-A(orCommand-Aon Mac) to select the entire canvas and then go toImage > Cropto trim any excess. Deselect by pressingControl-D(orCommand-Don Mac).Smart Object Conversion: For non-destructive editing, right-click on the image layer again and select
Convert to Smart Object. This step is vital for applying filters that can be revisited and adjusted later.
Building the Holographic Base: Gradients and Distortions
The initial layers of our hologram will be built upon gradient colors and carefully applied distortions.
Gradient Layer: Create a new layer positioned underneath the subject layer (or the color palette layer if you're working with one initially). Fill this new layer with a gradient of your chosen colors. Select colors from your established color palette that resonate with a futuristic or ethereal aesthetic.
Liquify Filter Application: With the gradient layer still selected, convert it to a Smart Object if it isn't already. Access the Liquify tool by going to
Filter > Liquify. Apply the Liquify tool to the gradient layer, observing the preview to understand how it warps and distorts the colors. Experiment with different brush sizes and pressures to achieve organic, flowing patterns that will form the basis of the holographic shimmer.

- Glass Effect: Another approach to creating a foundational distortion involves using the Glass filter. Navigate to
Filter > Filter Gallery. Within the Filter Gallery, select theDistortoption and then choose theGlasseffect. Increase the "Distortion" slider to its maximum, set "Smoothness" to approximately 3, and adjust the "Scaling" as needed to generate the desired glassy, warped appearance. This can be applied to the gradient layer or a separate layer to create a unique base texture.
Introducing the Core Holographic Elements: Glow and Beams
The transition from a flat image to a holographic projection involves creating luminous elements and ethereal beams of light.
Halftone Pattern: Apply a
Filter Gallery > Texture > Patchworkto your subject layer. Set the "Square Size" to 5 and "Relief" to 0. Change the Blending Mode of this Halftone Pattern filter toHard Light. This adds a subtle textural element that can enhance the digital feel.Circular Selections and Glow: Utilize the Elliptical Marquee Tool (M) to create a circular selection, approximately 3000 pixels in radius, centered on your canvas. Press
Control-J(orCommand-J) to duplicate this selection onto a new layer.Creating Glow Segments: Within this circular layer, make a selection of a single slice or segment using your preferred selection tool. Duplicate this segment onto a new layer (
Control-JorCommand-J). Transform this new layer (Control-TorCommand-T). Toggle the reference point and set its location as indicated in advanced tutorials.Hue/Saturation Adjustments: Add a
Hue/SaturationAdjustment Layer above your glow segment layer. Name it something descriptive, like "P_1_Color," and create a clipping mask (Control-Alt-GorCommand-Option-G) so it only affects the segment. Repeat this process to create multiple segments, each with slightly different hue and saturation settings, and potentially different transform parameters. This layering of adjusted segments will build a complex, multi-hued glow.Smart Object Merging for Glow: Select a glow segment layer and its corresponding color adjustment layer. Right-click on either and choose
Convert to Smart Object. Repeat this for all your glow segments. This consolidates the adjustments and allows for further non-destructive filter applications.Refining the Glow: Control-click on a glow segment layer's thumbnail to create a selection. Go to
Select > Modify > Contractby 35 pixels, and thenSelect > Modify > Featherwith a radius of 15 pixels. Change the Blending Mode of this layer toLinear Dodge (Add)and set the Opacity to 80%. Repeat a similar selection process on the original glow segment layer, but contract by 7 pixels and feather by 7 pixels.Generating Light Beams: Select a glow layer and create a new layer above it, naming it "Temp_3." Press
Dto reset colors to default black and white, then go toFilter > Render > Clouds. Select the entire canvas (Control-AorCommand-A). Go toLayer > Layer Mask > Reveal Selection. Right-click the layer mask and chooseApply Layer Mask.Stylizing the Beams: Apply
Filter > Stylize > Find Edges. Then, go toImage > Adjustments > Invert. Follow this withImage > Adjustments > Levels, setting the "Highlights Input Level" to 15. Apply aFilter > Blur > Gaussian Blurwith a radius of 5 pixels. Finally, useFilter > Blur > Radial Blur, setting "Amount" to 100, "Blur Method" to "Zoom," and "Quality" to "Best."Coloring the Beams: Use
Select > Color Rangeand set "Select" to "Midtones." Select a layer containing your stylized beams, hide its Smart Filters if applicable, and pressControl-J(orCommand-J) to create a new layer from the selection. Apply anotherRadial Blurwith the same settings as before. Add aHue/SaturationAdjustment Layer, create a clipping mask, and change its Blending Mode toColor. This will imbue the beams with the desired holographic hue.
How To Make Sci Fi Holographic Effect In Photoshop
Adding Detail and Realism: Shattered Parts and Stray Pixels
To enhance the authenticity of the hologram, we'll introduce elements that suggest fragmentation and digital noise.
Shattered Parts: Select and hide the "Beams" layer. Control-click on its layer thumbnail to create a selection. Select the "Beams_Color" layer and press
Control-Alt-Shift-E(orCommand-Option-Shift-E) to create a merged screenshot layer. Change this layer's Blending Mode toLinear Dodge (Add). ApplyImage > Adjustments > Levels, setting the "Shadow Input Level" to 15. Transform this layer (Control-TorCommand-T) and set the Angle to 15°. Repeat this process to create multiple shattered parts, experimenting with different levels and transform settings for variation.Fading Edges: For each shattered part layer, add a layer mask (
Layer > Layer Mask > Reveal All). Set your foreground color to black and use a soft brush to gently paint over the cut-off edges, creating a subtle fade that blends the shattered pieces more naturally.Stray Pixels: Select a shattered part layer and create a new layer above it named "Temp_4." Go to
Select > Color Range, set "Select" to "Sampled Colors," and use the Eyedropper Tool to click anywhere on the canvas to pick a color for selection, setting "Fuzziness" to 0. Drag this new layer just above the shattered part layer in the Layers panel. Change its Blending Mode toLinear Dodge (Add). ApplyImage > Adjustments > Levels, setting the "Shadow Levels Input" to 20. Name this layer "Stray Pixels." You can transform this layer or repeat the process to add more stray pixel layers for added texture and visual interest.
Advanced Techniques: Text and Scan Lines
The hologram effect can be further refined and specialized for text-based elements or to simulate the appearance of scan lines.
Holographic Text Effects
Creating holographic text involves a different approach, often leveraging layer styles and motion blur.
Layer Styles: Before recording any actions, create the necessary layer styles. Download any accompanying files, such as holographic patterns. Select the Horizontal Type Tool (T) and set your font size (e.g., 175 pt) and font (e.g., Komikahuna). On your text layer, set the Fill to 0%. Double-click the layer to open the Layer Style panel. Uncheck "Outer Glow" to disable it. Load a suitable holographic pattern (e.g., a white horizontal striped pattern) into Photoshop's Pattern Picker. Save this new style.
Recording Actions: Open the Actions panel (
Window > Actions). Create a new set (e.g., "My Text effects") and begin recording.Transforming Text: Press
Control-T(orCommand-T) to activate Transform. Uncheck "Maintain aspect ratio" and vertically scale the text down to a desired percentage (e.g., 59%). Right-click the Transform box and choose "Perspective." Click and drag a corner point to apply a perspective skew (e.g., 22º to the left).Duplicating and Blurring: Duplicate the text layer (
Control-JorCommand-J) and rename the copy (e.g., "HOLO - B"). Expand the duplicated layer to view its effects. Double-click on the "Motion Blur" filter to edit it.Smart Object Merging for Text: Select both original and duplicated text layers and convert them into a single Smart Object. Double-clicking this new layer will reopen the Layer Style panel, allowing for further adjustments. The combination of layer styles and motion blur is key to simulating a 3D holographic text effect, reminiscent of sci-fi films.
Simulating Scan Lines
To add a layer of authenticity, particularly for retro or glitchy holograms, simulating scan lines is highly effective.
Subject Isolation: Ensure your subject is on a separate layer, ideally a Smart Object. Duplicate the background image by pressing
CTRLorCMD + J, then right-click the duplicate and selectConvert to Smart Object. Apply a layer mask to this duplicate.Brightness and Contrast: Adjust the "Levels" of the subject layer to make the background significantly darker by moving the highlight slider to the left. This isolates the subject while maintaining its brightness.
Color Adjustments: Add a
Hue/SaturationAdjustment Layer above the subject layer and clip it. This allows you to change the color of the subject to achieve the desired holographic hue.Adding Softness: Apply a
Gaussian Blurfilter to the subject layer to give it a softer, more diffused appearance.Refining the Cutout: If the edges of your subject are not clean, use the
Select and Maskdialog (Select > Select and Mask). The "Shift Edge" slider can be used to move the edge of the cutout inward, refining the mask.Applying Scan Line Texture: If you have a scan line texture image, place it onto your canvas. Resize it appropriately so the lines appear narrow. You can copy and compress this texture to cover the entire hologram area.
Masking with Texture: Select the scan line texture layer, then hold
CTRLorCMDand click on the texture layer to select all its contents. Group your subject layer and all its adjustments (CTRL+GorCMD+G). With the selection active, select the newly created group and click the Layer Mask icon at the bottom of the Layers Panel. This applies the scan lines as a layer mask.Softening Scan Lines: Apply a
Gaussian Blurto the layer mask of the scan lines to make them appear softer and more integrated.Creating Glow Variations: Duplicate the main subject group several times. Apply a slightly higher amount of Gaussian blur to each duplicate. This creates layers of glow at different intensities.
Isolating Glow: Add a
LevelsAdjustment Layer to each glow copy. Drag the shadow slider to the right to limit the glow to only the brightest areas.Applying Scan Lines to Glow: Group all the glow copies together. Hold
ALTorOptionand click and drag the Layer Mask from the primary subject layer onto this new glow group. This copies the scan line effect to the glow. Add anotherLevelsAdjustment to the new Layer Mask and drag the highlight and shadow parameters inward to fine-tune the glow's interaction with the scan lines.Flicker Effect: Consider decreasing the opacity of certain glow layers to introduce a subtle flicker effect, further enhancing the dynamic nature of the hologram.
Beyond the Tutorial: Resources and Professional Assistance
While this tutorial provides a thorough guide to creating a hologram effect in Photoshop, mastering complex image manipulations can be challenging, especially for beginners. If you find yourself lacking the time, skill, or patience to achieve the desired realistic hologram Photoshop effect, consider seeking professional assistance. Services specializing in complex image manipulation can deliver professional results.
For those who prefer ready-made solutions or wish to explore a wider range of stylistic options, numerous pre-made Photoshop actions and effects are available. These often come with detailed instructions and well-organized layers, allowing for easy customization. You can find actions that create neon cyberpunk glows, retro 80s styles, glitch effects, and more, all designed to apply sophisticated visual treatments to your photos, text, logos, or vector graphics with just a few clicks. Some packages even include extensive sets of brushes to further enhance your holographic creations.
The journey into creating compelling visual effects in Photoshop is continuous. Whether you're aiming for a subtle iridescent shimmer or a full-blown futuristic projection, the tools and techniques discussed here provide a robust starting point. Remember, practice and experimentation are key to unlocking the full potential of Photoshop and bringing your holographic visions to life.