Creating compelling visual representations of apparel designs is crucial for designers, marketers, and brand owners. Hoodie mockups, in particular, offer a tangible way to visualize how a design will look on the final product before it goes into production. This comprehensive guide delves into the process of creating professional hoodie mockups using Adobe Photoshop, alongside exploring the convenience of online mockup generators. Whether you're aiming for a photorealistic black hoodie mockup from various angles or seeking a quick, efficient way to showcase your artwork, this tutorial covers it all.
The Power of the Hoodie Mockup
A hoodie mockup serves as a virtual representation of your apparel design, either displayed on its own or worn by a model. This "virtual try-on" is invaluable, allowing you or your client to see how your artwork looks before committing to costly production. For designers, it’s a way to present their vision effectively; for businesses, it’s a tool for product visualization, marketing, and generating excitement for new collections. The ability to quickly generate these mockups can significantly speed up the design and approval process, bridging the gap between concept and reality.
Crafting Realistic Mockups in Adobe Photoshop
Adobe Photoshop remains a powerhouse for creating detailed and realistic mockups due to its advanced editing capabilities. The key to achieving a lifelike hoodie mockup lies in ensuring the design seamlessly conforms to the fabric’s wrinkles, folds, and shadows.
Creating a Black Hoodie Mockup: Front Perspective
To begin creating a black hoodie mockup from the front perspective, start by opening a suitable hoodie PSD (Photoshop Document) file. Once the file is open, locate and hide the shadows layer to ensure a clean canvas for your design. Next, select the Rectangle Tool. Ensure it is set to Shape mode and choose any color for initial visibility. Right-click on this newly created shape layer and select "Convert to Smart Object" from the menu. This crucial step allows for non-destructive editing of your design.
Double-click the Smart Object layer thumbnail to open it in a new Photoshop window. Now, navigate to File > Place Embedded. Select the texture image you wish to use for your design and click "Place." Once the texture is embedded, go to File > Save to store the changes within the Smart Object. Close this file; returning to the main mockup file, you will observe that the texture has been applied.
To integrate the design onto the hoodie realistically, it's essential to adjust its appearance. Select the shape layer (now containing your design) and change its Blending Mode to "Linear Burn." This mode helps to blend the design with the underlying hoodie texture. Name this layer "Design" for clarity.
To make the design conform to the hoodie’s contours, we need to create a displacement map. Duplicate your current file by going to Image > Duplicate. In this newly opened duplicated file, hide the "Design" layer and show the "Depth" folder. This folder typically contains information about the mockup’s three-dimensional form. Apply a Gaussian Blur to this layer by going to Filter > Blur > Gaussian Blur and setting the Radius to approximately 5 pixels. This slight blur helps in creating a softer displacement effect.
Next, change the image Mode to "8 Bits/Channel" via Image > Mode. Add a layer mask that reveals the entire layer by selecting Layer > Layer Mask > Reveal All. It's important to unlink the layer thumbnail and its mask by clicking on the chain icon between them. Now, select the layer thumbnail and press Control-T (or Command-T on Mac) to initiate a transform. Right-click anywhere inside the transform box and choose "Warp." Manipulate the warp points to make the design accurately follow the creases and curves of the hoodie’s fabric.
Creating a Black Hoodie Mockup: Side Perspective
Following a similar process for the side perspective, open your downloaded PSD file. Again, hide the shadows layer. Create a rectangle, convert it to a Smart Object, and then double-click to open it. Place your design using File > Place Embedded and save and close the file.
Return to the main mockup file. Select the rectangle layer, change its Blending Mode to "Lighten," and name it "Design." To achieve a realistic look, create a displacement map as described previously: duplicate the file, hide the design layer, show the depth folder, apply Gaussian Blur, and set the Mode to 8 Bits/Channel. Add a layer mask, unlink it from the layer, and then use the Free Transform (Control-T) and Warp tool to meticulously adjust the design to fit the side profile of the hoodie, ensuring it follows the fabric’s natural draping.
Congratulations! You have now successfully created a 3D black hoodie mockup with both front and side views. This method can be extended to create back views and other variations of your hoodie design.
Advanced Photoshop Techniques for Realism
To achieve an even higher degree of realism in your Photoshop mockups, consider the following:
- Clipping Masks: After placing your design within the Smart Object, you can use clipping masks to ensure it only appears on the intended areas of the hoodie.
- Layer Styles: Experiment with layer styles like "Inner Shadow" or "Bevel and Emboss" on your design layer to simulate depth and how light interacts with the printed design.
- Texture Overlays: Beyond the initial texture placed in the Smart Object, you can add subtle fabric texture overlays to the main design layer to enhance realism.
- Shadow and Highlight Adjustments: Manually adjust shadows and highlights on your design layer to match the lighting conditions of the original mockup photo.
How to make a Hoodie Mockup | Photoshop Mockup Tutorial
Leveraging Online Mockup Generators
For those seeking a faster and often more accessible route, online mockup generators offer a streamlined solution. These platforms allow you to create professional-looking mockups with minimal effort, often requiring just a few clicks.
Mockey AI: Free and Versatile Mockups
Mockey AI is a notable platform that lets you create free hoodie mockups. The process is straightforward: simply upload your design or logo, and you can see it rendered in real-time on various hoodie templates. Mockey AI provides the flexibility to change colors, backgrounds, and other elements. A significant advantage is the availability of high-quality downloads without watermarks, making it an excellent choice for individuals and small businesses.
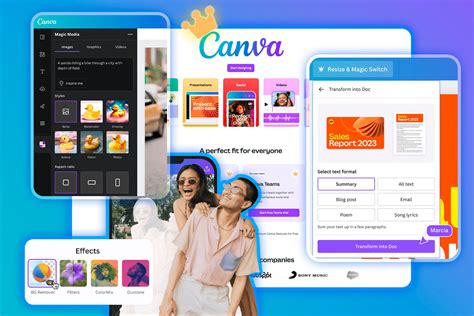
Canva: Design with Confidence
Canva's hoodie mockup generator is another user-friendly option, empowering you to create realistic and professional-looking mockups without the need for a photoshoot. This tool is particularly beneficial for visualizing designs before production, creating lifelike product catalogs, and impressing clients.
- Skip the Photoshoot: Launch your hoodie collection rapidly without the expense and time commitment of traditional photoshoots.
- Intuitive Editing: Canva's editing tools allow you to tweak mockups to perfection, highlighting unique design features.
- Speed and Efficiency: Create professional showcases in minutes. Upload your images, experiment with color combinations, and switch design elements swiftly.
- Brand Elevation: Generate excitement for product launches, capture attention on social media, and maintain a consistent visual identity across marketing channels.
Canva also integrates powerful AI tools to supercharge your designs:
- Magic Edit: Transform any element within your mockup.
- Magic Eraser (Pro): Remove unwanted distractions from the background.
- Magic Expand (Pro): Fix awkward framing issues easily.
Other Online Options
Platforms like Placeit and Mockup World also offer a wide array of pre-made hoodie templates. These sites cater to various needs, from simple drag-and-drop interfaces to more customizable options. When choosing a mockup template, ensure it aligns with your brand’s identity and effectively showcases your hoodie’s design. Utilizing high-resolution images is paramount for a photorealistic and appealing final product. Presenting your design from multiple angles (front, back, sides) provides a comprehensive view for your audience.
Best Practices for Hoodie Mockups
Regardless of the tool you choose, several best practices will ensure your hoodie mockups are effective:
- Pick the Perfect Mockup Template: Select a template that reflects your brand’s identity or the theme of your collection. It should best highlight your hoodie’s design.
- Use High-Quality Images: Ensure your mockups use high-resolution images to appear photorealistic and appealing, capturing your target market’s attention.
- Present Different Angles: Create multiple mockups showcasing different views of the product (front, back, sides) to provide valuable insight to your audience.
- Consider the Fabric: Pay attention to how the design interacts with the fabric's texture, folds, and wrinkles. In Photoshop, this is achieved through warping and displacement maps. Online tools often handle this automatically.
- Color Accuracy: Ensure the colors in your mockup accurately represent the intended print colors.
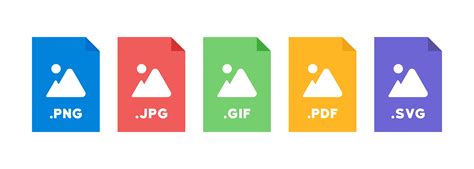
- File Format for Download: Hoodie mockups can typically be downloaded as JPG or PNG. PNG is recommended for complex images and illustrations, while JPG is suitable for sharing with clients or colleagues. PDF Standard is best for digital sharing, and PDF Print allows you to review your design on paper.
The Role of Smart Objects
A key advantage when working with Photoshop mockups is the use of Smart Objects. They unlock a quick drag-and-drop method for design inclusion. By double-clicking a Smart Object layer, you open a separate file where you can paste or place your design. Saving and closing this file automatically updates the main mockup, ensuring your design is seamlessly integrated and editable at any time.
Common Misconceptions and Tips
A common misconception is that creating realistic mockups is an overly technical and time-consuming process. While Photoshop offers deep control, online tools have democratized mockup creation. Another point to remember is that a good mockup isn't just about placing a design; it's about making that design look like it's part of the garment. This involves considering how light falls, how fabric folds, and the overall texture.
For those looking to save time, downloading ready-made mockups from the internet is a viable option. However, understanding the creation process, even if you opt for pre-made templates, allows you to better assess their quality and make informed choices.
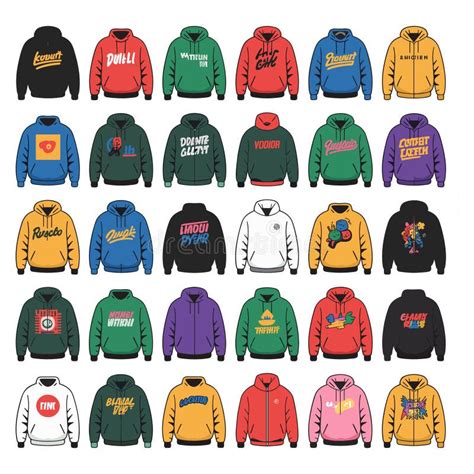
Exploring Different Hoodie Types
The user can pick from different hoodie types, change the background, and switch hoodie colors. This versatility is crucial for presenting a range of design options. Whether you are showcasing a minimalist logo on a classic pullover or a complex graphic on a zip-up hoodie, the ability to customize these elements is key.
AI Tools for Enhanced Mockups
The integration of AI tools is revolutionizing mockup creation. Platforms like Canva offer AI-powered features that can transform elements within your mockup, remove distractions, or fix framing. These tools can unlock creative potential and help you achieve stunning results with less manual effort. AI tools such as AI Photoshoots and AI Anime can also be explored for unique presentation styles.
Ultimately, whether you choose the intricate control of Adobe Photoshop or the swift convenience of online mockup generators, the goal is the same: to present your hoodie designs in the most professional and visually appealing way possible. By following these steps and best practices, you can elevate your design presentations and product promotions in an instant.