Embarking on a creative journey is a rewarding endeavor, and for many, the iPad has become an indispensable tool for artistic expression. Procreate, a powerful digital art application, unlocks a universe of possibilities for both aspiring and seasoned artists. This tutorial aims to guide you through the fundamental and advanced techniques within Procreate, drawing from a wealth of resources and practical applications. Whether you're looking to enhance your daily creative practice or seeking engaging activities as academic periods conclude, understanding Procreate's capabilities can significantly elevate your artistic output.
The Foundation: Getting Started with Procreate
For those new to digital art or Procreate specifically, the initial steps involve familiarizing yourself with the interface and core functionalities. The application is designed to be intuitive, yet its depth allows for continuous learning and skill development. One of the foundational concepts in digital art, and particularly in Procreate, is the effective use of layers.
Understanding and Utilizing Layers
Layers are the building blocks of digital artwork in Procreate, akin to transparent sheets stacked upon each other. Each layer can contain different elements of your artwork - sketches, line art, colors, shading, and textures - allowing for independent manipulation without affecting other parts of the image.
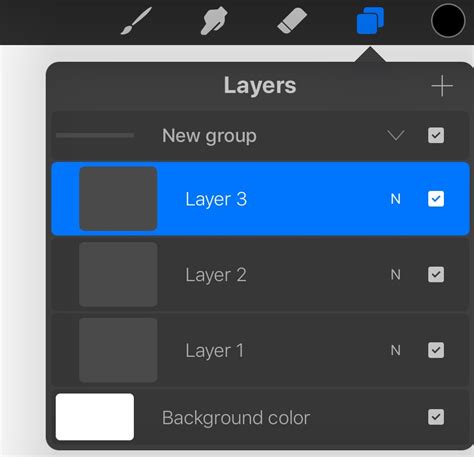
- Creating New Layers: To add a new layer, simply tap the '+' icon in the Layers panel, typically located on the upper right side of the Procreate interface.
- Layer Management: You can rename layers for better organization, adjust their opacity to control transparency, change their blending modes to interact with layers below, and group them to keep complex projects tidy. For instance, a "sketch" layer can be placed at the top and set to a lower opacity to guide your line art on a layer beneath it.
- Duplicating and Deleting: Layers can be duplicated to experiment with variations or deleted if no longer needed. Swiping left on a layer reveals these options.
Learning to manage layers effectively is crucial for creating depth, complexity, and for making revisions without starting over. This skill is fundamental whether you are creating simple illustrations or intricate digital paintings.
Developing Your Artistic Skills: Textures and Shading
Once comfortable with layers, the next step is to infuse your artwork with visual interest through textures and shading. These techniques add realism, depth, and a tactile quality to your digital creations.
Incorporating Textures
Textures can transform a flat digital drawing into something that appears to have physical substance. Procreate offers a variety of ways to apply textures, from custom brushes to imported image files.
- Brush Library: Procreate comes with an extensive library of brushes, many of which are designed to mimic various textures like charcoal, paper, fabric, or even grunge effects. Experimenting with different brushes and their settings (such as grain, jitter, and flow) can yield unique results.
- Importing Textures: You can import texture images, such as scanned paper or photographs of surfaces, into Procreate. These can be placed on their own layer, clipped to a specific object, or used to create custom brushes.
- Texture Brushes: Creating your own texture brushes by importing an image into the brush studio allows for highly personalized effects. This involves defining the shape and grain source of the brush.
The "Apple Crisp" tutorials are often praised for their creative approach to incorporating textures, demonstrating how to achieve diverse visual effects without overwhelming complexity. Learning to add subtle paper textures, for example, can give a digital painting a more traditional, grounded feel.
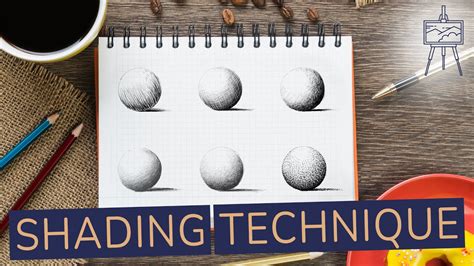
Mastering Shading Techniques
Shading is essential for defining form, creating volume, and establishing the direction and quality of light in your artwork.
- Understanding Light Sources: Before applying shade, determine the primary light source. This dictates where highlights and shadows will fall.
- Soft vs. Hard Shadows: Soft shadows, created with a soft brush and low opacity, suggest diffused light. Hard shadows, with a sharp edge, indicate a direct light source.
- Using Blending Modes: Layer blending modes are incredibly useful for shading. Setting a shading layer to "Multiply" allows it to darken the colors beneath it, simulating shadow. "Overlay" or "Soft Light" can be used for subtle color shifts or highlights.
- Color Theory in Shading: Shadows are not simply darker versions of the base color. They often contain cooler tones, reflecting ambient light. Conversely, highlights can pick up warmer tones from the environment.
By combining layers, textures, and sophisticated shading, you can achieve a remarkable level of realism and artistic expression in Procreate.
Advanced Techniques and Animation in Procreate Dreams
As your proficiency grows, you might explore more advanced features within the Procreate ecosystem, including the capabilities of Procreate Dreams. While Procreate is primarily for static art, Procreate Dreams opens up the world of animation.
Aligning Objects and Composition
Precise alignment is key to professional-looking artwork, especially in designs or illustrations where elements need to be perfectly positioned.
- Snapping and Magnetics: Procreate's snapping and magnetics features are invaluable for aligning objects. When enabled, these tools help elements snap into place with guides, grids, or other objects, ensuring perfect symmetry and alignment.
- Selection Tool: The selection tool, when used with transform functions, allows you to move, scale, rotate, and skew objects. Holding down a modifier key while transforming can constrain movement or rotation, aiding in precise adjustments.
- Distribute and Align Features: Within the transform tool, Procreate offers options to distribute objects evenly or align them to each other (e.g., aligning centers, tops, bottoms). This is particularly useful for creating patterns or organizing multiple elements.
Introduction to Procreate Dreams Animation
Procreate Dreams, a companion app to Procreate, is designed for animation. It offers several methods to bring your creations to life, catering to different animation styles and skill levels. The app builds upon the familiar Procreate interface, making the transition smoother for existing users.
- Frame-by-Frame Animation: This is the traditional animation method where each frame is a distinct drawing. Procreate Dreams streamlines this process with onion skinning, allowing you to see previous and subsequent frames as you draw the current one. This is excellent for fluid, hand-drawn motion.
- Keyframe Animation: Keyframes define the start and end points of a change in an object's properties (like position, scale, or rotation). Procreate Dreams allows you to set these keyframes and the software interpolates the motion between them. This is ideal for animating objects and elements smoothly.
- Performing Animation: This method involves recording your actions in real-time, similar to a performance. You can move, scale, and draw in real-time, and Procreate Dreams captures these movements as animation. This offers a more gestural and spontaneous approach to animation.
Procreate Dreams - Making frame by frame animation a little easier
Lisa Bardot's tutorials are highly recommended for understanding these three animation methods in Procreate Dreams. Her approach breaks down complex animation concepts into manageable steps, making them accessible to a wider audience.
Animation for Beginners with Alex
For those who are entirely new to animation, Alex's "Animation for Anyone" class is a fantastic starting point. He begins from the very basics, guiding you through the entire process of animating a character. The availability of a downloadable character file is a significant advantage, allowing you to focus on the animation principles rather than character design initially. Alex's expertise as a director and animator shines through, offering insights into bringing characters to life effectively.
Action-Packed Animation with Brooke Glaser
Brooke Glaser provides a concise yet information-rich 17-minute tutorial. This format is perfect for those looking for a quick, high-impact learning session. Her "action-packed" approach suggests a focus on dynamic animation techniques or efficient workflows that can be quickly grasped and applied.
These tutorials, whether focusing on core Procreate skills like layers, textures, and shading, or delving into the animation possibilities of Procreate Dreams, offer a structured path for creative development. They are designed to be both educational and enjoyable, fitting perfectly into a routine of daily creative exploration or as a stimulating activity during periods of downtime. The journey from understanding basic layers to animating characters is a testament to the versatility and power of the Procreate suite on the iPad.