Photoshop, the industry-standard image editing software, offers a multitude of ways to duplicate and manipulate elements within your creative projects. Whether you're looking to replicate an object, combine images, or refine a specific part of your artwork, understanding the nuances of copying and pasting is fundamental. This article will delve into various techniques, from the most straightforward shortcuts to more advanced methods, ensuring you can effectively duplicate and integrate content within your Photoshop workflow.
The Classic Copy and Paste: A Foundation for Duplication
At its core, duplicating an object in Photoshop often begins with the familiar Copy and Paste commands. This method is accessible and forms the basis for many other duplication workflows. To duplicate an object using this fundamental approach, you simply employ the classic keyboard shortcuts: Command + C followed by Command + V on a Mac, or Ctrl + C followed by Ctrl + V on a PC.
When you copy and paste a selection, Photoshop creates a new layer containing the duplicated content. This new layer appears directly above the currently active layer in the Layers panel. While this might not be immediately apparent visually if the pasted content is in the same location as the original, it's a crucial distinction to remember for subsequent editing. If you've made a selection before copying and pasting, the copied content will reside on a new layer, positioned precisely over the selected area of the original image. This new layer is essentially a direct copy of what was on your active layer within the bounds of your selection.
Duplicating Multiple Layers: Efficiency Through Selection
Beyond single objects, Photoshop provides streamlined methods for duplicating entire layers or groups of layers. This is particularly useful when working with complex compositions or when you need to replicate a set of elements that have been styled or arranged together.
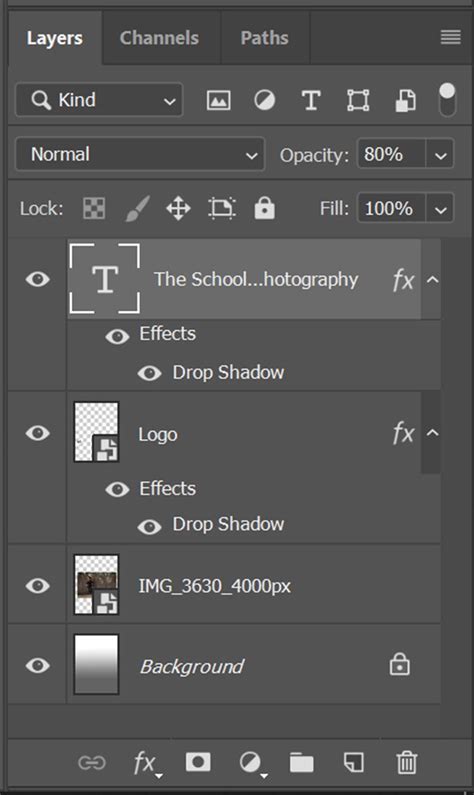
One of the primary ways to duplicate multiple layers is by utilizing the Layers Panel. Within this panel, you can select the layers you wish to duplicate. To select a contiguous range of layers, click on the first layer, then hold down the Shift key and click on the last layer in the desired range. For non-contiguous layers, hold down the Command (Mac) or Ctrl (PC) key and click on each individual layer you want to include. Once your layers are selected, you can duplicate them using the Command + J (Mac) or Ctrl + J (PC) shortcut. This powerful shortcut combines the copy and paste operations into a single, efficient step, creating exact duplicates of the selected layers.
Another method for duplicating multiple layers, especially if you want to treat them as a single unit, involves merging them first. After selecting the desired layers in the Layers panel by holding Shift and clicking, you can merge them into a single layer using the shortcut Command + E (Mac) or Ctrl + E (PC). Once merged, this new, combined layer can then be duplicated using the Command + J (Mac) or Ctrl + J (PC) shortcut, or through the traditional Copy and Paste commands. This approach is extremely useful after you are done duplicating the multiple layers you wish to duplicate, as it consolidates them for easier manipulation.
The Power of "Paste Into": Integrating Images with Precision
A more specialized yet incredibly powerful technique for copying and pasting involves Photoshop's "Paste Into" command. This method allows you to paste an image not just onto a new layer, but directly inside a pre-defined selection. This is invaluable when you want to replace the content of a specific area within an image with another image, ensuring a seamless integration.
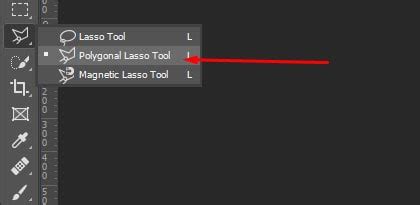
To utilize "Paste Into," you first need to make a selection in your target image where you want the new content to appear. For instance, if you want to place a new image onto a television screen within a photograph, you would select the area of the screen. Tools like the Lasso Tool, Polygonal Lasso Tool, or Quick Selection Tool can be employed for this purpose.
The Polygonal Lasso Tool, for example, is ideal for creating selections with straight edges. You click around the area you want to select, adding points where the line needs to change direction. Photoshop connects these points with straight lines. To use it, click in the desired starting corner, then move to the next point where the edge changes and click again. Continue this process, clicking to add points and release your mouse button, without clicking and dragging. To complete the selection, click back on your initial starting point.
Once your selection is in place, you open the image you intend to paste. You then need to select this entire image by going to the Select menu in the Menu Bar and choosing All (or using Command + A on Mac / Ctrl + A on PC). With the source image selected, you then navigate to the Edit menu and choose Paste Special > Paste Into.
Upon executing "Paste Into," the selected image will appear within the boundaries of your initial selection. However, the process doesn't always end there. You might notice that the selection outline disappears after pasting. This is because Photoshop often converts the selection into a layer mask. In the Layers panel, you'll see the mask represented by a thumbnail next to the image thumbnail. The white areas of the mask indicate where the pasted image is visible, corresponding to your original selection.
Refining Pasted Content: Addressing Perspective and Alignment
After using "Paste Into," it's common for the pasted image to require adjustments to align with the perspective and composition of the target image. For instance, if you've pasted an image onto a screen that is angled, the pasted image will appear flat, creating a perspective mismatch.
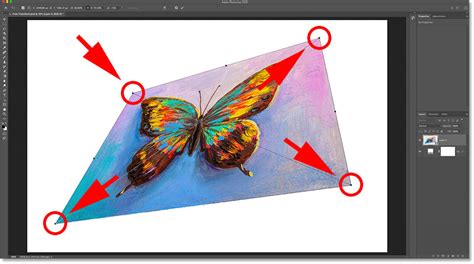
To address this, you'll need to transform the pasted layer. You can access transformation controls by going to Edit > Free Transform (or using Command + T on Mac / Ctrl + T on PC). When the transform handles appear, you can resize the image by clicking and dragging the corner handles.
Crucially, to correct perspective issues, you'll want to ensure the angles of the pasted image align with the angles of the object it's replacing. Sometimes, simply using Perspective mode within the Free Transform tool is sufficient to align the top and bottom angles together. In other instances, you might need to switch to Distort mode. In Distort mode, each corner handle can be moved independently. This allows you to drag a corner handle, for instance, the bottom right handle, upward to align the bottom angles without affecting the top angles. This granular control is essential for making the pasted image look natural within its new environment. The goal is to make the pasted image occupy the space convincingly, aligning with the existing lines and angles of the target image.
Cloning: Direct Object Duplication Within an Image
While Copy and Paste are excellent for duplicating entire objects or layers, the Clone Stamp Tool (S) offers a different approach to duplication by allowing you to sample and paint pixels directly from one area of an image onto another. This is particularly useful for removing unwanted elements, repairing damaged areas, or subtly duplicating textures and patterns within the same image.
To use the Clone Stamp Tool, you first select it from the toolbar. Then, you need to define a source point by holding down the Option key (Mac) or Alt key (PC) and clicking on the part of the image you wish to clone. This action "samples" the pixels from that area. Once the source is set, you can release the Option/Alt key and begin painting over the area where you want to duplicate those sampled pixels. As you paint, Photoshop replicates the pixels from your source point, effectively cloning the content.
The advantage of cloning is that it works directly on the existing pixels of an image, allowing for seamless integration and the ability to replicate intricate details. It's a powerful tool for retouching and for creating the illusion of duplicated elements without introducing new layers.
The "Copy Merged" Shortcut: A Comprehensive Duplication Method
For situations where you have multiple layers and want to copy everything visible on your canvas as a single entity, the "Copy Merged" command is invaluable. This command essentially takes a snapshot of all visible layers as if they were merged into one, and then copies it to your clipboard.
To use "Copy Merged," you first ensure that all the layers you want to include in your copy are visible (i.e., their eye icons are turned on in the Layers panel). Then, you can access this function through the Edit menu, but there isn't a direct keyboard shortcut assigned by default. However, many users find it efficient to assign a custom shortcut for "Copy Merged." Once copied, you can then paste this merged result as a new layer into your current document or another Photoshop file. This is a convenient way to duplicate a complex arrangement of layers in one go.
Understanding Layer Behavior with Duplication
It's important to acknowledge how Photoshop handles duplication, especially in layered documents. When you copy and paste, or use shortcuts like Command + J, the duplication process typically operates on the currently active layer. This means that if you have a file with multiple layers and you make a selection on one layer and press Command + J, you will only be copying and pasting the content from that specific active layer.
Furthermore, if you have used blend modes on your layers to affect the way the image looks, this can add another layer of complexity to duplication. When you duplicate a selection from a layer with a blend mode applied, the pasted selection will not only contain the pixel data but also inherit the blend mode and its associated effects. This can lead to unexpected results if you're not careful. For example, if you copied a section from a layer set to "Overlay" blend mode, the pasted section would also be on an "Overlay" blend mode, altering its appearance when placed over other layers.
The "old dog" in the provided text learned a new trick: ensuring that when pasting, the pasted part will look just like what you saw on the monitor. This often implies understanding how blend modes and layer effects interact during the duplication process. The key is to be aware of the active layer and any applied blend modes, as they will influence the outcome of your duplication.
Choosing the Right Method for Your Needs
The "better" way to copy and paste in Photoshop is ultimately the method that best suits your specific task and the one you can remember and execute most efficiently. Whether you prefer the classic Copy and Paste for simple duplications, the one-step Command/Ctrl + J for quick layer replication, the precise control of Paste Into for image integration, or the pixel-level manipulation of the Clone Stamp Tool, Photoshop offers a comprehensive suite of tools. Understanding these different approaches empowers you to work more effectively and achieve professional results in your image editing endeavors.