In the ever-expanding digital landscape, where images are shared and disseminated at an unprecedented rate, protecting your visual creations has become paramount. Whether you are a professional photographer, a budding artist, or a business owner showcasing products, adding a watermark to your images is an essential step. It serves as a clear declaration of ownership, a deterrent against unauthorized use, and a powerful tool for brand recognition. This guide will walk you through the various methods of creating and applying watermarks in Adobe Photoshop, from simple text overlays to sophisticated logo integration and automated actions.
The Importance of Watermarking in the Digital Age
The proliferation of social media platforms and online galleries has democratized image sharing, making it easier than ever for your work to reach a global audience. However, this accessibility also presents challenges. Images can be easily copied, downloaded, and re-uploaded without proper attribution or permission, potentially undermining your efforts and devaluing your work. A watermark acts as a digital signature, asserting your intellectual property rights. Furthermore, a well-designed watermark, often incorporating your logo or brand name, significantly contributes to establishing and reinforcing your brand presence across various online channels. While a watermark does not guarantee complete prevention of image theft, it functions as a strong deterrent and a visible indicator of ownership.
Creating a Text-Based Watermark
One of the most straightforward methods for watermarking is by using text. This approach is ideal for conveying copyright information or a simple brand name.
Step 1: Preparing Your Canvas and Adding Text
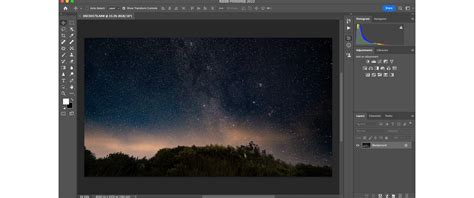
Begin by opening your image in Photoshop. For optimal results, especially if you plan to create a reusable watermark, it's recommended to start with a large canvas. A canvas size of 1920x1080 pixels is a good starting point. If you intend to use your signature or a handwritten script, utilizing a drawing tablet and a stylus will yield the most natural and authentic look.
Next, select the Horizontal Type tool (T) from the toolbar. Click anywhere on your canvas and begin typing your desired text. This could be your name, your company's name, or a copyright notice. If you need to include special characters like the copyright symbol (©), you can access them through the Windows Character Map (Start > Programs > Accessories > System Tools > Character Map) or the Mac OS X Character Palette (Edit > Special Characters).

Step 2: Customizing Text Appearance and Opacity
Once your text is in place, it's time to refine its appearance. With the Text tool still active, highlight your copyright notice. Use the options in the toolbar to adjust the font face, size, and color to suit your aesthetic preferences and brand identity. While many watermarks are white to ensure visibility on photographs, you have the freedom to choose any color that complements your brand. For instance, if your brand incorporates a gold logo, using a gold hue for your watermark can create a cohesive look.
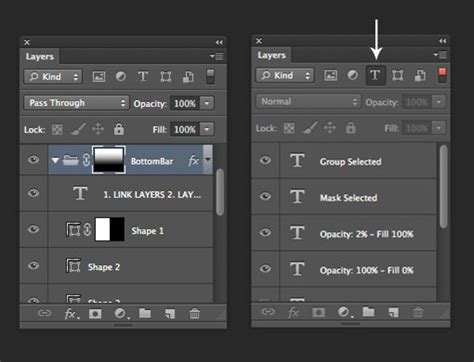
To ensure your watermark doesn't detract from the main subject of your image, it's crucial to adjust its opacity. You can make all, or just some parts, of the graphic see-through by changing the opacity level. This is typically done within the Layers panel. Lowering the opacity makes the watermark more subtle, blending it into the image without sacrificing its presence.
Step 3: Positioning and Refining Your Watermark
Consider where to place your watermark. A common practice is to position it in an area of relatively uniform color, often near a corner, where it is less likely to obscure the primary focus of the photograph. If you need to resize or rotate your watermark, the Free Transform tool (Ctrl+T on Windows, Cmd+T on Mac) is your ally. This allows for precise adjustments to the dimensions and orientation of your text.
While a basic text watermark is functional, you can enhance its visual appeal and integration with the image. Effects such as "Bevel and Emboss" can add depth and help the watermark stand out subtly from the background, particularly on images with varied textures.
Creating a Logo-Based Watermark
For professionals and businesses with an established logo, using it as a watermark offers a more personalized and branded approach.
Step 1: Preparing Your Logo for Watermarking
If you are using your logo as a watermark, it's essential to prepare it correctly. Open your logo image in Photoshop. For optimal quality across various image sizes, ensure you start with a high-resolution logo. If your logo has a colored background, you might need to remove it or adjust its blending mode to ensure it integrates seamlessly with your photographs.
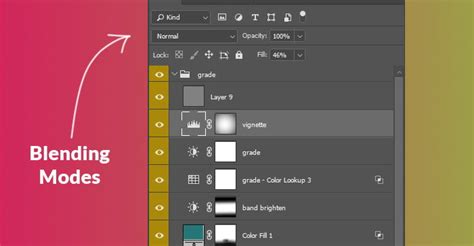
A common technique for logo watermarks involves converting the logo to monochrome. If your logo is initially black, and you wish to make it white for better contrast on darker images, you can use the "Invert" adjustment. Add an "Invert" adjustment layer (Layer > New Adjustment Layer > Invert) and position it directly above your logo layer. Then, hold Alt/Option and click on the line between the two layers in the Layers panel to create a clipping mask. This ensures only the logo layer is inverted. Subsequently, change the logo layer's blending mode to "Lighten." Conversely, if you start with a white logo and want it to appear black on lighter images, you can use the "Invert" adjustment again or simply change the foreground color to black before defining it as a brush.
Step 2: Transforming Your Logo into a Custom Brush
A highly efficient method for applying logo watermarks is by converting your logo into a custom brush preset. This allows you to "stamp" your watermark onto images with ease.
First, open the logo you intend to use as a watermark. Ensure it's of good quality and resolution. Select the Marquee tool from the toolbar and make a selection around your watermark design.
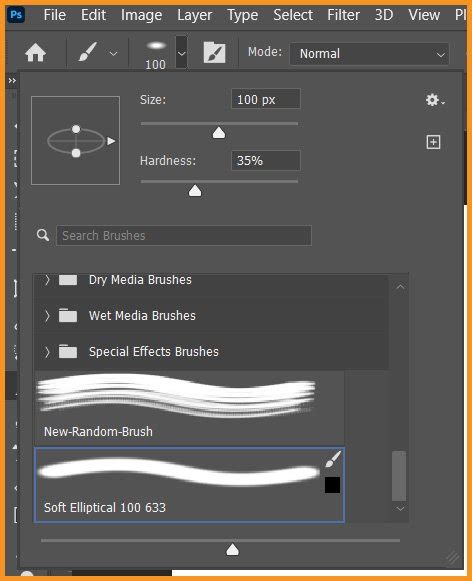
Next, navigate to "Edit" on the top toolbar and select "Define Brush Preset." A dialog box will appear, prompting you to give your watermark brush a suitable name. Click "OK."
Your watermark should now be available in your brush catalog. To test it, select the Brush tool (B) from the toolbar. Open the Brushes panel and locate your newly created watermark brush. You can then "stamp" it onto your images. Adjust the brush size as needed.
The areas of your logo that were black will appear as the foreground color you've selected, while lighter areas will be more transparent. You can adjust the overall transparency of the brush by reducing the Opacity value in the top menu or by adjusting the opacity of the layer you paint on.
Step 3: Applying and Adjusting the Brush Watermark
When using your watermark brush, create a new layer on top of your image by clicking the new layer icon at the bottom of the Layers panel. Rename this layer "Watermark." Select your watermark brush, choose your desired foreground color, and click on your image to apply it. You can then adjust the size and opacity of this layer to achieve the desired subtlety.
Even if your original logo has color, the resulting brush will be monochromatic. However, you can change the color of your watermark brush by simply changing the Foreground color in the toolbar to your desired hue. Brushes offer a swift and effective way to watermark your images, and you can even import and use pre-made brushes that already contain your watermark design.
Automating Watermarking with Photoshop Actions
For those who frequently watermark a large volume of images, creating a Photoshop Action is a game-changer. Actions allow you to record a series of steps and then play them back on multiple images, saving significant time.
Step 1: Setting Up and Recording an Action
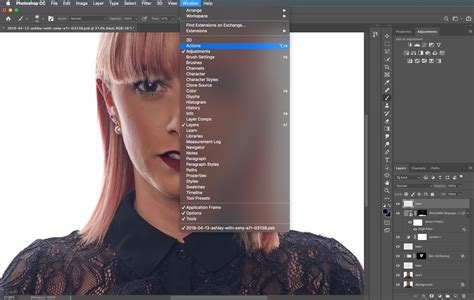
Open an image to which you want to apply the watermark. Open the Actions panel (Window > Actions). Click on the "Create New Action" icon (a small square with a folded corner) at the bottom of the panel. Give your action a descriptive name and click "Record."
From this point onward, all your actions will be recorded. You'll see a small red record icon at the bottom of the Actions panel indicating that Photoshop is recording.
Step 2: Creating a Placeholder and Importing Your Watermark
To ensure consistent placement, it's helpful to create a placeholder. Create a new "Solid Color" fill layer on top of your background. Choose any color, as this layer will be hidden later. Right-click on this color fill layer and select "Rasterize Layer." Then, enter Free Transform (Command/Control + T) and reduce the size of this placeholder layer by 5% in both width and height (to 95%). Commit the changes.
Next, hide the color fill layer by clicking the eye icon next to its thumbnail. Go to "File > Place Embedded" and navigate to your logo or watermark image. Place it into your document. Resize it as needed and commit the changes.
Step 3: Aligning and Styling Your Watermark
With both the watermark layer and the hidden color fill layer selected (hold Shift to select both), choose the Move tool (V). Use the alignment controls in the top menu to position your watermark precisely, for example, centering it or aligning it to a corner. It's preferable to use arrow keys or specific commands for movement during recording to ensure accuracy.
Now, double-click the watermark layer to open the Layer Style dialog. In the "Blending Options" tab, reduce the "Opacity" to a desired level, such as 40%. You can also explore other styles like "Drop Shadow" or "Color Overlay" to further refine the watermark's appearance.
Step 4: Finalizing the Action and Saving
Once you're satisfied with the watermark's appearance and placement, flatten the image by right-clicking on the layers and selecting "Flatten Image." If prompted to discard hidden layers, click "OK."
Go to "File > Save a Copy" and choose your desired file format and settings for the watermarked images. Click "Save."
Finally, press the "Stop" button in the Actions panel to end the recording.
Watermark Logo Action Using Photoshop
Applying Actions and Batch Editing
To apply your recorded watermark action to a single image, simply open the image in Photoshop, select your action from the Actions panel, and click the "Play" button.
For watermarking multiple images simultaneously, Photoshop's "Batch" function is invaluable. Go to "File > Automate > Batch." In the "Play" section, select your watermark action. For the "Source," choose the folder containing the images you want to watermark. Designate a different folder as the "Destination" where the watermarked images will be saved. Check "Override Action" for both "Open" and "Save As" commands, and also select "Suppress File Open Options Dialogs" and "Suppress Color Profile Warning." You can add a suffix like "-Watermark" to the filename to easily identify your processed images. Click "OK" to start the batch process.
Beyond Photoshop: Lightroom Integration
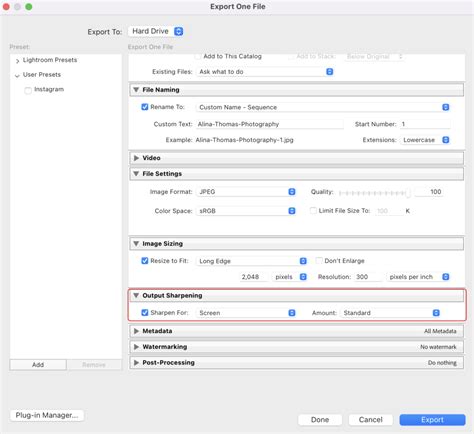
For users of Adobe Lightroom, watermarking is also integrated into the workflow. On desktop, when exporting images, you can enable the "Include Watermark" option and customize your text or graphical watermark. Similarly, on iOS and Android mobile devices, the "Include Watermark" option appears in the "Export As" screen or "Export Settings," allowing for on-the-go watermarking.
By mastering these techniques, you can effectively protect your visual assets and enhance your brand's visibility online. Experiment with different styles, opacities, and placements to find the perfect watermark solution for your needs.