In the realm of digital photography and graphic design, the ability to seamlessly alter images is a powerful skill. Among the many techniques available, the "face swap" or "headswap" stands out as a popular method for correcting imperfections, achieving artistic effects, or even for more dubious purposes. This tutorial delves into the intricacies of performing a face swap in Adobe Photoshop, exploring the essential prerequisites, various techniques, and offering an alternative perspective with Luminar Neo.
The Genesis of a Headswap: Why and When
The necessity for a headswap or a partial face swap often arises in situations where a perfect shot is elusive. When capturing multiple images of the same individual, it's common for the most compelling facial expression to be in one photograph, while the optimal background or pose resides in another. This is particularly true during extended fashion or commercial photo sessions, where the goal is to capture a model's ideal expression and attitude over hours of shooting. In such scenarios, resorting to an image editor for a headswap can be the most effective way to deliver satisfactory results to a client without the expense or logistical challenge of a reshoot.
Beyond professional contexts, headswaps can be crucial for rectifying wedding, business, or school portraits. Children, with their notoriously fleeting and ever-changing facial expressions, present a unique challenge where a headswap can be invaluable. Furthermore, artists and creators may employ this technique for generating unique artistic effects and caricatures, pushing the boundaries of visual storytelling.
However, it's imperative to acknowledge the darker side of this technology. The ability to manipulate images, including performing face swaps, has unfortunately been exploited for malicious intent. A prominent example of this misuse was the circulation of a fake image of Osama bin Laden in 2011, which was doctored to depict him as deceased. This highlights the critical importance of ethical considerations in photography. As photo manipulation becomes increasingly prevalent in our digital age, understanding and upholding ethical practices should be a cornerstone of any photography career.
The Foundation: Prerequisites for a Realistic Headswap
Achieving a convincing headswap is not solely dependent on the advanced functionalities of image editing software or one's proficiency in using them. The entire process originates at the moment of capture and is deeply reliant on meticulous attention to detail. Before even considering image editors, understanding the fundamental prerequisites for a successful headswap is paramount.
To ensure a seamless blend, the following conditions should ideally be met when selecting your source images:
- Subject Consistency: Utilize pictures of the same person. This is the most critical factor.
- Pose and Expression Alignment: The individuals in both images should be posing in the same position. The face and hair must be clearly visible, free from obstructions like hands in the hair or under the chin, and without any objects partially obscuring the face.
- Lighting Parity: The photographs must be taken under similar lighting conditions. For natural light, this means capturing images under comparable weather conditions and at similar times of day. For artificial lighting, the same light sources should be employed.
- Camera Angle and Distance: Both images should be captured from the same angle (e.g., frontal portraits or profiles) and from the same distance.
- Hairstyle and Neckline Similarity: The person should have similar hairstyles and a similar neckline in both images. A significant mismatch, such as a high-neck sweater in one image and a low-cut top in another, can be incredibly difficult to rectify.
- Background Neutrality: Opt for images with a neutral background. Blending a complex floral background into a picture with a clear blue sky background, for instance, presents a significant challenge.
- Shadow and Highlight Consistency: Avoid lateral lighting and any pronounced shadows or highlights that are not present in both images.
Furthermore, ensure that the head is approximately the same size in both pictures. While Photoshop allows for minor resizing of selections, excessive geometric transformations, especially with low-resolution images, can lead to blurry results and distorted facial features. The ultimate goal is to produce portraits that appear natural and accurately reflect reality in even the most subtle details.
Navigating the Digital Canvas: Headswapping in Photoshop
Adobe Photoshop, the undisputed titan of photo manipulation software, offers a robust suite of tools for executing headswaps. The verb "to photoshop" has become synonymous with image editing, a testament to its widespread recognition. While numerous methods exist within Photoshop, the following outlines a common and effective approach, assuming you have a good grasp of making selections.
The Step-by-Step Photoshop Face Swap
- Open Your Images: Begin by opening both the "base image" (the one you want to keep the body and background from) and the "new face image" (the one containing the desired face) in Photoshop.
- Select the Target Face/Head: On the "new face image," utilize a selection tool such as the Lasso Tool, Polygonal Lasso Tool, or Magnetic Lasso Tool to carefully select the face or head you wish to transfer. Include a small margin around the edges to facilitate blending. If you're unfamiliar with making precise selections, resources on "how to cut out an image in Photoshop" can be invaluable.
- Copy and Paste: Copy the selected area (Ctrl+C on Windows, Command+C on macOS) and paste it onto your "base image" (Ctrl+V on Windows, Command+V on macOS). This will create a new layer containing your selected face.
- Create a New Layer from Selection: Ensure the pasted face is on its own layer. If it's not already, you can create a new layer from the selection.
- Resize and Reposition: If the dimensions of the new face don't match the original, you'll need to resize it. Select the new face layer, then go to
Edit > Free Transform(Ctrl+T on Windows, Command+T on macOS). To maintain proportions, hold down the Shift key while dragging the corner handles, or use the dedicated lock aspect ratio button in the Options bar. Adjust the size and position until the new face aligns with the base image's head. Press Enter to confirm the transformation. - Align and Blend with Opacity: Lower the opacity of the new face layer (e.g., to 50%) to see through it and align it more precisely with the underlying face on the base image using the Move Tool. Once aligned, reset the opacity to 100%.
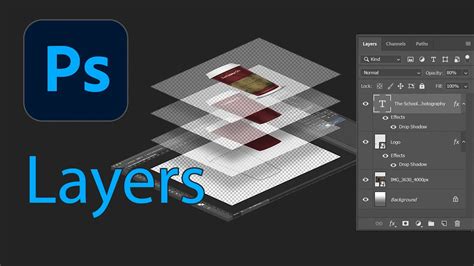
- Introduce a Layer Mask: Add a layer mask to the new face layer by clicking the "Add layer mask" icon at the bottom of the Layers panel.
- Refine with a Black Brush: Select a black brush with a soft edge. Use this brush on the layer mask to paint over the areas of the new face layer that you don't want to be visible. This effectively hides parts of the new face, allowing the base image to show through where necessary, and helps in blending the edges.
- Advanced Blending Techniques: If you notice any harsh edges or inconsistencies, Photoshop offers further tools for blending. You can explore options like
Filter > Blur > Gaussian Blurapplied subtly to the edges of the new face, or utilize theFeather Edgesoption within selection tools or theRefine Edgedialog box. Understanding "how to blend edges in Photoshop" is key to a natural look. - Consider the Clone Stamp Tool: For minor color corrections or to seamlessly blend small areas, the Clone Stamp Tool can be a useful alternative or complement to selections and masks. Ensure that the source and destination areas are visually similar in terms of color and texture.
When performing a headswap in Photoshop, meticulous attention to detail is paramount. Zoom in extensively while making selections and using brushes. Every pixel matters, and even the smallest oversight can result in a discernible fake.
Leveraging Auto-Blend Layers for Seamlessness
Photoshop CC 2019 and newer versions offer an "Auto-Blend Layers" feature, originally designed for stitching panoramas, which can be ingeniously repurposed for face swapping.
- Prepare Layers: Ensure your new face is on a layer above the base image. You might need to create a rough selection around the new face and potentially a selection on the base image where the original face was.
- Select Layers: In the Layers panel, hold down the Shift key to select both the base image layer and the new face layer.
- Apply Auto-Blend: Navigate to
Edit > Auto-Blend Layers. In the dialog box, check both "Seamless Tones and Colors" and "Content-Aware Fill Transparent Areas" (if available in your version). - Review and Refine: Photoshop will attempt to automatically blend the layers, matching tones and colors and filling in any transparent areas. While this feature can significantly simplify the process, it may not always yield a perfect result and often requires further refinement with layer masks and brushes.
Face swap Photoshop Tips and tricks
The "Auto-Blend Layers" feature, especially with the "Content-Aware Fill" option, can be a powerful ally in achieving a more natural transition, particularly in matching lighting and color profiles between the two images.
An Alternative Approach: Luminar Neo for Effortless Swaps
While Photoshop remains a powerful tool, dedicated photo editors like Luminar Neo offer a streamlined and often more intuitive approach, particularly for users who prioritize speed and AI-driven results. Luminar Neo is lauded as one of the best photo editors, designed for photographers who manage large volumes of images and need efficient retouching tools.
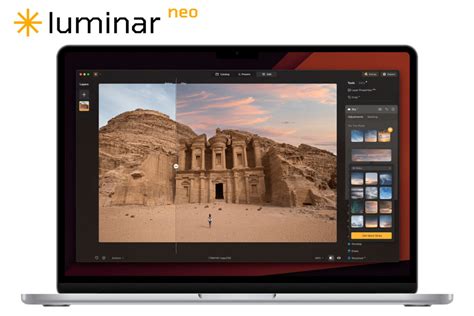
Luminar Neo operates on artificial intelligence, aiming to deliver realistic and striking images with minimal user intervention. Crucially, it supports layers and masks, making it fully capable of performing headswaps, often in a fraction of the time it might take in Photoshop.
Performing a Headswap in Luminar Neo
- Open Base Image: Start by opening the image that will serve as your base.
- Add New Image Layer: Select "Add New Image Layer" and open the image containing the desired facial expression.
- Align Images: Set the opacity of the new layer to approximately 25%. This allows you to see both images simultaneously. Use the Free Transform tool (accessible from the Tools menu) to resize and reposition the new layer until the faces are aligned and appear to be the same size.
- Restore Opacity and Mask: Set the opacity of the new layer back to 100%. Select the new layer and choose the Brush tool.
- Reveal the New Face: Use the brush to paint over the face on the new layer. This action "reveals" the new face, effectively replacing the original one. Adjust the brush size as needed for precision.
- Erase Unwanted Areas: If you accidentally paint over too much or need to make minor adjustments, switch to the Erase tool to refine the edges and blend the new face seamlessly.
- Final Touches: Once the headswap is complete, Luminar Neo offers a variety of "Looks" (pre-set filters and adjustments) that can be applied to enhance the image further and achieve your desired artistic vision. For instance, the "Dreamy Look" from the Portrait category can add a sophisticated finish.
The AI-powered nature of Luminar Neo often means it handles much of the complex blending and color matching automatically, significantly reducing the learning curve and the time investment required for a successful headswap.
Beyond the Swap: Artistic Applications and Ethical Considerations
The ability to perform headswaps extends beyond simple portrait correction. It opens doors to creative expression, allowing for the generation of unique artistic effects and even humorous caricatures. The technique can be used to combine the best elements of multiple shots, creating an idealized portrait or a fantastical composite.
However, as previously mentioned, the power of image manipulation comes with a responsibility. The ease with which faces can be swapped necessitates a strong ethical compass. It is crucial to use these techniques responsibly and transparently, especially when sharing images online or with clients. Misrepresenting reality through manipulated images can have serious consequences, both legally and reputationally.
The digital era has democratized image editing, making powerful tools like Photoshop accessible to a wider audience. This accessibility means that face swapping is no longer solely the domain of professional retouchers; it can be a fun and engaging activity for anyone looking to explore their creativity. Yet, with this democratization comes an amplified need for awareness regarding the ethical implications of image manipulation.
Conclusion: A Powerful Tool in the Photographer's Arsenal
A headswap is an efficient and often necessary method for correcting portraits when a reshoot is not feasible. It allows photographers to skillfully combine the strengths of different images, achieving the perfect facial expression and desired composition simultaneously. When it comes to software, Adobe Photoshop remains a formidable choice, especially for those already familiar with its extensive capabilities. However, the landscape of photo editing is constantly evolving. Photoshop plugins and standalone applications like Luminar Neo offer compelling alternatives, often providing faster workflows and more intuitive, AI-driven results.
Image retouching is an indispensable aspect of a modern photographer's skillset. The increasing adoption of dedicated software such as Luminar Neo by photographers underscores a trend towards tools that are easier to learn and deliver more natural-looking photographs. Exploring these alternatives can unlock new levels of efficiency and creativity.
Ultimately, whether you choose Photoshop, Luminar Neo, or another advanced editing tool, remember that a headswap is a form of image manipulation. It should be approached with a keen eye for detail, a commitment to realism, and a strong sense of ethical responsibility. The art of swapping faces or heads, while immensely popular and capable of producing impressive results, requires careful consideration of its application and potential impact.