Adobe InDesign offers a robust suite of tools for precise control over typography and color, essential for creating professional and visually appealing documents. Whether you're aiming to highlight specific text, establish a consistent brand identity, or simply refine the aesthetic of your layout, understanding how to manipulate font color and leverage advanced typographic features is paramount. This guide delves into the intricacies of applying color to text and objects, managing color swatches, and harnessing the power of OpenType fonts and font management within InDesign.
Applying Color to Objects and Text
In InDesign, color can be applied to various elements, including the stroke (border) and fill (background) of objects, as well as the text itself. When working with color, it's important to distinguish between these two aspects. The Fill box and Stroke box in the Toolbox or Color panel are your primary controls for this.

To apply color, you can utilize the Color Picker, accessible via the Toolbox or the Color panel. This tool allows for a broad spectrum of color selection. You can choose colors from a visual color field or specify them numerically using various color models like CMYK, HSB, RGB, or Lab. The Color Picker also features a color slider triangles to indicate the color’s position in the color field, and you can click or drag inside the color field to select your desired shade. Entering values directly into text boxes provides another method for precise color specification.
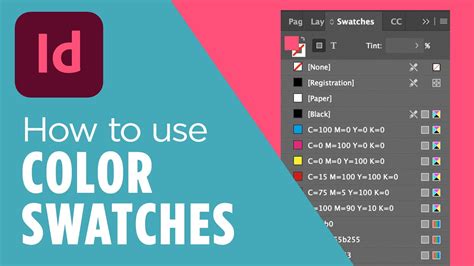
A crucial aspect of color management in InDesign is the ability to save frequently used colors as swatches. This is achieved through options like Add CMYK Swatch, Add HSB Swatch, Add RGB Swatch, or Add Lab Swatch within the Swatches panel. The Swatches panel is the recommended environment for organizing and applying colors, ensuring consistency throughout your document.
For a more dynamic approach, InDesign supports drag-and-drop functionality. You can easily apply colors or gradients by dragging them from a color source, such as the Swatches panel or the Gradient panel, directly onto an object or panel. This method allows for applying colors or gradients to objects without the need for pre-selection. The Toolbox displays the last color or gradient you applied, serving as a quick reference.
When working with text, you can select the text you wish to modify and then apply color. For objects like frames or tables, you would click the Object button. Clicking a color or gradient swatch from the Swatches panel will apply it to the selected element.
Formatting Affects Container vs. Content
A key distinction in InDesign's object formatting is the Affects Container option. When this is enabled, formatting changes, including color application, will affect the container itself (e.g., the frame of a text box). If Affects Container is disabled, the changes will apply to the content within the container (e.g., the text itself). This is particularly relevant when you want to change the color of text within a frame without altering the frame's border or background.

Advanced Color Management and Theme Generation
Beyond basic color application, InDesign provides sophisticated tools for managing and generating color palettes. The Color panel offers an alternative to the Swatches panel for mixing colors. You can add the current color from the Color panel to the Swatches panel at any time. It's important to note that if an object uses a named swatch, editing its color in the Color panel will change only that specific object. However, if the object uses a swatch from the Swatches panel, editing the color in the Color panel will not change the color of the object; it updates the swatch itself, affecting all objects using that swatch.
A powerful feature is the Color Theme tool, which allows you to extract color themes from selected areas, images, or even the entire layout. This tool can generate a theme composed of five different colors. You can click any part of the layout to pick a color, and this color is retained for reuse. The tool provides visual cues, marking areas where color themes can be generated. You can Shift+Click to pick a single (precise) color as the base color for the theme.
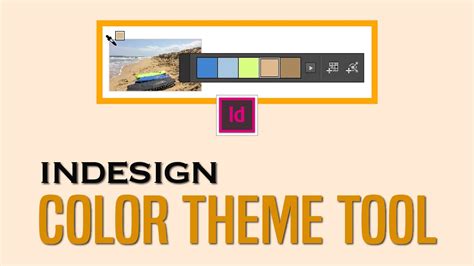
When you pick colors using the Color Theme tool, they are automatically added to the layout or can be added to the Swatches panel. These colors honor document intent and are converted to the appropriate color space before being added to swatches or applied to objects. The Color Theme tool can be accessed by double-clicking it on the Tools panel. The color theme persists until you press the ESC key to close the panel.
Working with Hexadecimal Color Codes
InDesign supports the application of color values using hexadecimal RGB code in workflows involving the Color Picker, New Swatch, and Edit Swatch. This allows for precise color input, especially when working with web-safe colors or when a specific hex code is provided. You can utilize the screengrabber within the Color Picker to sample colors directly from anywhere on your screen, displaying its hex color value. This feature is invaluable for matching colors from external sources or existing designs.
Organizing Colors with Color Groups
To enhance organization and facilitate the exchange of color schemes, InDesign introduces Color Groups. These groups allow you to categorize your swatches, making them easier to manage and access. You can create a color group by clicking the Color Group icon on the Swatches panel.
When creating a new color group, you have options to include Selected Swatches or swatches from Selected Page Items(s). You can select multiple swatches by holding down Ctrl (Win) or Option (Mac) before creating the group. The ability to organize swatches into groups is invaluable for complex projects with distinct color palettes.
Within color groups, you can perform several actions:
- Add a swatch to a color group: Simply select the color group and then add the swatch.
- Duplicate color group: This action duplicates the group and all swatches contained within it.
- Ungroup color group: This action removes the group structure, making the swatches available individually.
- Rename color group: You can rename groups via the context menu or by double-clicking the group name.
- Delete color group: Remove the group and its contents.
Color groups can also be saved and imported using ASE (Adobe Swatch Exchange) files. This format allows for seamless transfer of color swatches between different Adobe applications like Illustrator. You can import .ase files to load color groups into your Swatches panel or save existing color groups as .ase files for external use.
Understanding and Applying Fonts
The foundation of compelling typography lies in the effective use of fonts. InDesign offers extensive control over font selection, application, and management.
Font Families and Styles
Fonts are organized into font families, which are designed to be used together, such as Adobe Garamond. Within a family, various font styles exist, including regular, bold, semibold, italic, and bold italic. You can preview these styles in the Character panel or other font selection menus within InDesign.
Managing Fonts
You can make fonts available in InDesign by copying their font files into the Fonts folder within the InDesign application folder on your hard drive. If multiple fonts share the same family name but have different Adobe PostScript names, they will all be available in InDesign. Duplicate fonts are indicated in menus with their font technologies abbreviated.
Adobe Fonts plays a crucial role in font management. When an InDesign document contains missing fonts, InDesign can automatically activate them from Adobe Fonts in the background, provided the Auto-activate Adobe Fonts setting is enabled in Preferences. If only some missing fonts are available, they will be activated, and any others will be substituted with default fonts. The progress of font activation can be monitored in the Background Tasks panel. If Auto-activate Adobe Fonts is disabled, a Missing Fonts dialog will appear when a document with missing fonts is opened.
OpenType Fonts and Advanced Typographic Features
OpenType fonts are a modern standard that offers an expanded character set and advanced layout features, providing richer linguistic support and superior typographic control. OpenType fonts from Adobe that support central European languages are typically labeled with "Pro" in their name, while those without this support are labeled "Standard" (with an "Std" suffix).
OpenType fonts can include a variety of attributes that enhance text appearance and functionality. These include:
- Ordinals: Formatted numbers like "1st" or "2nd."
- Discretionary ligatures: Optional ligatures that can be turned on for aesthetic effect.
- Fractions: Properly formatted fractions (e.g., 4/13).
- Proportional figures: Figures that have varying widths for a more natural appearance.
- Tabular figures: Figures with fixed, equal widths, ideal for aligning numbers in tables.
- Contextual alternates: Glyphs that adapt their shape based on surrounding characters for better joining behavior.
- Swash: Decorative, ornate characters for stylistic emphasis.
- Small caps: Capital letters that are smaller than the regular uppercase letters.
- Oldstyle figures: Figures designed with ascenders and descenders, similar to lowercase letters.
- Ligatures: Characters formed by combining two or more letters.
- Stylistic alternates: Variations of characters for stylistic purposes.
- Titling alternates: Decorative caps for titles.
- Case-sensitive forms: Punctuation marks that adjust their position when used with uppercase letters.
- Localized forms: Glyphs that are specific to certain languages.
- Slashed zero: A zero character with a diagonal slash for clarity.
- Ornaments: Decorative characters.
How to use OpenType in InDesign (Trailer)
To access these features, you typically select text and then choose the desired OpenType attribute from a pop-up window in the Character panel, Control panel, or Properties panel.
OpenType SVG Fonts and Emoji
InDesign supports OpenType SVG fonts, which enable the use of multi-colored glyphs and gradients within a single character. This is particularly useful for emoji fonts, allowing you to incorporate a wide range of colorful and graphical characters like smileys, flags, animals, and food into your documents.
Emoji fonts can also support composite glyphs, where multiple characters combine to form a single emoji. For instance, in the EmojiOne font, combining two characters representing a country's ISO code can form that country's flag. Similarly, you can combine default skin tone characters with available skin colors to customize emoji.
To use these specialized characters, you'll need to access the Glyphs panel (Type > Glyphs). The characters in emoji fonts are not directly mapped to keyboard keys; instead, you select them from the Glyphs panel to insert them into your document.
Variable Fonts
A newer development in font technology supported by InDesign is Variable fonts. This OpenType format allows for custom attributes like weight, width, and slant to be adjusted continuously within a single font file, offering unprecedented flexibility in typographic design.
Finding and Applying Fonts
InDesign provides efficient ways to find and apply fonts:
- Favorites and Recent Fonts: You can mark individual font families as favorites or rely on the Recently used fonts list, which appears at the top of the font menu for quick access.
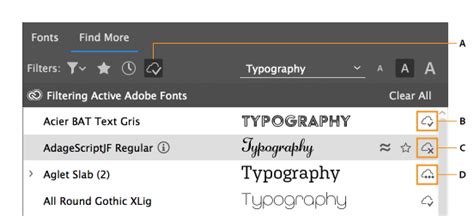
- Filtering Fonts: When searching for fonts, you can narrow down results by classification (Serif, Sans Serif, Handwritten) or even by visual similarity. Fonts that closely match your search criteria will appear at the top.
- Browsing and Activating Adobe Fonts: InDesign allows you to browse thousands of fonts from Adobe Fonts directly within the application. You can activate fonts instantly by clicking the activate icon next to them, making them available for immediate use in your document. You can also deactivate fonts when they are no longer needed.
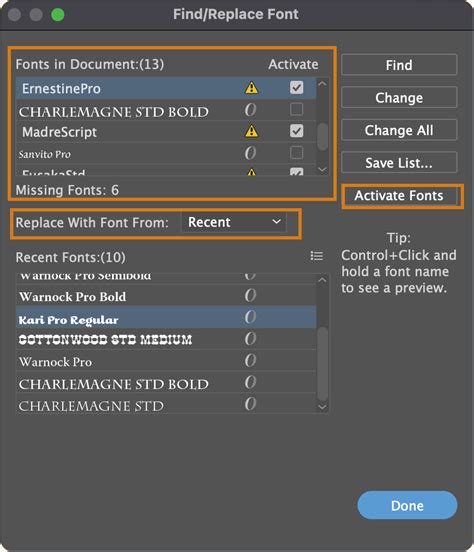
Substituting Fonts
When a document contains missing fonts that are not available through Adobe Fonts, InDesign will substitute them with default fonts. These substituted fonts will be listed at the top of the Type > Font menu under a "Missing Fonts" section. You can use the Type > Find Font command to locate and replace these substituted fonts.
Applying Color to Text: A Practical Approach
The user's specific scenario highlights a common need: changing the text color of multiple text boxes efficiently. While assigning classes like in CSS isn't directly available, InDesign offers powerful alternatives.
The core concept here is to leverage Paragraph Styles. If your text boxes utilize different paragraph styles, modifying the color attribute within each style will update all text formatted with that style simultaneously. This is indeed one of the fundamental "InDesign commandments" for efficient workflow.
If all text boxes share a common characteristic (e.g., they are all currently black), you can use the Find/Replace feature. However, caution is advised: ensure that your search criteria are specific enough to target only the text you intend to change. For instance, if you want to change only a specific set of paragraph styles from black to white, you would first identify which paragraph styles are applied to the text on that particular page.
To change the color of text within specific paragraph styles, follow these steps:
- Open the Paragraph Styles panel (Window > Styles > Paragraph Styles).
- Edit the desired paragraph style.
- Navigate to the Basic Character Formats section.
- Use the Fill color dropdown menu to select the new color.
- Click OK.
This action will instantly update the color of all text formatted with that paragraph style throughout your document. If you need to change the color for multiple styles, repeat this process for each style.
For the user's specific case of wanting to change text to white on one page while managing multiple paragraph styles, the most streamlined approach is to modify the relevant paragraph styles individually. While it might seem like managing an "entire set," applying changes at the style level is far more efficient than manually altering each text box.
In conclusion, mastering font color application and typographic controls in Adobe InDesign empowers designers to create visually rich and consistent documents. By understanding the nuances of color application, utilizing swatches and color groups, and leveraging the advanced capabilities of OpenType fonts and paragraph styles, you can significantly enhance your design workflow and the final output of your projects.