The world of digital art and design increasingly relies on the precision and intuitiveness of graphics tablets. For users of Arch Linux, a powerful and flexible operating system, getting these devices to work seamlessly can sometimes present a unique set of challenges. This guide aims to demystify the process of setting up XP-Pen graphics tablets on Arch Linux, covering everything from basic driver recognition to advanced customization of buttons, pen pressure, and aspect ratio. We will explore the interplay between the kernel drivers, Xorg configuration, and application-level settings to ensure your XP-Pen tablet becomes an extension of your creative workflow.
Understanding the Linux Graphics Tablet Ecosystem
Before diving into specific configurations, it's essential to understand the components that enable graphics tablet functionality on Linux. Arch Linux, like many other distributions, leverages a combination of kernel modules and user-space drivers to interact with these devices.
The primary kernel drivers are provided by two main projects:
- linux-wacom: This project primarily supports Wacom devices, offering robust and well-established integration.
- DIGImend: This project focuses on supporting devices from manufacturers other than Wacom, which is crucial for brands like XP-Pen. The Arch Linux kernels include drivers from both of these projects.
For Xorg, the display server, the xf86-input-wacom driver is the standard. Even for non-Wacom devices that are supported by DIGImend, configuring Xorg to use the xf86-input-wacom driver often allows for greater customization through tools like xsetwacom.

When you connect your XP-Pen tablet via USB, it should be recognized by the system. You can verify this by running dmesg as root, which will show kernel messages related to device detection. The command lsusb from the usbutils package will also list your tablet, providing its Vendor and Product IDs, which are crucial for identifying device-specific configurations. For devices recognized by DIGImend, you might see them listed in /proc/bus/input/devices.
Initial Setup and Driver Recognition
Most graphics tablets, including many XP-Pen models, will work out of the box with Arch Linux without requiring extensive manual configuration. The kernel drivers, whether from linux-wacom or DIGImend, handle the fundamental input detection.
If you have a Wacom device, the xf86-input-wacom Xorg driver package typically includes a configuration file (/usr/share/X11/xorg.conf.d/70-wacom.conf) that automatically loads the appropriate driver when a Wacom device is plugged in.
However, for non-Wacom devices like many XP-Pen models, the situation can be more nuanced. While DIGImend might recognize the device at the kernel level, getting it to work seamlessly with Xorg for advanced features might require manual configuration. This often involves ensuring that the xf86-input-wacom driver is used, even for non-Wacom hardware, to enable customization tools.
Troubleshooting Initial Detection:
- Kernel Modules: Ensure that the relevant kernel modules for graphics tablets are loaded. If your device is not recognized, you might need to install a DKMS (Dynamic Kernel Module Support) package. For Wacom devices, this would be
input-wacom-dkms-gitAUR. For non-Wacom devices that benefit from DIGImend, considerdigimend-kernel-drivers-dkms-gitAUR. These packages ensure the drivers are rebuilt for your specific kernel version. - udev Rules: Sometimes,
udevrules are necessary to correctly identify and configure devices. These rules dictate how the system handles specific hardware upon connection. For Wacom devices, thewacom.rulesfile in/usr/lib/udev/rules.d/is important. If your XP-Pen tablet isn't automatically configured, you might need to create customudevrules, especially for button mapping.
Configuring Aspect Ratio and Screen Mapping
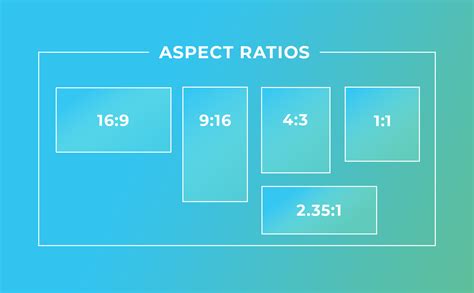
A common issue when using graphics tablets with widescreen displays is an aspect ratio mismatch. Tablets often have a more square active area compared to the 16:9 aspect ratio of modern monitors. This can lead to a vertical compression of your drawing or input.
There are two primary approaches to resolving this:
- Force Proportions (Reducing Drawing Area Height): This involves adjusting the tablet's active area to match the screen's aspect ratio by reducing its height. This preserves the 1:1 mapping of input to screen space but sacrifices some of the tablet's usable drawing surface.
- Reducing Screen Area Width: Alternatively, you can map the tablet to a specific region of your screen that matches its aspect ratio. This means you might not be able to reach the extreme edges of your monitor with your stylus.
The xsetwacom tool is invaluable for these adjustments. It allows for runtime configuration of Wacom-compatible devices.
Using xsetwacom for Mapping:
First, you need to identify your tablet and its associated tools (stylus, eraser, etc.). Run xsetwacom list devices to get a list of recognized devices, which will include their names and IDs.
For example, you might see something like:UGTABLET 24 inch PenDisplay stylus id: 10
To adjust the aspect ratio, you can use the Coordinate Transformation Matrix property. This matrix allows for precise control over how the tablet's active area is mapped to the screen.
The command format is:xsetwacom set "device name or id" --type=float "Coordinate Transformation Matrix" a b c d e f g h i
Where a through i are the values of the 3x3 transformation matrix. A common scenario is to adjust the e value to compensate for the aspect ratio. For instance, if your tablet's active area is wider than it is tall relative to your screen, you might need to adjust e to a value slightly greater than 1 to stretch the input vertically. Conversely, if it's taller, you'd adjust a to be less than 1.
A practical example seen in user experiences is using a matrix like 1 0 0 0 1.070866 0 0 0 1. This suggests an adjustment to the vertical scaling.
Mapping to a Specific Monitor:
If you have multiple monitors, it's often desirable to map your tablet exclusively to one of them to avoid input distortions when drawing across displays. The xsetwacom command can be used to set the screen area to match a specific monitor's dimensions.
xsetwacom set "device name" MapToOutput <output_name>
The <output_name> can typically be found using tools like xrandr. If xsetwacom has trouble identifying the output, you might need to manually define the screen area using pixel coordinates:
xsetwacom set "device name" Area 0 0 SCREEN_WIDTH SCREEN_HEIGHT
Where SCREEN_WIDTH and SCREEN_HEIGHT are the resolution of your target monitor. You can also specify offsets if you need to map to a portion of the screen.
Using xinput as an Alternative:
In some cases, xinput might be a more direct or alternative tool, especially if xsetwacom doesn't fully support your device or if you encounter issues. The xinput command allows you to directly manipulate device properties, including the Coordinate Transformation Matrix.
xinput set-prop "device name or id" --type=float "Coordinate Transformation Matrix" a b c d e f g h i
A user reported success with this command for aspect ratio adjustments:xinput set-prop "device name" --type=float "Coordinate Transformation Matrix" 0.5 0 0 0 1 0 0 0 1
This specific example effectively halved the active area's width, mapping it to the left half of the screen. This indicates that xinput can be used to achieve similar, and sometimes more granular, control over the tablet's input mapping.
Customizing Pen and Tablet Buttons
One of the most sought-after features for graphics tablet users is the ability to customize the buttons on the pen and the tablet itself. These buttons can be mapped to frequently used shortcuts, saving time and improving workflow efficiency.
Pen Buttons:
The buttons on the pen are typically treated as mouse buttons by the system. The stylus tip contact is usually button 1, and subsequent buttons are numbered sequentially. xsetwacom can be used to remap these buttons.
xsetwacom set "Stylus Name" Button <button_number> <action>
The <action> can be a mouse button event (e.g., button 2 for middle click, button 3 for right click) or a key combination.
Tablet Buttons:
Tablet buttons, often found on the bezel of display tablets or the surface of non-display tablets, can be more complex. XP-Pen tablets often send these button events as separate keyboard events. This means they can be mapped to keyboard shortcuts.
Customizing these buttons often involves udev rules, specifically using the hwdb (Hardware Database) system. This allows you to redefine how specific button events are interpreted by the system.
Using udev and hwdb for Button Mapping:
- Identify Button Events: Use a tool like
evtestorxinput test "device name"to capture the events generated when you press a tablet button. You'll be looking for keycodes or scancodes. - Create a
hwdbFile: Create a new file in/etc/udev/hwdb.d/, for example,90-xppen.hwdb. This file will contain rules to remap the button events. - Define Device Match: The rule needs to match your specific tablet. This is typically done using the
BUS_ID,VENDOR_ID, andMODEL_ID. A common format isb{BUS_ID}v{VENDOR_ID}p{MODEL_ID}. You can find these IDs usinglsusb. - Map Scancodes to Keys: Within the device match section, you define key mappings. For example:
KEYBOARD_KEY_{scancode}={key_name}Thescancodeis what you captured withevtest(e.g.,d0044), andkey_nameis a standard key identifier (e.g.,KEYBOARD_BUTTON_MIDDLEfor middle mouse click, or a specific key likeKEYBOARD_KEY_F2for F2). Key names can be found in/usr/include/linux/input-event-codes.hand should be in lowercase.
Example hwdb Rule:
# /etc/udev/hwdb.d/90-xppen.hwdbevdev:input:b0003v28BDp092De0100* KEYBOARD_KEY_d0044=middle button KEYBOARD_KEY_d0045=keyboard:key 38, shiftThis example shows mapping a scancode d0044 to a middle mouse button and d0045 to a key combination (likely 'a' with shift, depending on the exact key code interpretation).
After creating or modifying the hwdb file, you need to reload the udev rules:sudo udevadm control --reload-rules && sudo udevadm trigger
Mapping to Custom Commands:
While xsetwacom and hwdb are powerful for remapping to existing key presses or mouse buttons, directly mapping tablet buttons to complex custom commands or scripts isn't always straightforward. A common workaround is to map the tablet button to a unique key combination (e.g., Ctrl+Alt+F1) and then use a separate keybinding utility like sxhkd or your window manager's shortcut configuration to trigger a script or command when that key combination is detected.
Pressure Sensitivity and Curve Adjustments
Pressure sensitivity is a cornerstone of digital art, allowing for nuanced line weight and opacity. Ensuring this works correctly on Arch Linux involves verifying that the drivers correctly interpret the pressure data and that applications are configured to use it.
Pressure Curve Tuning:
The default pressure curve provided by drivers might not be ideal for everyone. Some users find that the initial touch of the stylus is ignored, or that it takes too much pressure to reach maximum sensitivity. xsetwacom allows you to adjust the pressure curve.
The command xsetwacom set "Stylus Name" PressureCurve P1 P2 P3 P4 allows you to define four points on the curve. P1 and P2 typically define the lower range of pressure, while P3 and P4 define the upper range.
A user shared their optimized pressure curve for an XP-Pen Artist 24 Pro:xsetwacom set "UGTABLET 24 inch PenDisplay stylus" PressureCurve 0 10 40 85
This curve starts with minimal pressure (0) mapping to a low output (10), then rapidly increases sensitivity between 40 and 85 before flattening out. The default might have been 0 20 100 100, which implies a slower initial response and a more linear increase towards the end.
Application-Specific Settings:
Most creative applications (GIMP, Krita, Inkscape, MyPaint, etc.) have their own input device settings where you can fine-tune pressure sensitivity and select the input tool (stylus, eraser).
- GIMP/Inkscape: Navigate to
Edit > Input Devices. Here, you can often see your tablet listed and adjust settings like pressure sensitivity, tilt, and which tool the stylus should map to. For pressure sensitivity to work, ensure the "Mode" for your stylus is set to "Screen" or "Screen Distance" and that "Pressure" is enabled. - Krita: Krita generally works well with tablets if Qt can detect them. Krita often includes patches for Qt and other dependencies that improve tablet support. You can check
Settings > Configure Krita > Tablet Settingsfor options. - MyPaint: MyPaint uses
libmypaintfor its brush engine. Pressure sensitivity is typically managed within the brush settings. Look for a "Pressure" checkbox or slider in the brush configuration. - Pencil2D: This 2D animation tool also supports pressure-sensitive input.
Xournal++: For note-taking and annotation, Xournal++ is a popular choice and offers full support for pressure-sensitive stylus input.
Persistence of Settings: Configuration Files and Startup Scripts
A significant challenge in Linux tablet configuration is ensuring that your custom settings persist across reboots, logouts, and hot-plugging events.
Runtime Commands vs. Configuration Files:
Commands executed directly in the terminal using xsetwacom or xinput are temporary. They only last until the Xorg session is restarted, the device is unplugged and replugged (hot-plugged), or the system is rebooted.
The Arch Wiki and other resources often suggest two main methods for making settings permanent:
- Xorg Configuration Files (
xorg.conf.d): Placing configuration snippets in/etc/X11/xorg.conf.d/or/usr/share/X11/xorg.conf.d/can provide static configurations. However, the effectiveness of these files for runtimexsetwacomproperties can be debated, as some properties might be dynamic. One user noted that "xinput runtime commands will lose their effect after a hot-plug, log-off, or re-start" but "adding them to a custom xorg.conf.d (static) configuration file will preserve them after a hot-plug." This implies that while static configurations might survive hot-plugging, they might not necessarily persist across full logouts or restarts without additional measures. - Runtime Scripts: The most reliable method for applying dynamic settings like
xsetwacomproperties orCoordinate Transformation Matrixis to use a script that runs automatically at system startup or user login.
Creating Startup Scripts:
Systemd User Services: A modern and robust approach is to create a systemd user service. This service can be configured to start your custom tablet configuration script automatically when your user session begins.
Create a script (e.g.,
~/scripts/configure_tablet.sh) containing yourxsetwacomorxinputcommands.Make the script executable (
chmod +x ~/scripts/configure_tablet.sh).Create a systemd unit file (e.g.,
~/.config/systemd/user/tablet-config.service) with content like:[Unit]Description=Configure XP-Pen Tablet[Service]ExecStart=/home/your_user/scripts/configure_tablet.shType=oneshot[Install]WantedBy=default.targetEnable and start the service:
systemctl --user enable tablet-config.servicesystemctl --user start tablet-config.service
Autostart Applications: Desktop environments (KDE, GNOME, XFCE, etc.) usually have an "autostart" or "startup applications" feature where you can add your script to be run when the desktop session loads.
Handling Dynamic Device IDs:
A significant challenge is that device IDs (used in xsetwacom commands) can change when devices are unplugged and replugged, especially if multiple identical devices are present. Hardcoding IDs in scripts is prone to failure.
To overcome this, scripts should be designed to dynamically find the correct device. You can parse the output of xsetwacom list devices to find the device by its name (e.g., "UGTABLET Pen stylus") and then extract its current ID before applying settings.
#!/bin/bash# Find the tablet stylus ID dynamicallySTYLUS_ID=$(xsetwacom list devices | grep "UGTABLET Pen stylus" | awk '{print $4}' | cut -d '=' -f 2)if [ -n "$STYLUS_ID" ]; then # Apply settings using the found ID xsetwacom set "$STYLUS_ID" PressureCurve 0 10 40 85 xsetwacom set "$STYLUS_ID" "Coordinate Transformation Matrix" 1 0 0 0 1.070866 0 0 0 1 # Add other settings hereelse echo "XP-Pen tablet stylus not found."fi# Add a small delay if needed for devices that take time to initializesleep 5Important Note on Timing: Sometimes, tablet devices might not be fully initialized by the time a startup script or service runs. Adding a short sleep command (e.g., sleep 5 or sleep 10) at the beginning of your script can resolve issues where settings are applied before the device is ready.
Software Compatibility and Applications
Once your tablet is configured at the system level, its true utility shines through in creative applications.

- Drawing and Painting: Applications like Krita, GIMP, MyPaint, and Pencil2D are excellent choices. Krita, in particular, is highly regarded in the open-source community for its robust tablet support and extensive features.
- Vector Graphics: Inkscape also supports pressure-sensitive input for its freehand drawing tools.
- 2D Animation: OpenToonz benefits from pressure-sensitive input for its drawing tools.
- Note-Taking and Annotation: Xournal++ is a powerful tool that fully leverages stylus input.
When experiencing issues within an application, first confirm that the tablet is working correctly at the system level using xinput list or xsetwacom list devices. Then, check the application's input device settings.
Proprietary Drivers vs. Open-Source Drivers
XP-Pen does offer proprietary Linux drivers, and for some users, these might provide a more straightforward setup, especially for specific models. However, these drivers are often closed-source, meaning their inner workings are not visible, and they may not integrate as seamlessly with the broader Linux ecosystem or receive timely updates.
The open-source approach, utilizing DIGImend and the xf86-input-wacom driver with xsetwacom, offers greater transparency, flexibility, and community support. While it might require more initial configuration, it generally leads to a more stable and customizable experience in the long run.
A user review of the XP-Pen Artist 24 Pro on Kubuntu 20.04 highlighted this dilemma, noting that while the proprietary driver might exist, the open-source Digimend route was preferred for its transparency, despite requiring manual workarounds.
Wayland Considerations
If you are using Wayland as your display server (common in newer versions of GNOME, KDE Plasma, and Sway), the configuration landscape changes slightly. Wayland compositors (like Mutter, KWin, or Sway) handle input devices through libinput, which relies on libwacom for device information.
xsetwacomis Not Applicable: Configuration throughxsetwacomis specific to Xorg and will not work under Wayland.- Desktop Environment Settings: Tablet configuration is typically handled through the settings provided by your Wayland compositor or desktop environment. Look for tablet-specific options within your system settings.
libinputandlibwacom: These are the core components. Ensure they are up-to-date.- OpenTabletDriver: For Wayland environments lacking robust built-in tablet options, the OpenTabletDriver project is an alternative that aims to provide a unified driver solution across different platforms and display servers.
Touch and Stylus Arbitration in Wayland:
For devices that have both a touchscreen and a stylus, Wayland's libinput might not group these devices together by default, leading to issues with touch arbitration. This can often be resolved by creating custom udev rules to ensure they are treated as a single logical input device.
Advanced Customization and Troubleshooting
Udev Rules for Specific Hardware:
For highly specific hardware quirks or to ensure consistent device identification, custom udev rules are powerful. These rules can be written to match devices by their Vendor and Product IDs and then assign specific properties or trigger scripts.
Example of a Custom udev Rule (simplified):
ACTION=="add", SUBSYSTEM=="usb", ATTRS{idVendor}=="28bd", ATTRS{idProduct}=="092d", ENV{LIBINPUT_CALIBRATION_MATRIX}="1.0 0.0 0.0 0.0 1.0 0.0"This rule, when added to a file in /etc/udev/rules.d/, would attempt to set a calibration matrix for a device with the specified Vendor and Product IDs.
Troubleshooting "Unknown device_type":
If dmesg shows "Unknown device_type" for your Wacom tablet, it usually means the input-wacom driver doesn't have specific configuration for your hardware ID. Installing input-wacom-dkms-gitAUR can help, but you might also need to manually add your device's Vendor and Product IDs to the wacom.rules file or create a new udev rule.
Driver Installation Issues:
When attempting to install proprietary XP-Pen drivers (if you choose that route), issues can arise during the post-installation phase, such as the installer failing to grant necessary permissions. This might require manual intervention to fix file permissions or re-run parts of the installation script.
Conclusion
Configuring an XP-Pen graphics tablet on Arch Linux is a rewarding process that can lead to a highly personalized and efficient digital art setup. While some initial effort may be required, understanding the roles of kernel drivers, Xorg, xsetwacom, xinput, and udev provides the foundation for overcoming common challenges. By leveraging startup scripts and dynamic device identification, you can ensure your custom settings persist, and by exploring application-specific options, you can unlock the full potential of your tablet's pressure sensitivity and button customization. The open-source approach, though sometimes demanding, offers unparalleled control and transparency, making your Arch Linux system a powerful and adaptable creative workstation.