As a business owner, particularly in creative fields like wedding photography, your logo is a crucial element of your brand identity. It's the visual representation of your unique style and the message you wish to convey to your clients. Ensuring your logo integrates seamlessly with your overall brand aesthetic and photography style is paramount. This often necessitates the ability to make your logo transparent, allowing it to be placed over various backgrounds without clashing. Fortunately, Adobe Photoshop, a powerful industry-standard software, offers robust tools to achieve this. This guide will delve into the intricacies of making a logo transparent in Photoshop, providing a detailed walkthrough for both beginners and those seeking to refine their skills. The ability to manipulate image backgrounds, including making them transparent, is not limited to logos; it's a fundamental skill applicable to a wide range of image editing scenarios, from product photography to graphic design, where isolating subjects and removing distracting backgrounds is essential.
Unlocking Your Logo's Potential: The Importance of Transparency
In the realm of professional wedding photography, the post-wedding workflow can often feel overwhelming and time-consuming. Having a solid understanding of essential editing processes, such as making a logo transparent, can significantly streamline this workflow. Your logo is more than just an image; it's a cornerstone of your brand message, meticulously crafted to represent you and your wedding photography business. Showcasing it effectively to clients, ensuring it complements the overall design and theme of your brand, is vital. Every photographer possesses a distinctive style, and this individuality is frequently reflected in their branding, including their logo. Therefore, acquiring the skills to quickly and efficiently make a logo transparent is an invaluable asset, empowering you to maintain brand consistency across all your visual materials. This technique allows you to effectively "get rid of the things you don’t want in your backgrounds so your subjects can really shine," as the saying goes.

Step-by-Step: Making Your Logo Transparent in Photoshop
The process of making a logo transparent in Photoshop is accessible and can be mastered with practice. While various methods exist, we will focus on a commonly used and effective approach.
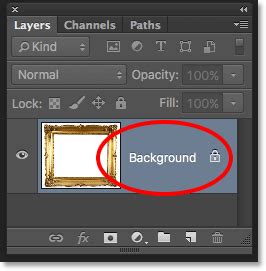
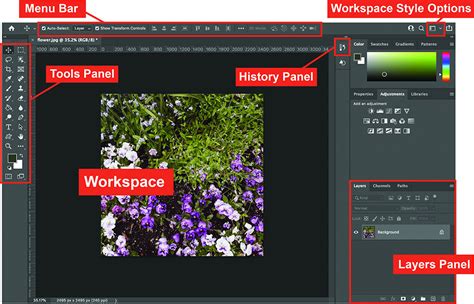
1. Opening Your Logo in Photoshop:The very first step is to open your logo file within Adobe Photoshop. Navigate to your files and select the logo image you wish to edit. Often, upon opening, the logo layer will appear locked in the "Layers" panel. Before proceeding, it is essential to unlock this layer. This is typically achieved by double-clicking on the layer or clicking a lock icon, depending on your Photoshop version.
2. Introducing a Transparent Layer:To prepare for transparency, you need to add a new, transparent layer to your document. Go to the top menu, click on "Layer," hover over "New," and then select "Layer." Alternatively, you can use the keyboard shortcut: "Command + N" for Mac users or "Control + N" for PC users. This newly created layer should, by default, be transparent. Once created, drag this new layer below your original logo layer in the "Layers" panel. Remember, layers positioned higher in the panel will always overlay those below them.
3. Isolating and Removing the Background:With your logo layer selected and a transparent layer beneath it, you can now focus on making the background transparent. One of the most straightforward tools for this task is the "Magic Wand" tool. Select the "Magic Wand" from the Photoshop toolbar. Click on the background area of your logo that you wish to remove. Once the background is selected, press the "Delete" button on your keyboard. The selected area will be removed, revealing the transparent layer underneath.
If the "Magic Wand" tool doesn't select the entire background you intend to remove in a single click, you can adjust its settings. Look for the "Tolerance" setting in the options bar at the top of the screen; a higher tolerance will select a broader range of similar colors. You can also hold down the "Shift" key while clicking on different parts of the background to add them to your selection. If you find that the "Magic Wand" is still not selecting the desired area accurately, you can refine your selection. Go to the "Select" menu at the top of the screen and explore options like "Color Range" or "Select Subject," which can offer more sophisticated background removal capabilities. For more precise selections, especially around intricate edges, the "Pen Tool" or "Lasso Tool" can be employed to manually trace the outline of your logo.
4. Saving Your Transparent Logo:The final and crucial step is to save your logo in a format that preserves transparency. When you save your logo as a PNG (Portable Network Graphics) image, it will retain the transparent background. PNG is an excellent choice for web graphics and logos because it supports alpha transparency, meaning it can handle varying degrees of opacity, and it generally offers better compression than other lossless formats. Navigate to "File," then "Save As," and choose "PNG" from the file type dropdown menu. Ensure that the "Transparency" option is checked if prompted.
Advanced Techniques for Seamless Transparency
Beyond the basic "Magic Wand" method, Photoshop offers more advanced techniques for achieving professional-grade transparency, particularly for complex logos or images.
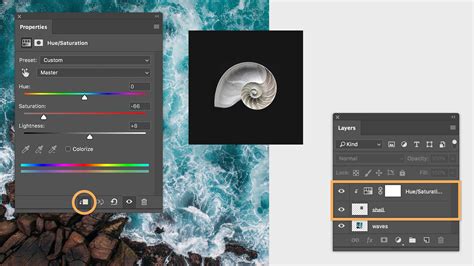
Using Layer Masks for Non-Destructive Editing:A highly recommended approach for achieving transparency is by utilizing layer masks. This method is non-destructive, meaning you can always go back and make adjustments without permanently altering your original logo.
- Desaturate the Image: Start by adding a "Hue/Saturation" adjustment layer above your logo layer. Turn the saturation all the way down until the image has no color. While technically this step can be skipped as pasting into a layer mask converts to grayscale anyway, it helps visualize the process.
- Invert and Adjust Curves: Add an "Invert" adjustment layer, followed by a "Curves" adjustment layer. Manipulate the "Curves" adjustment layer until all the areas you want to be solid and opaque appear white, and all the areas you want to be fully transparent appear black. This creates a grayscale mask where white reveals and black conceals.
- Copy and Apply the Mask: Select the entire image (CTRL+A or Command+A) and copy the combined grayscale result (CTRL+SHIFT+C or Command+SHIFT+C). Then, create a layer mask on your original logo layer by clicking the layer mask icon at the bottom of the "Layers" panel.
- Edit the Mask Directly: Hold down the "Alt" (or "Option" on Mac) key and click on the layer mask icon. This enters direct edit mode for the mask. Paste your copied grayscale image into this mask (CTRL+V or Command+V).
- Return to Normal View: Click back on your original logo layer to exit the layer mask's direct edit mode. This will hide all your adjustment layers and reveal your logo with a perfectly transparent background.
Leveraging Adobe Sensei for Automatic Background Removal:For users of more recent Photoshop versions, Adobe's Artificial Intelligence (AI) technology, Adobe Sensei, offers remarkably powerful tools for automatic background and subject isolation. In the "Layers" panel, you can often find a "Properties" panel. Within this panel, there's typically a "Remove Background" button. Clicking this button allows Photoshop to intelligently detect and isolate the subject of your photo, creating a transparent background automatically. This feature is incredibly efficient for quickly removing distracting backgrounds and placing your subject into new designs.
Beyond Logos: General Background Removal in Photoshop
The skills honed in making a logo transparent are directly transferable to broader image editing tasks. Whether you're working on product photography, graphic design projects, or simply want to isolate a subject from a cluttered background, Photoshop provides the tools.
Making White Backgrounds Transparent:You can easily make a solid white background transparent in Photoshop. After opening your image, if the background layer is locked, unlock it. Then, use the "Magic Wand" tool (with appropriate tolerance settings) to select the white background. Press "Delete." If there are subtle variations in the white, you might need to use the "Select > Color Range" option to pick out all shades of white.
Using Selection Tools for Precision:For more complex backgrounds or when the "Magic Wand" isn't sufficient, Photoshop offers a suite of powerful selection tools:
- Lasso Tools (Lasso, Polygonal Lasso, Magnetic Lasso): These allow for freehand, straight-edged, or edge-snapping selections, respectively.
- Quick Selection Tool: This brush-like tool allows you to "paint" a selection based on texture and color.
- Pen Tool: For the ultimate precision, the Pen Tool allows you to create vector paths that can be converted into selections, ideal for sharp, defined edges.
- Object Selection Tool: Another AI-powered tool that allows you to draw a rough rectangle or lasso around an object, and Photoshop will attempt to automatically select it.
Refining Selections with "Refine Edge":Once you've made an initial selection, the "Refine Edge" (or "Select and Mask" in newer versions) workspace is invaluable. Here, you can smooth rough edges, feather selections to create a softer transition, and decontaminate colors, ensuring your isolated subject blends seamlessly with new backgrounds.
Exploring Other Tools and Platforms
While Photoshop is a leading professional tool, other options exist for achieving transparency, catering to different needs and skill levels.
Adobe Express for Quick Edits:Adobe Express (formerly Adobe Spark) offers a free plan that includes tools to make image backgrounds transparent. This is an excellent option for users who need a quick and easy solution without the complexity of Photoshop. You can upload your image, use their transparent background tool, and instantly download the result. Adobe Express also provides a suite of design tools, allowing you to further enhance your image by adding shape crops, filters, text, GIFs, and animations. You can transform your edited image into flyers, social media posts, album covers, and much more, leveraging a vast library of templates and design assets.
Scripting for Bulk Transparency:For photographers or designers who frequently need to make backgrounds transparent across a large number of images, Photoshop offers the capability to create and run scripts. A script can automate a series of actions, including opening files, applying transparency techniques, and saving them in the desired format. You can access this functionality via "File > Scripts > Browse…" in Photoshop.
Limitations and Considerations:
- GIFs and Transparency: It's important to note that GIF image files do not support alpha transparency. This means each pixel in a GIF must be either fully transparent or fully opaque, with no in-between states.
- Image Dimensions: Be mindful of image file size limitations. As noted in the provided information, there can be maximum dimension limits for files that can be processed.
Streamlining Your Workflow with Post-Production Software
Understanding how to effectively use post-production software like Photoshop and Lightroom is key to a streamlined workflow. Knowing which tool is best suited for specific editing scenarios, whether it's making a logo transparent, reducing image noise, or adding film grain, can save significant time. The more efficient your post-production process, the more time you can dedicate to other critical aspects of your photography business. For those who wish to outsource the bulk of their wedding photo editing, services are available, offering professional editing at various price points.
One Click Remove Background In Adobe Photoshop
By mastering the techniques for creating transparent backgrounds in Photoshop, you not only enhance your logo's versatility but also unlock a powerful capability for a wide array of image editing needs. This skill is fundamental to professional image presentation and brand consistency in today's visually driven digital landscape.