Adding bullet points to your InDesign documents is a fundamental skill for organizing information and enhancing readability. Whether you're creating a simple list of items or a visually striking, branded design, InDesign offers versatile tools to achieve your desired outcome. This guide will walk you through the various methods of incorporating bullet points, from basic application to advanced customization, ensuring your layouts are both functional and aesthetically pleasing.
The Basics of Adding Bullet Points
The most straightforward way to introduce bullet points into your InDesign project is by utilizing the built-in formatting options. This method is ideal for quick list creation where intricate design isn't the primary concern.
To begin, ensure you have an InDesign document open and a text box containing the text you wish to format. Using the Selection Tool, select the text box, or even just a single line of text, that will receive the bullet points. InDesign can apply these list styles to an entire text frame or to specific lines within it.
Once your text is selected, you can apply the default bulleted list style. This is often found within the Control panel, typically displayed at the top of your InDesign workspace. Look for an icon that represents a bulleted list (often a series of dots or lines) and click it. This action will instantly transform your selected text into a bulleted list using InDesign's default bullet character. It’s a simple and efficient process that quickly organizes your content.
The Control panel offers a streamlined approach. When in Paragraph mode (indicated by a paragraph symbol icon), you will find options for both bulleted and numbered lists. Simply selecting your text and clicking the bulleted list symbol will apply the default formatting.
Understanding Bullet and Numbering Defaults
It's important to understand that when you apply bullets or numbers this way, the characters themselves aren't actually inserted into the text as typed characters. Instead, InDesign manages them as formatting attributes. This means that if you were to select the text and attempt to delete the bullet character directly, you wouldn't be able to using a standard text editing tool unless you first convert the list.
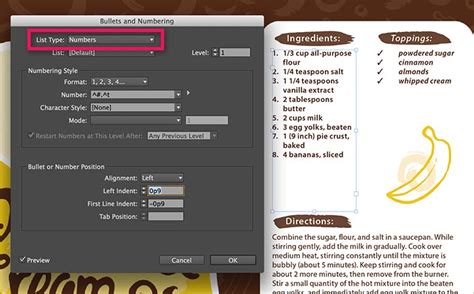
The Bullets and Numbering dialog box, accessible through the Paragraph panel menu or the Control panel, provides a more in-depth control over list formatting. This dialog box allows you to specify settings for both bulleted and numbered lists, offering greater flexibility than the immediate application of the default style.
Customizing Your Bullet Points
While the default bullet points serve their purpose, InDesign's true power lies in its ability to customize nearly every aspect of your design, including list formatting. Moving beyond the basic application, you can create highly stylized and unique bullet points that align with your brand or project aesthetic.
Leveraging Paragraph and Character Styles
The most robust and efficient way to manage custom bullet points is through Paragraph Styles and Character Styles. These powerful features allow you to define formatting once and apply it consistently across your document, or even across multiple documents.
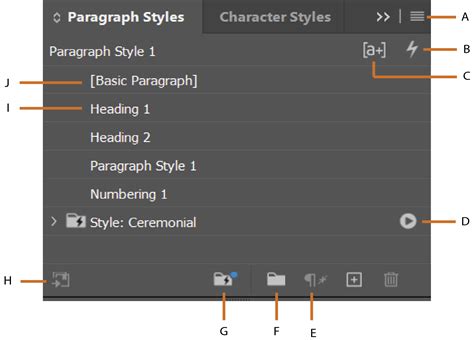
To create a custom bullet point, you'll typically start by defining a new Paragraph Style. In the Paragraph Styles panel, click the "Create New Style" icon (often a plus sign). Double-click on your newly created style to open its options.
Within the Paragraph Style Options, navigate to the "Bullets and Numbering" section. Here, you can choose to define a new list or modify an existing one. To add a custom bullet character, click the "Add" button. This opens up a world of possibilities, as you can use any font installed on your system as your bullet. For instance, a font that includes decorative symbols like hearts, stars, or unique geometric shapes can transform a simple list into a design element.
Fine-Tuning List Behavior
Beyond the bullet character itself, you can also control how the bullet points behave in relation to your text. By default, the "Text After" value in the Bullets and Numbering settings often inserts a tab character (^t). This tab dictates the space between the bullet and the start of your text.
For more precise control, you can change this to an "Em Space" (^m). An Em Space is a unit of measurement relative to the current font size, providing a more consistent and scalable space than a standard tab. You can also adjust the indent spacing. The Left Indent, First Line Indent, and Tab Position settings within the Bullets And Numbering dialog box are paragraph attributes that govern the spatial relationship between the bullet, the text, and the margins of the text frame.
Advanced Customization: Color and More
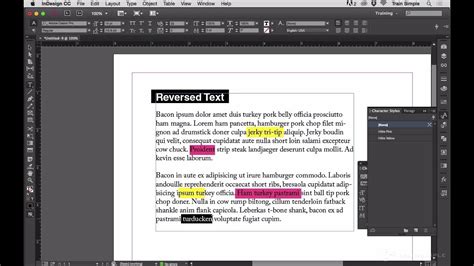
To take your customization even further, you can apply character-level formatting to your custom bullet characters. Within the Paragraph Style Options, you can find settings for "Character Color." By selecting a specific color here, you can make your custom bullet points stand out or integrate them seamlessly with your document's color palette. For example, if you've chosen a star symbol as your bullet, you can assign it a vibrant color that complements your design.
It’s also possible to assign a Character Style to your bullet character. This allows you to apply more complex character-level formatting, such as specific fonts, sizes, tracking, or even kerning, to the bullet itself, independent of the main text's formatting. This is particularly useful for ensuring consistency across various list items or for creating a distinct visual hierarchy.
Once you have defined your custom bullet character, adjusted spacing, and applied any desired color or character styles, you can then apply this Paragraph Style to your text. Simply select the text frame or text you want to format, and click on your newly created Paragraph Style in the Paragraph Styles panel. The text will instantly adopt the defined bullet point style, complete with your custom character and spacing.
Working with Multi-Level Lists
InDesign also excels at creating structured, multi-level lists, often referred to as outline lists or hierarchical lists. These are essential for organizing complex information, such as outlines, hierarchical structures, or step-by-step instructions where items have sub-items.
To create a multi-level list, you first define the list structure within the "Bullets and Numbering" dialog box, similar to single-level lists. However, you then create separate Paragraph Styles for each level of your outline. Each of these paragraph styles should be assigned the same defined list. The key difference lies in how you adjust the indent spacing and numbering for each level.
For example, a list with four levels would require four distinct Paragraph Styles, each linked to the same defined list. By adjusting the Left Indent and First Line Indent values within the Paragraph Style Options for each level, you can create the visual hierarchy that makes the outline easy to follow. Lower-level items will naturally be indented further than higher-level items, creating a clear visual hierarchy that resembles an outline.
Restarting Numbering and Nested Lists
InDesign provides control over how numbering restarts within lists. You can choose to restart numbering at the beginning of a story, or to have it continue consecutively. This is managed through the "Bullets and Numbering" dialog box and can be set within your Paragraph Styles.
When creating nested lists, the command "Restart Numbering" or its equivalent within the list definition can be crucial. For instance, if you have a main numbered list (e.g., 1, 2, 3) and within item "1" you have sub-items (e.g., 1a, 1b), you'll want the sub-list numbering to restart with each main item. The command "Numbered Lists > Restart Numbering" in the Paragraph panel menu makes a paragraph the first in a list, effectively restarting the sequence. Similarly, a command might assign the first lower-level number to a nested paragraph, ensuring correct sequential order within the hierarchy.
Converting Lists to Text
At times, you may need to convert your formatted bullet points or numbered lists into actual text characters. This can be useful if you need to export your document to a format that doesn't support InDesign's list formatting, or if you want to break the connection between the formatting and the text for independent manipulation.
InDesign provides the "Convert Bullets and Numbering to Text" option. This command takes the generated bullet characters and number sequences and inserts them directly into your text as editable characters. You can find this option in the Paragraph panel menu. Once converted, the text will behave like any other typed text, and the automatic numbering or bulletting functionality will be removed.
The Importance of Styles for Bullet Points
While it's possible to format bullet points locally on a per-text-box or per-paragraph basis, this approach is highly inefficient and prone to inconsistencies, especially in larger or more complex documents. The true power of InDesign lies in its style-based workflow.
Using Paragraph Styles and Character Styles for your bullet points offers several significant advantages:
- Consistency: Apply the exact same bullet style across multiple paragraphs, text frames, or even entire documents with a single click. This ensures a uniform and professional look.
- Efficiency: Make a change to a style, and that change will propagate to all instances where that style is applied. This saves an enormous amount of time and effort, especially when revisions are needed.
- Maintainability: Documents formatted with styles are easier to manage and update. You don't have to hunt down every bullet point to make a modification; you simply edit the style.
- Advanced Features: Styles unlock advanced list functionalities, such as multi-level lists, running captions, and cross-referencing, which are difficult or impossible to achieve with local formatting alone.
If you're not using styles, you're likely spending more time on formatting than necessary and risking an inconsistent layout. Embracing styles, particularly for elements like bullet points, is a fundamental step towards mastering InDesign and producing professional-quality work.
Advanced List Features: Running Captions and More
InDesign's list capabilities extend beyond simple bulleted and numbered lists. You can also create "running lists" which are essential for features like automatically numbering figures, tables, or chapters consecutively throughout a document or book.
Running Captions for Figures, Tables, and More
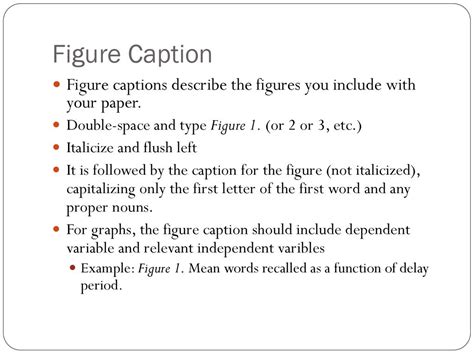
To create running captions, you define a list specifically for the item you want to number (e.g., "Figure"). You then create a Paragraph Style that incorporates this list definition. For example, you might define a list for figures, and then create a Paragraph Style called "Figure Caption." When this style is applied to text, InDesign will automatically generate the correct numbering (e.g., "Figure 1," "Figure 2," etc.).
This numbering is dynamic and updates automatically as new items are added or removed. The numbering can be configured to restart at the beginning of a document or a chapter, or to continue consecutively across multiple documents within a book. This is invaluable for technical documentation, reports, and any project where consistent item numbering is critical.
The "Bullets and Numbering" dialog box allows you to specify the format for these running lists. For instance, you can set it to display as "Figure ^#.^t" where ^# represents the automatic number and ^t represents a tab. You can also define custom prefixes or suffixes.
Lists Spanning Multiple Stories or Documents
Creating a running list that is interrupted by other paragraphs or spans across multiple text frames (stories) or even different documents within a book requires careful use of Paragraph Styles and list definitions. By applying the same Paragraph Style (which contains the list definition) to all paragraphs that should be part of the continuous list, InDesign ensures that the numbering or bulleting remains sequential and consistent, regardless of where those paragraphs appear in the layout.
Defining Lists for Specific Purposes
You can define multiple lists within a single InDesign document, each with its own numbering scheme and format. This is useful when you need to manage different types of numbered items separately. For example, you might have one list for figures, another for tables, and a third for equations. Each list can be configured independently within the "Bullets and Numbering" dialog box.
When you apply a Paragraph Style that uses a specific list definition, InDesign associates that style with that list. This ensures that when you create a multi-level list, the numbering for each level is correctly associated with its predefined list. For instance, you might have a list definition for numbering chapters (1, 2, 3) and another for numbering sections within chapters (1a, 1b, 1c).
Character Grid and Font Consistency
A subtle but important consideration when using custom bullet characters is font consistency. If you choose a character from a specific font as your bullet, and that font is not available on another user's system, the bullet character may appear inconsistently or be replaced by a default character (often indicated by a red "u" placeholder).
To mitigate this, it's good practice to embed the font used for your custom bullet points when exporting your document, especially for print or interactive PDFs. Alternatively, you can convert the bullet character to outlines (though this makes it uneditable as text) or use a symbol font that is widely available or easily embeddable. The "Bullets and Numbering" dialog box remembers the font used for any bullet character you add, which is helpful for tracking and managing these dependencies.
Where to Find Bullet Point Options in InDesign
Bullet points and numbering options are accessible from multiple locations within Adobe InDesign, catering to different workflow preferences:
- Control Panel: When the text tool is active or text is selected, the Control panel at the top of the screen provides quick access to bulleted and numbered list icons, along with basic indentation controls.
- Paragraph Panel: The Paragraph panel (Window > Type & Tables > Paragraph) offers access to the "Bullets and Numbering" dialog box via its panel menu.
- Control Panel (Paragraph Mode): Within the Control panel, ensure you are in Paragraph mode (click the paragraph symbol icon). This reveals the list formatting controls.
- Paragraph Styles Panel: For robust and repeatable formatting, the Paragraph Styles panel (Window > Type & Tables > Paragraph Styles) is where you define and manage your custom bullet point styles. This is where you'll access the "Bullets and Numbering" settings within the style's options.
By understanding these various access points and leveraging the power of styles, you can effectively manage and customize bullet points in your InDesign projects, enhancing both their visual appeal and organizational clarity.