Clip Studio Paint (CSP) offers a robust set of tools and features that empower artists to create intricate designs and apply them seamlessly to various surfaces, particularly clothing like t-shirts. This comprehensive guide delves into the process, from understanding fundamental art concepts to mastering advanced material application techniques within CSP. Whether you're a seasoned digital artist or a beginner exploring graphic design, this tutorial will equip you with the knowledge to bring your shirt designs to life.
The Foundation: Line Art and Coloring
Before diving into the specifics of shirt design, it's crucial to establish a strong foundation in the core principles of digital illustration: line art and coloring. The quality of your line art directly impacts the ease and effectiveness of your coloring process.
Crafting Clean Line Art for Effective Shading
Clean and detailed line art serves as a vital guide for shading and defining textures. When drawing clothing, the lines of folds are particularly important as they dictate where shadows will fall, adding depth and realism to your illustration. This fundamental step ensures that subsequent coloring and shading stages are more intuitive and yield better results.
Importing and Utilizing Custom Designs as Materials
Clip Studio Paint excels in its material management system, allowing users to import their own artwork and use them as reusable assets. This is particularly beneficial for graphic design, where repeating elements like logos or intricate patterns are common.
Preparing Your Design for the Material Library
To add your own illustrations and designs to the Materials library, you first need to open the image in Clip Studio Paint. If the design is intended for a specific area, such as a character's shirt, ensuring the background around the art is transparent is essential. This allows the design to be placed cleanly without an unwanted background.
If your design is composed of multiple layers, it's necessary to combine them into a single layer before proceeding. The "Layer - Merge Visible To New Layer" option is highly recommended as it creates copies of your layers and merges them into one flat layer, preserving your original layers for future edits.
Saving Your Artwork as a Material
Once your artwork is prepared on a single layer with a transparent background, you can save it to the Material library. Open the "Material Name" box and enter a descriptive name for your material. The "Material Image" box will display a preview of your design.
Under the "Paste Operation" settings, check the box next to "Scale up/down" and ensure the drop-down menu is set to "Adjust after pasting." This provides flexibility when applying the material later. In the "Location To Save Material" window, scroll down and select the "Image Material" category. To facilitate easy retrieval, consider adding a "custom" tag in the "Search Tag" box. This allows you to quickly find any custom materials you've created.
How To Save, Backup and Restore Clip Studio Paint Custom Brushes
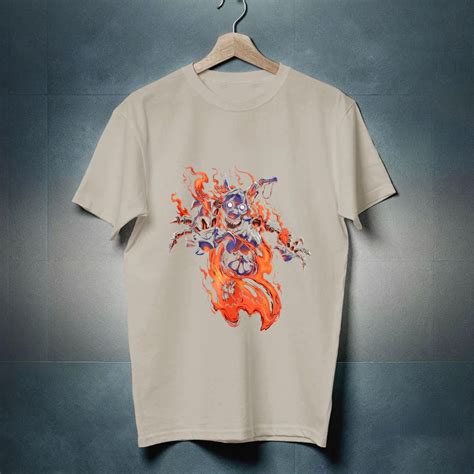
Applying Designs to Character Clothing
A common challenge for sequential artists is the repetitive task of drawing the same graphic t-shirt design on a character across multiple panels or scenes. Clip Studio Paint's Material Library offers a streamlined solution for this.
Basic Application of Shirt Designs
First, ensure you have your character artwork ready. Open the Material Library, which is typically docked to the right side of the user interface. If it's not visible, you can open it via "Window - Material - All Materials" (Ctrl+Shift+M on Windows).
Locate the design you saved to the library. Click on the material to select it. The bottom of the Material Library window will display information about the selected item. Drag and drop the material onto your canvas, onto your character's shirt. Once pasted, you can resize and rotate the design using the control handles around it to fit the character's shirt accurately.
Creating Convincing Fabric Patterns with Materials
While simply pasting a material onto clothing is a good start, making the pattern look like a natural part of the fabric requires more advanced techniques. This involves understanding how fabric drapes and folds.
Breaking Down Clothing into Sections
To create a convincing fabric pattern, mentally break down the piece of clothing into its constituent parts. For a shirt, this would include the front, back, and sleeves. For a skirt, it might be individual pleats. This approach allows you to transform the pattern to conform to the specific contours of each section.
Applying and Transforming Pattern Materials
Using the lasso tool, draw a selection around the area of the clothing you wish to fill with the pattern. Ensure the selection is slightly larger than the fabric's boundaries to provide ample pattern to work with.
Apply the pattern material as described in the previous section, resizing it to fit the scale of the selected area. Once scaled, right-click on the material layer and select "Rasterize." This converts the material into a regular layer, allowing for further manipulation.
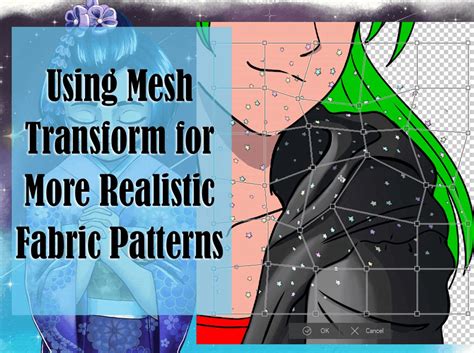
Utilizing Mesh Transformation for Realistic Drapery
To make the pattern appear to follow the curves of the fabric, use the "Mesh Transformation" tool found under "Edit - Transform - Mesh Transformation." This will overlay a grid onto your pattern layer. By clicking and dragging the control points of the mesh, you can warp and distort the pattern to convincingly match the folds and curves of the clothing. Increase or decrease the number of control points for finer adjustments. Commit to the transformation once you are satisfied with the result. Repeat this process for each section of the clothing item.
Designing Custom Patterns from Scratch
Beyond using pre-made materials, Clip Studio Paint facilitates the creation of unique, seamless patterns from your own illustrations. This is invaluable for bespoke fabric designs, tote bags, or custom apparel.
Theme and Style Development
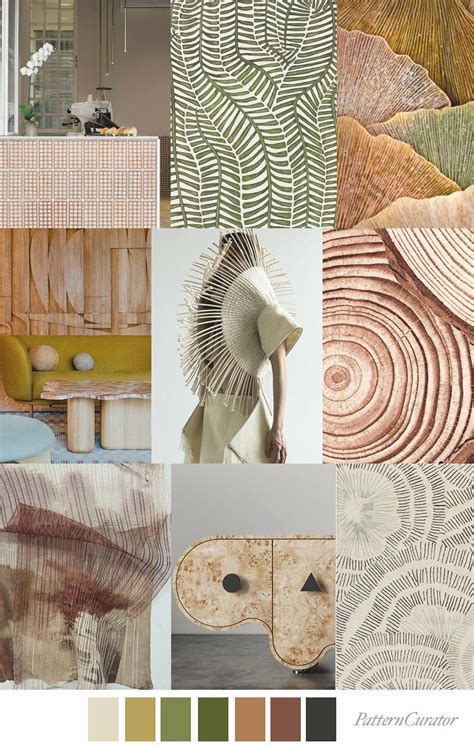
The first step in designing a custom pattern is to establish a theme and style. If working on commission, the client will provide the theme. For personal projects, explore art prompt generators or brainstorm ideas. Consider the overall mood you want to convey - serious and detailed, or relaxed and cartoonish. Creating a Moodboard on platforms like Pinterest can be very helpful for gathering inspiration for style, color palettes, and design structure.
Sketching and Composition
Once the theme and style are defined, begin sketching the pattern. For a repeatable pattern, it's ideal to work with square dimensions. Sketch individual elements like characters, flora, or abstract shapes. Aim to create drawings that can seamlessly connect from one edge of the canvas to another.
For a design intended for an item like a tote bag, consider the overall composition. This often involves balancing a repeating pattern with a central text element or graphic. Ensure there's enough visual breathing room between elements to avoid a cluttered appearance.
Color Palette Selection
Choosing the right color palette is crucial for establishing the mood and aesthetic of your design. Refer to your Moodboard for inspiration. Consider color psychology: warm colors like yellow and orange can evoke feelings of comfort and attract attention, while cool colors like blues and greens promote calmness. For a design with a specific style, like "kawaii," pastel colors often work well.
Creating Seamless Patterns in Clip Studio Paint
To create a seamless pattern, start with a new document of your desired dimensions (e.g., 35cm x 35cm for a tote bag design). Ensure the resolution is appropriate for your intended output (300dpi for print, lower for digital).
Trace your pattern elements on a new layer. To achieve seamlessness, you'll need to manipulate the canvas edges. Enlarge the image until your drawing is cut off by the top and bottom edges. Then, select the entire canvas (Ctrl+A), cut (Ctrl+X), and paste (Ctrl+V). This creates a new layer with the canvas content and leaves the original layer with elements that were outside the canvas.
Use the "Move Layer" tool or the 'K' key to shift these outer elements back into view, effectively tiling them. Duplicate layers and move sections to the opposite edges to ensure continuity. Flatten these layers to create a single, complete pattern tile.
To enable tiling, select your pattern layer and go to "Layer - Convert Layer." Choose "Image Material Layer." Then, in the "Operation - Object" panel, select the "Tiling" option and set the mode to "Repeat" for both "Vertical and Horizontal" tiling. Anchor points will appear, allowing you to resize the pattern.
How To Save, Backup and Restore Clip Studio Paint Custom Brushes
Typography and Element Integration
Once your pattern is established, you can integrate text and other graphic elements to complete your design.
Selecting and Creating Typography
The choice of typography should align with your overall theme and style. For a "kawaii" dinosaur theme, a handwritten or rounded sans-serif font would be appropriate. You can also create text manually using brushes that offer texture, giving the lettering more personality.
To make text stand out, consider adding a subtle shadow effect. Duplicate the text layer, select the text on the new layer (Ctrl+Click on the layer thumbnail), fill it with a darker color, and offset it slightly from the original text.
Designing Supporting Graphic Elements
Elements like color blocks or shapes placed behind text can enhance readability and visual appeal. For the dinosaur theme, a dinosaur footprint shape would be a fitting choice. Use the same brushes and colors from your palette to maintain design consistency.
Refining and Composing the Final Design
As you assemble all the elements - pattern, text, and supporting graphics - you may find the design looks too cluttered. To achieve a balanced composition, you might need to adjust the placement and scale of each component.
To modify the pattern layer independently, convert it back from an "Image Material Layer" to a "Raster Layer." This allows you to erase or draw on the pattern directly. To ensure clean edges around your central elements, you can use selection tools. Select your text and graphic elements (Ctrl+Click on their respective layer thumbnails), expand the selection slightly, and then delete the corresponding area on the pattern layer. This creates a visual separation and prevents incomplete pattern elements from appearing awkwardly cut off.
Understanding Fabric Properties for Realistic Textures
To truly master applying designs to clothing, it's essential to understand the properties of different fabrics. Line art plays a crucial role here, as it defines the folds and textures that will guide your shading.
The Importance of Observing Fabric
To effectively paint the texture of clothes, you must first understand the fabric itself. Observe how light interacts with different materials, how they drape, and how wrinkles and folds form. This knowledge informs your line art and subsequent shading.
Layer-Based Shading for Depth
A common and effective technique for rendering clothing involves using multiple layers. Start with a base color layer. Above this, add a "Gradient" layer with a darker shade of the base color to establish initial depth. On another layer above the gradient, paint hard shadows. Finally, in a layer below the "Shadows" layer, place your line art and adjust its opacity to act as a guide. This three-layer system (excluding the base color) provides a solid framework for painting various types of clothing.
For added texture, consider using a "Noise RGB" texture layer set to "Soft Light" mode. This can introduce subtle, realistic surface detail.
Special Cases: Tulle and Pantyhose
Even seemingly simple items like tulle or pantyhose require specific approaches. For tulle, begin by drawing the illustration that will appear underneath it. This establishes the base visibility. For pantyhose, after drawing them, create a new layer above to add highlights using the same skin color as the underlying skin. This creates a subtle sheen.
Graphic Design Principles in Digital Art
Beyond the technical aspects of using Clip Studio Paint, understanding fundamental graphic design principles enhances the impact and professionalism of your shirt designs.
Visual Communication and Design Elements
Graphic design is a dynamic form of visual communication. Professional designers utilize software like Clip Studio Paint to create visuals that convey messages effectively. Key design principles, such as composition, typography, and color theory, are applied across all design projects, whether it's a logo, an illustration, or a website banner.
Color Theory and Psychology
Color theory is the bedrock of effective color schemes. The choice of colors significantly influences the emotional impact of a design. Understanding color relationships - monochromatic, analogous, complementary, and triadic schemes - allows for harmonious and visually appealing palettes. Color psychology further guides choices, with warm colors often evoking energy and cool colors suggesting calmness.
Illustration as a Design Asset
Graphic illustration combines design principles with artistic expression. Illustrations can simplify complex ideas, support textual information, and add visual interest. As an illustrator, you can specialize in creating assets for design projects or expand your skillset to encompass broader design concepts like layout and typography.
Conclusion: Unleashing Your Creative Potential
Clip Studio Paint offers a powerful and versatile environment for creating and applying shirt designs. By mastering the fundamental art techniques, understanding the material system, and applying graphic design principles, you can produce professional-quality artwork. Whether you're designing a simple graphic tee or an intricate fabric pattern, the tools and workflows within Clip Studio Paint provide the means to bring your creative vision to life. Experiment with different techniques, explore the vast resources available in the Clip Studio Assets, and don't hesitate to push the boundaries of your creativity.