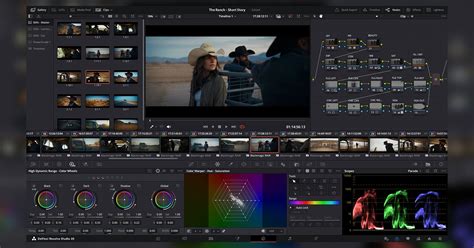
DaVinci Resolve 18 stands as a robust and sophisticated platform for video editing, empowering users to elevate their raw footage into polished, professional productions. Beyond the fundamental tasks of cutting and splicing, video editing encompasses a spectrum of techniques, including the application of visual effects, color correction, and audio enhancement. Among these, the blur effect plays a pivotal role in shaping visual narratives. Blurring softens the details within a video frame, either partially or entirely, to achieve a hazy or dreamlike aesthetic. This effect serves diverse purposes, such as obscuring sensitive data in documentaries, minimizing distracting background elements in vlogs, or simulating a shallow depth of field in cinematic projects. This article provides an in-depth guide to implementing blur effects within DaVinci Resolve 18, focusing on two primary methods: blurring specific sections of a video background and blurring the entire background.
Before delving into the technical aspects of blurring, it's essential to ensure you are working with high-quality video footage. For those new to video creation or lacking immediate material, Envato presents a valuable resource offering access to millions of premium digital assets. An Envato subscription allows for unlimited downloads, streamlining the acquisition of professional-grade content. The process involves creating or signing into an Envato account, searching for desired video footage using specific or general terms, and utilizing filters to refine search results. Previewing clips by hovering over thumbnails or clicking for detailed views allows for informed selection. Once a clip is chosen, it can be downloaded and then extracted from its .zip file for import into DaVinci Resolve 18. Starting with excellent footage is fundamental to a successful video project, and Envato offers a straightforward pathway to professional-grade material.
Blurring Specific Portions of a Video Background
DaVinci Resolve 18 offers the capability to selectively blur specific areas of a video background, a technique that effectively directs viewer attention to the intended focal points of the scene. This method, while simple, significantly enhances the professionalism of your videos.
Step 1: Launch DaVinci Resolve and Import Your VideoBegin by opening DaVinci Resolve on your computer and initiating a new project. Import the video you intend to edit by navigating to 'File' > 'Import' > 'Media'.
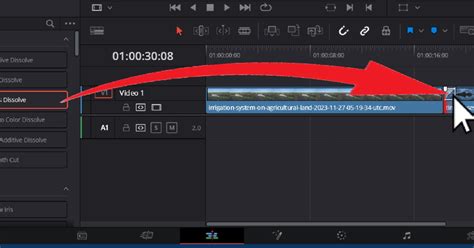
Step 2: Add the Video to the TimelineNext, drag and drop your imported video onto the timeline. Ensure the clip is selected.
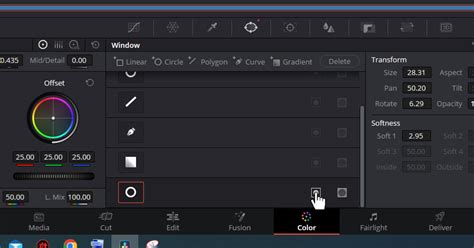
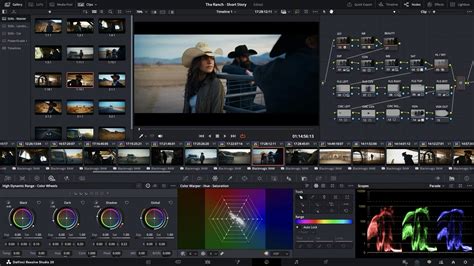
Step 3: Navigate to the Color PageThe Color page in DaVinci Resolve is the primary workspace for executing this blurring technique. Click on the 'Color' tab located at the bottom of the screen to access this section.

Step 4: Utilize Power WindowsWithin the Color page, locate and select the 'Power Windows' tool. This feature allows you to define specific regions within your video frame to which effects will be applied.

Choose a shape from the available options (circle, rectangle, polygon, etc.) that best matches the area you wish to blur. Draw this shape over the relevant section of your video.
Once the shape is positioned over your target area, you can adjust its size to precisely cover the desired region.
Step 5: Apply the Blur EffectWith the Power Window active, navigate to the 'Blur/Sharpness' panel.
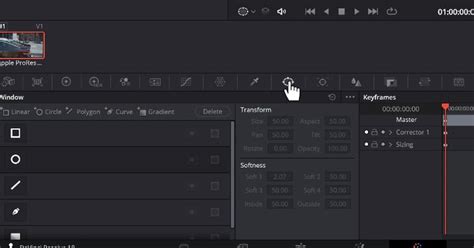
Adjust the 'Radius' slider to control the intensity of the blur. Further fine-tuning of the blur effect can be achieved by modifying the 'H/V Ratio', 'Angle', and 'Aspect' sliders.
Step 6: Track the Object (Optional)If the area you intend to blur is in motion, it is necessary to track its movement. With the Power Window still selected, click on the 'Tracker' panel.

Then, press the 'Start' or 'Track Forward' button to initiate the tracking process.
Blurring the Entire Video Background
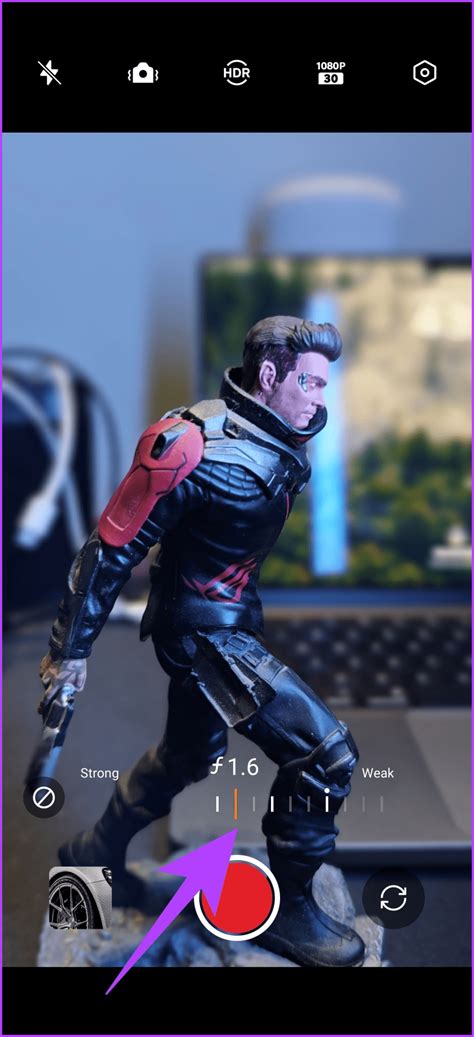
To isolate your subject and make it stand out, blurring the entire video background in DaVinci Resolve 18 is an effective strategy. This technique can establish a specific aesthetic and draw significant attention to your primary subject.
Step 1: Open DaVinci Resolve and Import Your VideoLaunch DaVinci Resolve 18 and create a new project. Import the video you wish to edit by going to 'File' > 'Import' > 'Media'.
Step 2: Add the Video to the TimelineDrag and drop your video onto the timeline. Ensure that the clip is selected.

Step 3: Go to the Color PageClick on the 'Color' tab at the bottom of the screen to navigate to the Color page, where the background blurring process will be executed.

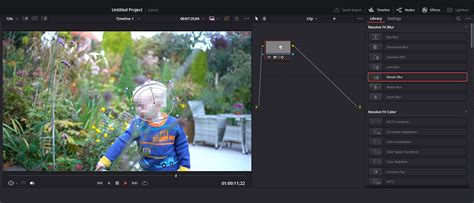
Step 4: Create a Power Window Around Your SubjectIn the Color page, utilize the 'Power Windows' feature to define the area of your video that you want to remain in focus-your subject. Draw a shape around your subject using one of the available shapes (circle, rectangle, polygon, etc.).
Step 5: Invert the Power Window to Target the BackgroundAfter creating the Power Window around your subject, you must invert the selection to apply the effect to the background rather than the subject. With the inverted Power Window selected, navigate to the 'Blur/Sharpness' panel.

Adjust the 'Radius' slider to increase or decrease the amount of blur applied to the background.

Step 7: Track the Subject (Optional)If your subject is moving within the video, tracking is essential to ensure the Power Window accurately follows its movement. With your Power Window still selected, click on the 'Tracker' panel.
Then press 'Start' or 'Track Forward'.

DaVinci Resolve will then automatically track the subject's movement throughout the video.
Review and Export Your Blurred Video
Once you are satisfied with the blur effect, return to the 'Edit' page to review your work. If the results meet your expectations, you are ready to export your video.
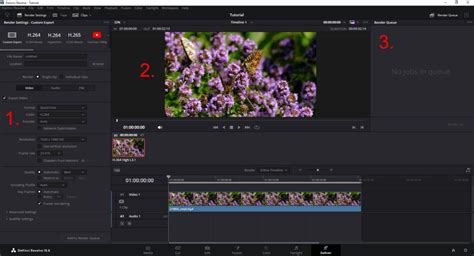
1. Access Custom Export Settings:Navigate to the 'Deliver' tab.
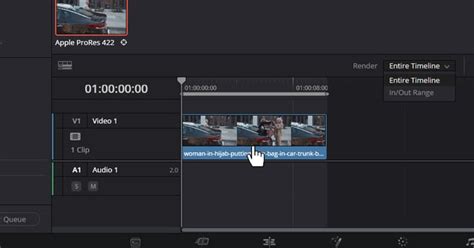
Choose your export option by selecting the dropdown next to 'Render'. You can opt for 'Entire Timeline' by clicking on the clip, or select 'In/Out Range' for a specific portion of the clip. To define an In/Out range, click on the clip, press 'I' to set the starting point, and then click elsewhere and press 'O' to set the ending point.
For greater control over export settings, select the 'Custom Export' tab.
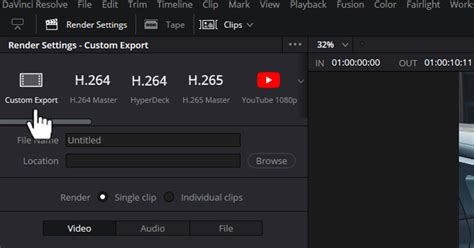
Remember to name your export file and then click 'Browse' to select the desired save location.
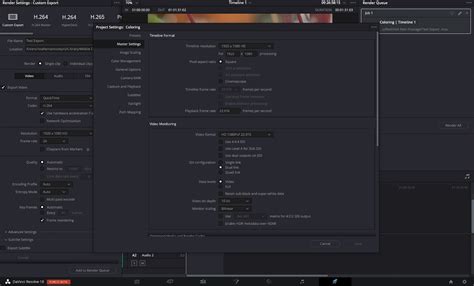
2. Select Desired Resolution:In the export settings, choose a resolution that matches your desired video quality, such as HD (1080p) or Ultra HD (4K).

3. Choose the Right Frame Rate:Ensure the frame rate selected matches your original video or desired output for smooth playback.
4. Choose the Right Quality Level:Automatic settings are generally suitable. However, for enhanced quality, consider using around 10,000kb for HD video or at least 40,000kb for 4K.
5. Render the Video:After configuring all settings, click 'Add to Render Queue' to prepare the export.
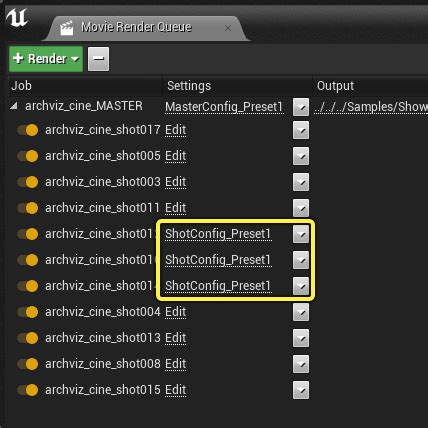
To begin rendering, click the 'Render All' button on the right-hand side.

Wait for the rendering process to complete.
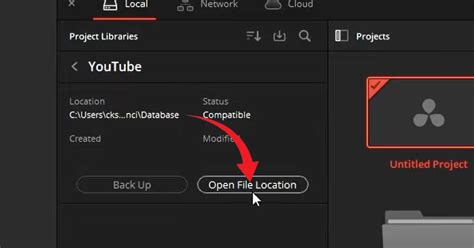
6. Locate and Play the Completed Video:Once rendering is finished, you can locate your exported video by right-clicking on it in DaVinci Resolve and selecting 'Reveal in Finder' (or the equivalent option for your operating system). This will open the folder containing your exported file, allowing you to play or move it as needed.
Advanced Blurring Techniques and Considerations
The ability to blur specific areas or the entire background in DaVinci Resolve 18 is a powerful tool that can significantly elevate the production value of your video projects. Experimenting with different blur intensities is crucial, as various videos will benefit from distinct levels of blur. Consistent practice is key to mastering these techniques and achieving professional results.
Blurring is not merely for concealment; it serves as a potent method for directing viewer attention and adding depth to a scene. Whether the objective is to mask a logo, protect an individual's privacy, or achieve a cinematic look, DaVinci Resolve provides the necessary tools to realize your creative vision. Targeted blurring allows for the emphasis of essential details, the redaction of distractions, and the infusion of a cinematic quality into your shots. This guide has outlined the step-by-step process for implementing blur effects in DaVinci Resolve, granting you greater command over your editing workflow.
5 creative ways to use the Magic Mask in DaVinci Resolve and how to apply the Magic Mask
While the provided information focuses on basic blur effects using Power Windows and the Defocus effect, DaVinci Resolve Studio offers an expanded array of six distinct blur effects, each suited for different applications:
- Gaussian Blur: A smooth and versatile blur ideal for softening backgrounds, refining skin tones, and obscuring sensitive information.
- Box Blur: Creates a uniform, pixelated blur, effective for more overt obscuring of elements like license plates and logos.
- Lens Blur: Mimics the natural bokeh effect produced by camera lenses, delivering a realistic depth-of-field aesthetic.
- Directional Blur: Applies blur in a specific direction, simulating motion and enhancing the perception of speed.
- Radial Blur: Generates blur that emanates from or circles a central point, useful for simulating zoom effects or creating a disorienting sensation.
- Mosaic Blur: Pixelates an area rather than smoothing it, serving as an effective tool for censorship.
It is important to note that these advanced blur settings are exclusive to DaVinci Resolve Studio and are not available in the free version of the software.
For those seeking to further optimize their workflow, pre-made templates and specialized plugins designed for blur effects can significantly expedite the editing process. Exploring additional DaVinci Resolve tutorials and articles can further enhance editing skills. For continuous access to a vast library of high-quality, royalty-free stock assets and customizable DaVinci Resolve templates, a Storyblocks subscription can be invaluable, making advanced effects and graphics more accessible.
Addressing Common Mistakes with the Defocus Effect
A frequent oversight when employing the Defocus effect, particularly with moving subjects, involves the interaction with foreground elements that share a similar focal plane. For instance, when a subject walks past window frames or plant branches, and these elements enter the same focal distance as the subject, they too should appear in focus. However, if only the subject is masked, these transient elements might be inadvertently blurred. This scenario highlights that the Defocus effect, when applied solely based on a subject mask, may not be the optimal choice for backgrounds with dynamic foreground elements that frequently appear and disappear. In such cases, alternative masking or compositing techniques might be more appropriate to achieve a natural-looking depth of field.
The "Global Blend" slider within the Defocus effect's customization options is a powerful tool for mitigating over-processing. It allows users to dial down the intensity of all applied Defocus customizations collectively, providing a safety net to prevent the effect from becoming too pronounced or stylized, ensuring a more balanced and refined final output.