The digital design landscape is constantly evolving, with new aesthetics emerging that redefine user interfaces and visual experiences. One such impactful trend, heralded by Apple's "Liquid Glass" redesign unveiled at WWDC, has captivated designers and users alike. This innovative approach promises to usher in a new era of interface design, characterized by fluidity, depth, and an almost tangible quality. Understanding how to replicate this captivating effect is becoming an essential skill for anyone looking to stay at the forefront of digital aesthetics. This tutorial delves into the intricacies of creating the Liquid Glass effect in Adobe Photoshop, offering both a swift, accessible method for beginners and a more advanced technique for achieving a result remarkably close to Apple's signature look.
Embracing the Liquid Glass Paradigm
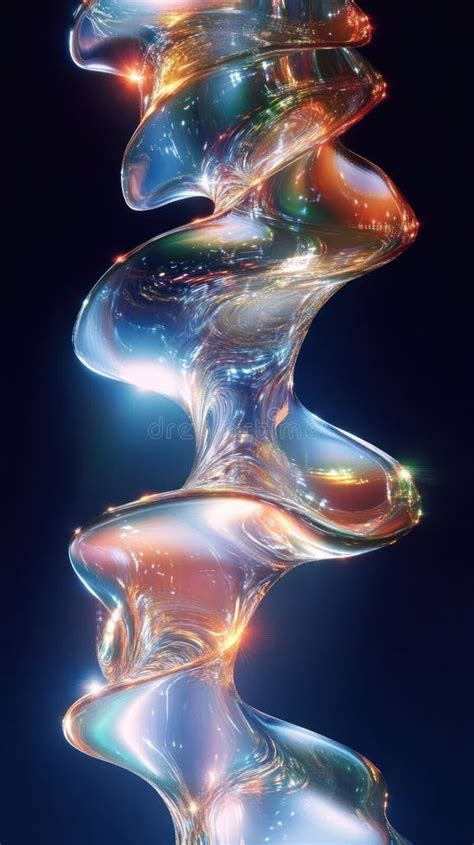
Apple's announcement of their Liquid Glass redesign at WWDC marked a significant moment in interface evolution. This shift is poised to inspire a wave of design trends, and mastering its creation empowers you to incorporate this cutting-edge aesthetic into your own projects. The essence of the Liquid Glass effect lies in its illusion of depth, transparency, and subtle distortions, mimicking the way light interacts with a fluid, glass-like surface. It's a design philosophy that moves beyond flat, static elements, introducing a dynamic and engaging visual language.
Method 1: The Swift and Accessible Approach for Beginners
For those new to Photoshop or seeking a quick way to achieve a compelling Liquid Glass illusion, this method focuses on the core principles. It provides a foundational understanding of the key steps involved in generating this effect, allowing for rapid experimentation and application.
To begin, the process involves selecting and applying specific Layer Styles. These pre-defined settings within Photoshop are instrumental in building complex visual effects with relative ease. You will observe the layer style applied without the underlying pixel layer being directly manipulated, emphasizing a non-destructive workflow initially.
Introduction to Photoshop Layer Styles (in depth) - Photoshop Basics by Digital Tutorials
The core of this method lies in judiciously choosing and configuring these layer styles. While the specifics will vary based on your design context, the principle remains consistent: layering effects to simulate the desired translucency, reflection, and subtle distortions characteristic of liquid glass. This approach prioritizes speed and ease of understanding, making the Liquid Glass effect accessible even to those with limited Photoshop experience.
Method 2: Achieving a Realistic Liquid Glass Effect
For those who desire a more sophisticated and lifelike rendition of the Liquid Glass effect, this advanced method delves into techniques that closely mirror Apple's implementation. This approach acknowledges the nuanced visual cues that make the original design so striking, such as the subtle blurring of elements behind the "glass" and the refractive distortions around its edges.
The Foundation: Shape and Stroke
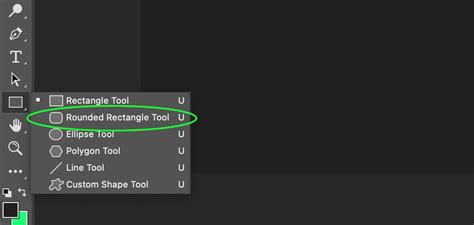
The journey begins with the creation of a base shape. In this method, the emphasis is on using a shape with no stroke initially, and crucially, rounded corners. The precise value for rounded corners, such as 121 as mentioned, is a critical detail that contributes to the organic, flowing appearance. When you drag this shape onto your document, it might not be immediately visible, which is an expected part of the process.
The next step involves adding a thin white stroke to this shape. The thickness of this stroke, for instance, 9 pixels, is a variable that will need adjustment based on the overall size and resolution of your document. This thin, defined edge is crucial for creating the illusion of a distinct glass boundary.
Building Depth: Bevel and Emboss
The "Bevel and Emboss" layer style is where the magic of dimensionality truly begins to unfold. This powerful tool allows you to simulate raised or indented surfaces, adding that essential 3D quality. A key observation in achieving the Liquid Glass effect is the fill opacity being set to 0. This might seem counterintuitive, but it's a deliberate technique. By setting the fill to zero, the visual impact of the Bevel and Emboss effect is applied to the stroke and any other layer effects, rather than the solid fill of the shape itself. This creates the appearance of a transparent object with depth.
The ability to move this shape around the document using the move tool is a significant advantage. As you reposition the "glass" element, you'll notice that whatever is beneath it becomes blurred. This dynamic blurring effect is a hallmark of the Liquid Glass aesthetic, simulating how light bends and distorts when passing through a transparent, uneven surface. This aspect of the technique, where the background dynamically blurs, is crucial for creating a sense of real-world interaction and depth.
Incorporating Color and Refraction
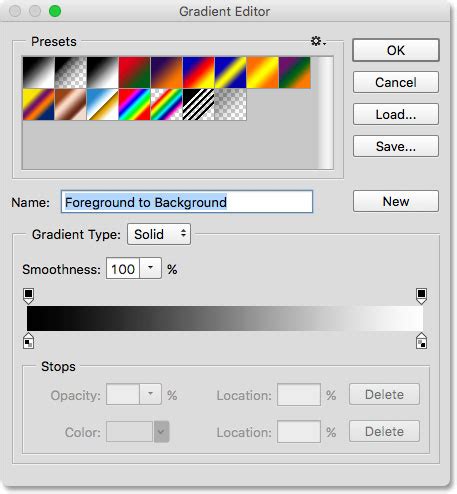
Some of Apple's Liquid Glass icons feature subtle hints of color, often concentrated at the bottom or edges of the elements. To replicate this, a rainbow-colored gradient can be employed. Adjusting the angle of this gradient to 0 or 180 degrees allows for precise control over the color placement, creating those delicate chromatic aberrations that enhance realism.
The concept of working non-destructively is important. However, after certain points in this advanced method, you may need to transition to more direct manipulation. A powerful technique for achieving realistic refraction involves Ctrl/Cmd-clicking on the rectangle's thumbnail in the layer panel. This action creates a selection based on the shape of your "glass" element, which can then be used to apply further effects or masks.
Grouping layers is a strategic move, especially when aiming for complex effects. By placing the "glass" shape and its associated effects within a group, you gain the flexibility to apply additional masks. This allows for finer control over where and how the effects manifest, enabling you to sculpt the Liquid Glass appearance with greater precision.
An optional, yet highly effective, step involves repeating some of these processes on the top of the element. This can further enhance the perceived depth and the way light interacts with the surface, leading to an even more convincing Liquid Glass effect.
Advanced Techniques: Channels and Frosted Glass
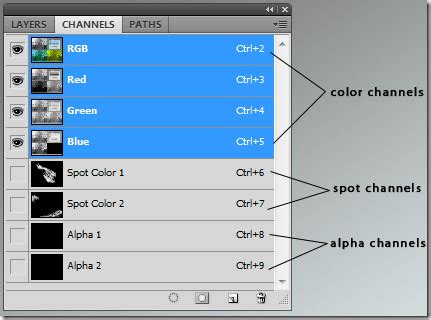
Beyond the core methods, Photoshop offers powerful tools that can be leveraged for even greater realism. The use of channels can provide a unique way to achieve a three-dimensional appearance, manipulating the color channels of an image to create depth and form. This technique often involves working with grayscale masks and applying them strategically to simulate the subtle variations in light and shadow that define a physical object.
Another related effect that can complement or be integrated into the Liquid Glass aesthetic is the "Frosted Glass" effect. This is achieved by applying a Gaussian Blur to an image or layer, followed by a visit to the Filter Gallery. Within the "Distort" group, the "Glass" filter offers a range of parameters that can simulate the look of frosted or textured glass. By adjusting the values within this filter, you can control the degree of distortion and the intensity of the frosted appearance.
To implement the frosted glass effect as a distinct element within your design, you would typically draw a shape that will serve as the "frosted glass" area. This shape is then given a layer style, including a stroke. Crucially, when applying a gradient to the stroke, selecting a "White to Transparent" gradient is often key. This allows the frosted effect to blend seamlessly with the background. Finally, a "Drop Shadow" effect can be applied to further enhance the dimensionality and separation of the frosted glass element from its surroundings.
The true power of these effects, including the Liquid Glass and frosted glass techniques, lies in their portability. Once you have perfected a glass effect, you can move the corresponding layer around your design. The effect will dynamically follow the shape's location, allowing you to apply it to various elements and positions within your overall composition, ensuring a consistent and sophisticated visual language. The ability to move your "Glass Shape" layer around the design and have the effect follow its location means that the texture and visual properties are intrinsically linked to the shape itself, offering a flexible and powerful design tool. This adaptability is fundamental to creating dynamic and interactive user interfaces where elements can shift and transform while retaining their unique visual identity.