Adobe InDesign offers a robust suite of tools for manipulating color, empowering designers to create visually compelling layouts. While often a point of inquiry, changing the page color in InDesign is a straightforward process that can significantly enhance the aesthetic appeal of any design. Beyond simply altering the background, understanding InDesign's color capabilities unlocks a world of creative possibilities, from defining individual page hues to crafting intricate gradient transitions and managing sophisticated color workflows. This article delves into the various methods for changing colors, applying them to different elements, and understanding the underlying principles of color management within the software.
Setting the Page Background Color
One of the most fundamental questions for new InDesign users revolves around how to change the page color. This action is crucial for establishing the overall mood and aesthetic of a document, whether for print or digital distribution. Adobe InDesign provides an accessible method to alter the background color with just a few clicks, allowing for a more interesting design and a more impactful presentation.
To modify the background color of your InDesign document, begin by ensuring your project is open and any necessary images have been placed. The key to this operation lies within the Swatches panel. Locate this panel, typically found among other InDesign panels. Within the Swatches panel, you will find a swatch labeled [Paper]. This swatch represents the default background color of your pages. Double-clicking on this [Paper] swatch will open the Swatch Options dialog box. Here, you can easily define a new color for your page background. For instance, to achieve a specific hue, you might input CMYK values such as C8 M10 Y21 K0, or select a color using other color models. This simple adjustment can transform the entire feel of your layout.
![InDesign Swatches panel showing the [Paper] swatch](https://eduardooroz.co/i/img386_0.jpg)
Applying Color to Individual Pages and Frames
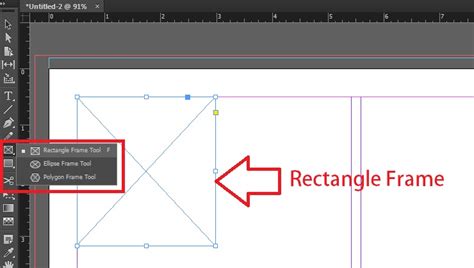
Beyond setting a uniform background color for the entire document, InDesign also allows for the customization of individual page backgrounds. This is particularly useful for creating distinct sections within a larger publication or for adding visual emphasis to specific pages. To achieve this, you can utilize the Rectangle Frame Tool, accessible by pressing F on your keyboard.
Once the Rectangle Frame Tool is selected, draw a rectangular frame that covers the entire page you wish to modify. This frame will act as a container for your new background color. To introduce a new color to your palette, navigate back to the Swatches panel. Click on the hamburger menu (the icon with three horizontal lines) in the Swatches panel and select "New Color Swatch." Define your desired color within the subsequent dialog box. After creating your new color swatch, ensure the frame you drew is selected. Then, right-click on the frame, navigate to "Arrange," and choose "Send to Back." This action places your colored frame behind all other content on that specific page, effectively changing its background color.
Creating Transparency Effects
InDesign's color manipulation extends to creating transparency, a powerful tool for layering and achieving sophisticated visual effects. If you've ever wondered how to make a background transparent in InDesign, often in the context of isolating elements or preparing images, there are specific techniques to achieve this. While not directly changing a page's color to transparent, you can alter the transparency of objects or image frames.
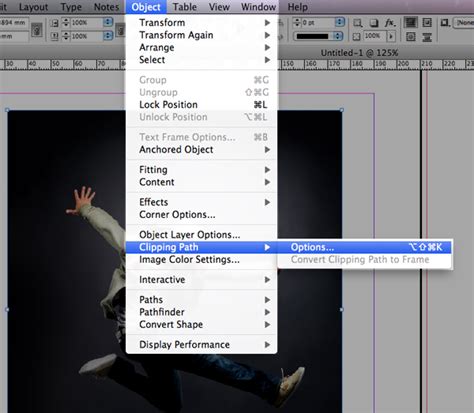
For example, if you have an image frame containing an element like a goldfish, and you wish to create a transparent background around it, you can utilize the Clipping Path options. Select the frame containing the goldfish. Then, go to the menu bar and navigate to "Object" > "Clipping Path" > "Options." Within the Clipping Path Options dialog box, you can experiment with different settings. Changing the "Type" to "Detect Edges" and adjusting the "Threshold" to 1 and "Tolerance" to 2 can often yield a transparent background around the detected edges of the object within the frame. This technique is invaluable for integrating imagery seamlessly into your designs.
Understanding Color Modes and Management
The effective use of color in InDesign is deeply intertwined with understanding different color modes and the principles of color management. When you apply color to objects, you can choose whether it affects the object's stroke (the border) or fill (the background). This distinction is fundamental to controlling how colors are applied.
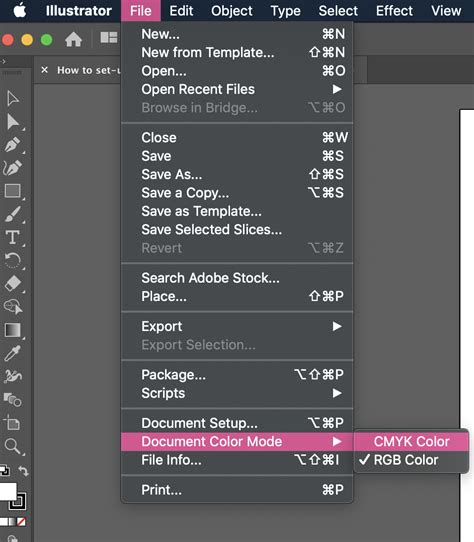
InDesign supports various color models, including CMYK (Cyan, Magenta, Yellow, Black), RGB (Red, Green, Blue), HSB (Hue, Saturation, Brightness), and Lab (Lightness, a, b). The choice of color model often depends on the intended output. For print, CMYK is standard, as it represents the inks used in printing presses. For digital displays and web use, RGB is generally preferred. The Color panel in InDesign allows you to switch between these color models and adjust color values numerically.
When preparing a document for print, color management becomes critically important. This involves ensuring that the colors you see on your screen are accurately represented when printed. InDesign, in conjunction with your operating system and printer drivers, uses color profiles to achieve this. A color profile is essentially a set of data that describes the color characteristics of a device, such as a monitor or a printer.
CRDs (Color Rendering Dictionaries) are PostScript equivalents of color profiles, often used in printing workflows. The accuracy of color conversion can vary among printers, and it's essential to consider the specific capabilities of your output device. InDesign's color setting defaults are designed to result in calibrated color output, but understanding these settings is key to predictable results. When printing, the option to "Proof" can be selected under "Print," allowing you to preview how colors will appear using a specific rendering intent, such as "absolute colorimetric." This process converts color data to RGB values using selected color profiles, ensuring that colors are translated as accurately as possible to the output device's color space.
The Adobe Print Resource Center at www.adobe.com/go/print_resource provides valuable information on these topics. When working with images without embedded profiles, InDesign must interpret the color data, which can lead to inconsistencies. Specifying the correct color profiles for both your working environment and your intended output device is crucial for maintaining color fidelity.
Working with Swatches and Color Groups
The Swatches panel is your central hub for managing colors in InDesign. It allows you to store, organize, and apply colors, gradients, and tints consistently throughout your document. You can create new color swatches by defining custom colors using various color models or by extracting colors from existing artwork.
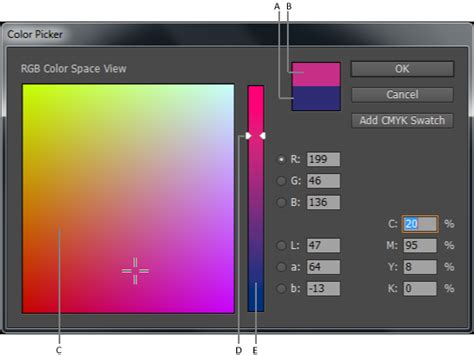
To create a new color swatch, you can use the Color Picker, which allows you to select colors from a visual field or specify them numerically. Once a color is chosen, you can save it as a swatch by clicking "Add CMYK Swatch," "Add HSB Swatch," "Add RGB Swatch," or "Add Lab Swatch" within the Swatch Options dialog. This ensures that the color is readily available for repeated use.
Color groups are an advanced feature that enables you to organize your color schemes more effectively. You can create color groups to categorize specific palettes for different projects or clients, making them easier to manage and exchange across Adobe applications like Illustrator. To create a color group, click the "Color Group" icon at the bottom of the Swatches panel. You can then choose to add selected swatches or the swatches from selected page items to the new group.
Color groups can be imported and exported using ASE (Adobe Swatch Exchange) files, facilitating seamless color workflows between different Adobe programs. Right-clicking on a color swatch or a color group reveals a context menu with various options, including duplicating, ungrouping, renaming, and deleting. This organizational structure is invaluable for maintaining consistency and efficiency in complex design projects.
Applying and Editing Colors
Applying color in InDesign is a versatile process. You can apply colors to the fill or stroke of objects using the Toolbox or various panels. The Fill box and Stroke box in the Toolbox or Color panel allow you to select and apply colors directly. You can also drag and drop colors from the Swatches panel or Gradient panel onto objects, a convenient method that applies the color without requiring you to pre-select the object.
When you select an object that uses a named swatch from the Swatches panel, editing its color using the Color panel will change the color of that object only. However, if you wish to modify the swatch itself, any object using that swatch will be updated accordingly. This behavior highlights the power of using swatches for global color changes.
The Eyedropper tool is another indispensable tool for color application. It allows you to sample colors from existing objects, images, or even outside the InDesign document. You can configure the Eyedropper tool to copy various attributes, including color, type, and transparency settings. By clicking on a source, the Eyedropper tool loads with that color, and you can then click on other objects to apply the sampled color.
Working with Gradients
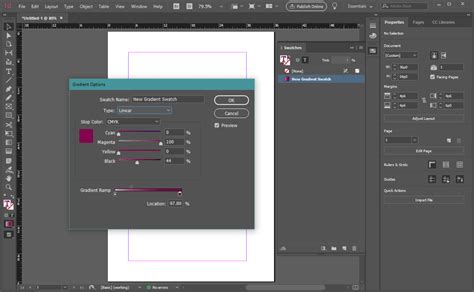
Gradients offer a dynamic way to introduce color transitions and depth into your designs. InDesign provides robust tools for creating and editing gradients. To change a gradient color, open the Gradient panel. This panel displays a graphical representation of the gradient, with gradient stops acting as anchor points for different colors.
You can add new colors to a gradient by dragging swatches from the Swatches panel directly onto the gradient stops in the Gradient panel. To adjust the transition between colors, you can click and drag the small anchor points located above the gradient stops. Removing a color from a gradient is as simple as clicking and dragging the color stop downwards, effectively pulling it off the gradient.
When creating gradients, especially for print, consider potential issues like banding, which occurs when smooth color transitions appear as distinct steps. InDesign offers options to mitigate banding, such as increasing the number of colors in a gradient or using shorter gradients. The software also provides tools to simulate continuous tone using halftoning, a process that creates the illusion of smooth shades by varying the size and spacing of printer dots.
How to Make a Gradient in InDesign
Advanced Color Extraction and Application
InDesign's Color Theme tool offers an innovative way to extract color palettes directly from your artwork. You can generate color themes from selected areas, entire images, or even the whole layout. This feature is incredibly useful for creating harmonious color schemes based on existing visual elements.
When you activate the Color Theme tool, you can click on any part of your layout to pick a color. InDesign will automatically suggest a theme of five colors based on your selection. These extracted colors can be added to your Swatches panel, often organized as color groups. If you Shift-click, you can pick a single, precise color as the base for your theme. The colors picked and added to swatches honor the document's intent and automatically convert to the appropriate color space, ensuring consistency across different applications and outputs.
Applying Hexadecimal RGB Values
For precise color control, InDesign allows you to apply color values using hexadecimal RGB codes. This is particularly useful when working with web design elements or when precise color matching is required. You can input hexadecimal values in the Color Picker, when creating a New Swatch, or when editing an existing swatch.
To use a hex code in the Color Picker, open it via the Color panel or Toolbox. You can then enter the hex value in the designated field. When creating a new swatch, the "New Color Swatch" dialog box will also have a field for hexadecimal input. Similarly, you can edit an existing swatch and change its hex value. The Color Picker also features a "screengrabber" that allows you to click and hold anywhere on your screen to sample a color and view its hex value, facilitating easy replication of colors from external sources.
Color Considerations for Print and PDF
When preparing documents for print, understanding the nuances of color conversion is paramount. InDesign converts color data to the color space of the output device using selected color profiles. The color management settings in InDesign play a vital role in ensuring that colors appear as intended on the final printed piece.
For print, it's often beneficial to use the "Proof" option under the Print dialog. This feature, when paired with an appropriate color profile, allows you to preview how your colors will be rendered by the printer. The rendering intent, such as "absolute colorimetric," dictates how out-of-gamut colors (colors that cannot be reproduced by the printer) are handled.
For PDF distribution, InDesign's settings allow you to preserve all color values in the original document or to convert colors to a specific color space suitable for PDF. This flexibility ensures that your designs are optimized for their intended medium, whether it's a high-quality print run or a universally accessible PDF document. The goal is to ensure that the colors on a printing press look as close as possible to what you see on screen, or to define how they should be converted for digital display.
In conclusion, mastering color in Adobe InDesign involves understanding not only how to change colors but also the underlying principles of color theory, color modes, and color management. From setting page backgrounds and manipulating gradients to extracting color themes and ensuring accurate print output, InDesign provides a comprehensive toolkit for designers to bring their visions to life with vibrant and precise color.