Adobe Photoshop offers a versatile toolkit for manipulating the appearance of shapes, allowing users to refine their designs with precision and creativity. Whether you're working with simple geometric forms or intricate custom shapes, understanding how to alter their fill and stroke colors is fundamental to achieving professional results. This guide explores various methods for changing shape colors in Photoshop, from quick adjustments to advanced techniques, empowering designers to adapt their artwork to any project's needs. You never know when you might need to do a quick color change of a picture while you’re working with a design. Photoshop gives you the tools to modify colors in ways that fit your workflow. Wondering why you might want to do this, or curious about the different tools you can use? Follow these steps to create a newly hued object. These Photoshop tutorials show you how to achieve color matching as well as advanced techniques for swapping out background colors, foreground colors, and other color options. Learn to do realistic color matching that works for product photography and other retail applications.
Understanding Photoshop's Shape Layers
At its core, Photoshop treats shapes as vector objects when created using the dedicated shape tools (like the Rectangle, Ellipse, or Custom Shape tools). This vector nature means shapes are resolution-independent and can be scaled without quality loss. Crucially, when these shapes are created as "Shape Layers," they retain their editable properties, including color. Each shape is probably its own layer, which provides excellent flexibility for individual manipulation.
A key concept to grasp is the distinction between vector shapes and rasterized (pixel) shapes. When you create a shape using a shape tool, it's initially a vector object. You can then convert it to pixels if needed, but this process is generally irreversible and sacrifices the editability of the vector data. For color modification, working with vector shape layers is highly recommended.
Direct Color Changes via the Options Bar
One of the most straightforward methods to alter the color of a shape layer is through the Options bar, which appears at the top of the Photoshop interface when a shape tool is active.
If you have each shape layer selected, then select a shape tool (Rectangle tool, Ellipse tool, etc.). In the Options bar at the top, there is a dropdown for fill and stroke. If you have each shape layer selected, change the fill and it will change all of them. This method allows for immediate visual feedback as you select your desired color. You can change the color of the shapes if you select one of the shape tools.
Modifying the Fill Color
The "Fill" option in the Options bar controls the primary color of the shape. Clicking on the color swatch next to "Fill" opens Photoshop's color picker, allowing you to select any hue, saturation, and brightness. You can choose from solid colors, gradients, or even patterns directly from this dropdown.
Adjusting the Stroke Color
Similarly, the "Stroke" option controls the color of the shape's outline. You can set a specific color for the stroke, adjust its thickness (width), and even choose the style of the stroke (e.g., solid, dashed, dotted). You can also apply a variety of different stroke settings to the art.
Utilizing Blending Options for Color Overlays
For more dynamic color application or to easily experiment with different hues without directly altering the shape's original fill, Photoshop's Blending Options offer a powerful solution. This technique is particularly useful for applying a consistent color overlay to multiple shapes or for creating complex color effects.
Double click on the Group folder or right click on it and select Blending Options. Select Color Overlay in the list on the left, click on the red box to select the color you want. No copy or pasting required. This method applies a color effect on top of the existing shape, which can be easily turned on or off, or have its color changed at any time.
The Power of Color Overlay
The "Color Overlay" blending mode allows you to apply a solid color to a layer. You can control the blend mode of the overlay (e.g., Normal, Multiply, Screen) and its opacity, giving you fine-grained control over how the overlay interacts with the underlying shape. This is an excellent way to quickly change the color of a shape without affecting its original vector data or pixel information.
Leveraging Foreground and Background Colors
Photoshop's foreground and background color swatches are central to many color-related operations. You can efficiently change the fill color of selected shape layers by utilizing these swatches.
Set your foreground color to your desired color, then select the shape layers you want in your layer panel and hold ALT down and press backspace. This shortcut is a rapid way to fill selected layers with the current foreground color. It's an efficient method for bulk color changes when you have a specific hue already set as your foreground color.
Advanced Filling Techniques: Gradients, Patterns, and Images
Photoshop shapes are not limited to solid color fills. You can fill Photoshop shapes as a layer with gradients, patterns, and even images, offering a vast spectrum of creative possibilities.
Gradient Fills
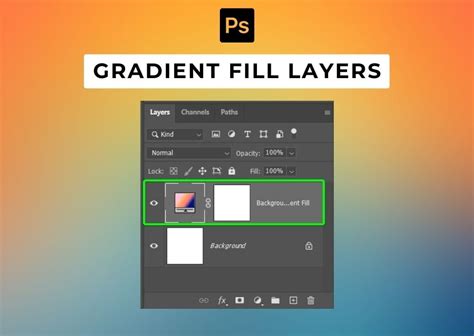
You can fill the Photoshop shapes with gradients as well. Gradients allow for smooth transitions between multiple colors, adding depth and dimension to your shapes. When applying a gradient fill, you can select from various gradient presets or create your own custom gradients. You can set the angle and mode, though you are limited in the things you can change via the panel; you can use the next technique to alter the origin, etc.
Pattern Fills
Using patterns as a fill for your shapes can introduce texture and intricate detail. Photoshop comes with a library of pre-defined patterns, and you can also import or create your own. You can use any of the pre-defined patterns included in the panel as well as any of the items available via the right side menu. You can also define your own or use ones ready made available on the web. A particularly useful feature is the ability to use a large image and define it as a pattern. If it is much larger than the shape, then it doesn't matter if the artwork is seamless or not.
Image Fills
For highly customized fills, you can use an image directly. This is achieved by defining an image as a pattern, or by using clipping masks. By using an image as a pattern, you can essentially "tile" that image within your shape. Alternatively, you can place an image on a layer above your shape layer and then create a clipping mask, confining the image to the boundaries of the shape.
Working with "No Color" Fill and Strokes
Sometimes, you may only want the outline of a shape to be visible, without any fill color. Photoshop accommodates this by allowing you to set the fill to "No Color."
You can also use a no color fill and then set a stroke to create an outline shape. You can also set the fill to "No color," and I know that sounds a little boring, but actually, it is very useful as you can then just use the stroke (both stroke and fill can be no fill, and that can have their uses, such as layers with a shadow and other effects). This is ideal for creating outlines, borders, or when the shape's color will be defined by other elements in your design.
Modifying Pixel-Based Shapes
While working with vector shape layers is generally preferred for color flexibility, you might encounter shapes that have been rasterized into pixels.
Changing the color if the pixel option for the custom shapes has been selected: You cannot change the fill color via the dropdown if you select the pixel option. You can change the color before you add the artwork. A quick workaround for this is to add the vector to a layer and then use the various adjustment functions to change the color at a later date.
For pixel-based shapes, color changes are typically made using Photoshop's adjustment layers or image editing tools. Techniques like "Hue/Saturation," "Color Balance," or "Photo Filter" can be applied to modify the color of the pixels.
How to Adjust Specific Colors with Hue & Saturation Adjustment Layers in Photoshop
Smart Objects for Non-Destructive Editing
Converting shapes into Smart Objects offers a powerful way to perform non-destructive edits, including color changes.
Select shapes and make a "Smart Object." Now you can work with it like you work with a simple layer. When a shape layer is converted to a Smart Object, it encapsulates its original data. This means you can apply filters, transformations, and even color adjustments without permanently altering the underlying pixels. To change the color of a shape within a Smart Object, you can double-click the Smart Object thumbnail in the Layers panel to open it in a separate window, make your color edits there, and then save and close. The changes will be reflected in your main document. You can also change the color by using adjustments as shape / smart objects, etc.
Recolor Artwork with Illustrator Integration
For users who also work with Adobe Illustrator, there's an option to leverage Illustrator's robust vector editing capabilities. You can also copy the artwork to Illustrator and re-color it there. If the artwork is complex or requires intricate path manipulation for color changes, exporting to or copying to Illustrator can be a highly effective workflow. Once recolored in Illustrator, the artwork can be placed back into Photoshop, maintaining its vector quality.
Conclusion: A Spectrum of Color Control
Photoshop provides an extensive array of methods for changing the color of shapes, catering to various skill levels and project requirements. From simple adjustments in the Options bar to sophisticated use of blending modes, gradients, patterns, and Smart Objects, users have the flexibility to achieve virtually any desired color outcome. By mastering these techniques, designers can ensure their visual creations are not only aesthetically pleasing but also perfectly aligned with their creative vision.