Achieving natural and appealing skin tones in photographs is a cornerstone of professional photo editing. Whether you're working with fashion shoots, candid portraits, or street photography, the captured colors may not always reflect the reality as perceived by the human eye. Photoshop offers a powerful suite of tools to rectify these discrepancies, allowing for subtle enhancements or dramatic transformations. This guide delves into various techniques for adjusting skin tones, from fundamental color channel manipulation to advanced matching across multiple images, ensuring your subjects look their best.
Understanding the Foundations of Skin Tone
At its core, skin tone is a complex interplay of colors, primarily dominated by red and yellow hues, regardless of the subject's ethnicity. For individuals with darker skin tones, blue tones can also play a significant role in the overall color balance. Recognizing these fundamental components is the first step towards effective color correction.
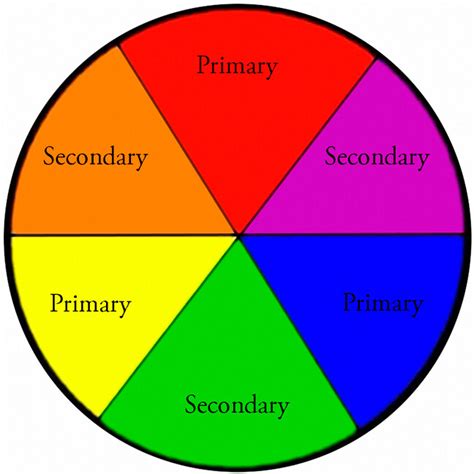
The Role of Color Channels: Red, Yellow, and Blue
Photoshop's color correction tools often operate on the principle of adjusting individual color channels. The primary channels relevant to skin tone are red, yellow, and blue. By selectively targeting these, editors can fine-tune the warmth, coolness, and overall vibrancy of the skin.
Selective Color Adjustments
The Selective Color panel in Photoshop provides a granular approach to color manipulation. Here, you can directly target specific color ranges within your image and adjust their constituent components. For skin tones, focusing on the Red, Yellow, and Blue channels is paramount.
Within each selected channel, four sliders are available:
- Cyan: Adjusting this slider impacts the red tones. Moving it towards Cyan will decrease red, while moving it towards Red will increase it.
- Magenta: This slider affects green tones. Moving it towards Magenta increases green, and towards Green decreases it.
- Yellow: This slider directly influences blue tones. Increased Yellow will add blue, and decreased Yellow will remove blue.
- Black: This slider controls the overall density or darkness of the targeted color range.
By strategically manipulating these sliders within the Red and Yellow channels, you can bring skin tones closer to a natural appearance. For darker skin tones, the Blue channel may also require attention to prevent them from appearing too warm or muddy.
Advanced Techniques for Skin Tone Enhancement
While basic adjustments can yield good results, Photoshop offers more sophisticated methods for achieving precise and nuanced skin tone corrections.
Leveraging the Camera Raw Filter
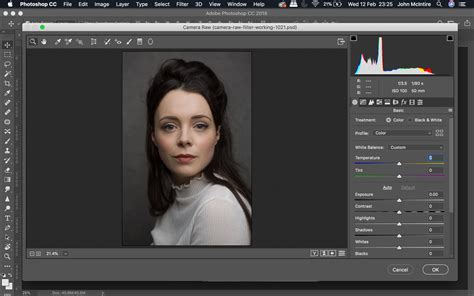
The Camera Raw Filter is a powerful, all-in-one toolset that offers extensive control over image adjustments, including color and tone. It provides a streamlined workflow for making global or targeted edits. Within the Camera Raw Filter, you can access tools to adjust white balance, exposure, highlights, shadows, and crucially, individual color channels. This filter is particularly effective for initial color grading and can significantly improve skin tones before delving into more detailed retouching.
Replicating Skin Tones Across Multiple Photos
A common challenge in professional photography is maintaining consistent skin tones across a series of images, such as those from a single photoshoot. Replicating a specific skin tone from one image to another requires a methodical approach.
Bringing Images Together: To begin, open both your "project image" (the one you want to edit) and your "sample image" (the one with the desired skin tone) in Photoshop. With the Move tool selected, drag the tab of the sample image onto the tab of the project image. This will place the sample image within the same document as the project image, allowing for easy comparison and sampling.
Sampling Colors: The Eyedropper tool is your primary instrument for capturing color information. To ensure accuracy, especially when dealing with subtle variations, it's recommended to adjust the sample size in the top menu to "5 by 5 Average." This will average the color values from a small area rather than relying on a single pixel, providing a more representative sample.
Using the Color Sampler Tool: For a more precise and persistent way to track color values, the Color Sampler tool, found nested under the Eyedropper tool, is invaluable. Click on a representative skin tone swatch in the sample image and then on a similar area in the project image. The Info panel will then display the RGB color values for each sampled point.
Matching RGB Values with Curves: The Curves panel, accessible via an adjustment layer, offers a powerful way to match color values. Enable the "On-image adjustment tool" (the pointing finger icon) in the Curves panel. Then, hold down
Ctrl+Shift(Windows) orCommand+Shift(Mac) and click directly on the project image's skin tone swatch. This will open the Curves adjustment for the selected color range.- With the Red channel selected, adjust the "Output" value in the Curves panel to match the "Info" box value for the sample skin tone.
- Repeat this process for the Green and Blue channels, ensuring the RGB values align as closely as possible.
This method allows you to meticulously match the color profile of the sample image's skin tone to your project image, ensuring consistency.
Easy Trick To Match SKIN TONES in Photoshop Fast!
Utilizing Layer Masks for Targeted Edits
When your image contains background elements with colors you don't want to alter, applying edits globally can be problematic. Layer masks are essential for isolating adjustments to specific areas of the image.
Creating a Layer Mask: To apply adjustments only to the skin tones of a subject, create a layer mask over the person in your image. This can be achieved by using selection tools like the Lasso tool to draw around the face, then creating a mask from that selection.
Painting on the Mask: Once a layer mask is created, you can refine it by painting. Select the Brush tool and ensure your color is set to black or white. Painting with black on the mask will hide the effect of the adjustment layer in those areas, while painting with white will reveal it. Reducing the brush's hardness to zero creates a soft, feathered edge, which is crucial for natural-looking transitions.
- To paint out unwanted areas, use black.
- To bring back areas that were incorrectly masked, use white.
If black is your background color, you can quickly fill the mask with black using
Ctrl+Backspace(Windows) orCommand+Delete(Mac).
The "Skin Tone Line" Concept and Vectorscopes
While not a standard feature in all image editing software, the concept of a "skin tone line" is a valuable theoretical tool for understanding and correcting skin tones. This concept is often visualized using a vectorscope, which displays the color data of an image as a cloud of dots on a Hue-Saturation chart.
- The Skin Tone Line: Normally, skin tones should cluster around a specific line on this chart, typically in the orange area, between yellow and red. Deviations from this line indicate color imbalances.
- Vectorscope in Practice: Although Photoshop doesn't have a built-in vectorscope for direct skin tone line analysis in the same way some specialized video scopes do, understanding this principle helps in interpreting color readouts and making informed adjustments. Tools like the Color Balance or Hue/Saturation adjustments can be used to nudge colors towards this ideal line.
A Simple RGB Slider Method
A revelation for many editors is a surprisingly simple method for adjusting skin colors within the RGB model. This technique relies on the observation that the three RGB sliders, when adjusted correctly, can form a more or less straight line.
- Identify the Color Range: Use tools like "Color Range" to select only the skin tones in your image. The "Skin Tone" option within "Select > Color Range" is particularly useful. Adjust the "Fuzziness" slider to control the extent of the selection.
- Apply Curves Adjustment: Go to the Adjustment Panel and select the Curves icon. From the RGB tab, you can target specific skin tones.
- Forming the Straight Line: The trick is to adjust the sliders for Red, Green, and Blue so that they form a straight line when plotted. This relationship is more stable than one might initially assume and provides the freedom to choose which channel to adjust. By measuring and adjusting these values, you can achieve a more natural skin tone.
- Further Refinements: Once the primary color balance is achieved, you can further reduce brightness, saturation, or make other subtle adjustments as needed.
Mastering Specific Tools and Techniques
Beyond these broader methodologies, several specific Photoshop tools empower precise skin tone control.
Hue/Saturation Adjustment Layer
The Hue/Saturation adjustment layer is a versatile tool for altering colors.
- Open Your Image: Begin by opening your image in Photoshop.
- Create a Hue/Saturation Adjustment Layer: Go to the Layers panel, click the "Create new fill or adjustment layer" icon, and select "Hue/Saturation."
- Target the Skin Tones: A color picker will appear. Instead of selecting a general color, click directly on the skin of your subject in the image. This helps Photoshop identify the dominant color range.
- Adjust the Master or Specific Channels: In the Hue/Saturation dialog box, the "Master" dropdown menu can be changed to a more specific color range, such as "Reds," which often represents the primary skin tones.
- Manipulate the Sliders: Use the Hue, Saturation, and Lightness sliders to achieve the desired skin tone. To achieve a green skin tone for a zombie effect, for example, you would slide the Hue slider until the skin appears green.
Refining Saturation and Realism
After initial color adjustments, the skin tone might appear too artificial or flat. Refining saturation and adding subtle undertones can restore realism.
- Blend-If Sliders: The Blend-If sliders, found in the Layer Style dialog box, can be used to control how a layer blends with the layers below it. By separating the black or white "blend-if" triangle into two, you can create more nuanced transitions. For instance, to bring back a subtle red tone into an overly green skin tone, you might adjust the Blend-If sliders on the Hue/Saturation layer to selectively reveal red tones from the underlying layer.
Creative Applications: Beyond Natural Tones
The techniques for adjusting skin tones are not limited to achieving natural results. They can also be used for creative transformations. For instance, turning a person into a zombie involves starting with a base skin color change and then adding other details like putrid veins and wrinkles. The initial skin color adjustment is the foundation upon which these further effects are built.
Navigating Layer Masks and Painting
A common point of confusion for beginners is the effective use of layer masks for painting.
- Adding a Layer Mask: In the Layers palette, select the layer you want to mask. Then, click the icon with a dotted circle at the bottom of the layer palette. This adds a layer mask to your selected layer.
- Painting with Black and White: Once the mask is active, use the Brush tool.
- Paint with black to hide the effect of the adjustment layer in specific areas.
- Paint with white to reveal the effect.
- Softening Edges: For natural transitions, set the Brush tool's Hardness to zero. This creates a soft, feathered edge, ensuring that the adjustment blends seamlessly with the surrounding areas.
Conclusion: A Continuous Learning Process
Adjusting skin tones in Photoshop is a skill that improves with practice and experimentation. While the tools and techniques are powerful, understanding the underlying principles of color theory and how Photoshop manipulates color is key. From the fundamental adjustments of red and yellow channels to the advanced replication of tones across images and the creative use of layer masks, Photoshop offers a comprehensive toolkit for any editor seeking to perfect their subjects' complexions. The journey of mastering these techniques is ongoing, with continuous learning and exploration leading to increasingly refined and impactful results.