Procreate, a powerful digital art application for iPad, offers a robust suite of tools for artists to create stunning visuals. Among its many features, the ability to effectively manipulate text is crucial for graphic design, illustration, and mixed-media projects. This guide delves into the various methods for changing text color in Procreate, catering to both beginners and advanced users, and exploring techniques from simple fills to intricate gradient and pattern applications.
Adding and Editing Text Content
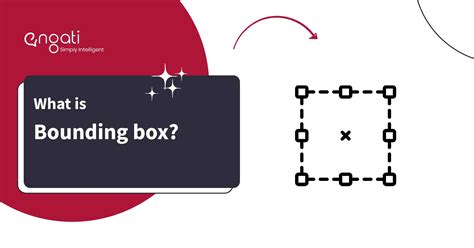
When you begin a new project in Procreate, adding text is straightforward. A bounding box containing the word "Text" will appear on your canvas. This initial text is already highlighted and ready for you to type over. This ensures that when you add new text to your canvas, the word "Text" is immediately available for replacement.
To further refine your text, you can access a comprehensive set of editing options. Tapping the font name within the Text Entry Companion allows you to adjust the font, style, design, and other attributes. This companion panel, which appears at the bottom of the screen when you add new text, is your central hub for typographical customization. Within the Font list, you can tap any font to explore its available variants in the Style section. Procreate fonts often include regular, italic, and bold versions, offering a wide range of aesthetic possibilities.
Moving your text is as simple as dragging the active bounding box around the canvas. It's important to note that resizing the text box itself only changes the shape of the container, not the size of the text within it. For basic edits, you can keep your text in a crisp, editable vector form. This means that vector text can be resized up and down without any loss of quality, preserving its sharpness at any scale.
Understanding Vector vs. Rasterized Text
Procreate distinguishes between vector text and rasterized text, a crucial concept when it comes to applying certain tools and effects. In the Layers panel, you can identify vector text by the distinctive 'A' icon visible in the Text layer thumbnail. You also have the option to override the automatic naming of a vector text layer for better organization.
While vector text offers scalability without quality degradation, there are instances where you must rasterize your text to utilize specific Procreate tools. Rasterizing converts the vector text into pixels, making it behave like any other pixel-based layer. To rasterize your text, simply tap the text layer in the Layers palette to bring up the options menu and choose "Rasterize."
Changing Text Color: Basic Fills
Once you have your text in place and are ready to apply color, Procreate offers several intuitive methods. For a straightforward color fill, ensure your text layer is selected. You can then double-tap the text to bring up the text editing options. Here, you can select your desired new color for the text. With the color chosen, tap directly on your text on the canvas to apply the change.
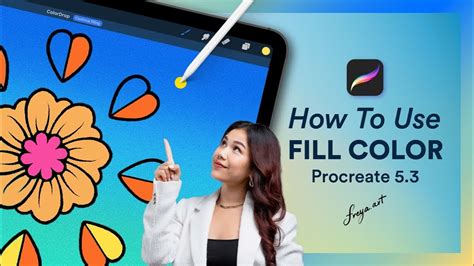
If you want to fill your text with a specific color, or even use a gradient or pattern, you can achieve this by rasterizing the text layer first. After rasterizing, the Color Drop feature becomes an excellent tool for applying your chosen color. Simply drag the color from the top-right circle and drop it onto the text. This method is quick and effective for solid color fills.
Advanced Color Techniques: Gradients and Patterns
For more complex and visually dynamic text coloration, such as gradients or patterns, Procreate utilizes a clipping mask system. To implement these, add a new layer directly above your text layer (or your rasterized text layer). On this new layer, apply your desired gradient or pattern. Once the color, gradient, or pattern is in place, set this new layer as a clipping mask. You can do this by tapping on the layer in the Layers panel and selecting "Clipping Mask" from the menu. The content of the clipping mask layer will then be confined to the shape of the layer beneath it, effectively filling your text with the applied effect. This technique is invaluable for creating rich, textured, or multi-toned text.
Exploring Textual Attributes and Effects
Beyond color, Procreate provides a wealth of options to customize the appearance of your text. Within the Text Entry Companion, you can fine-tune various typographical settings.
Font Styling and Variants
The Text Entry Companion is where you can select your font and explore its available styles. Tapping any font in the Font list reveals its variants, such as regular, italic, or bold, in the Style section. This allows for precise control over the text's aesthetic.
Paragraph Alignment
The top four buttons in the Text Entry Companion are dedicated to setting your paragraph alignment. You can choose from left, right, center, or justified alignment to arrange your text blocks effectively.
Text Effects: Underline and Outline
Procreate offers two simple yet impactful text effects. The middle buttons in the Text Entry Companion allow you to toggle these effects. "Underline" adds a stroke beneath your text, providing emphasis. "Outline" transforms a solid font into an outlined version, which can be particularly useful for creating stencil-like text or for applying different fill colors to the outline and the interior of the letters.
Capitalization Control
A toggle at the bottom of the Text Entry Companion allows you to change your text to full capitalization. This function operates regardless of how the capitalization was initially entered, ensuring consistency across your text elements.
Fine-Tuning Typography: Kerning and Tracking
For those who want to achieve professional-level typography, Procreate offers advanced controls for spacing: kerning and tracking.
- Tracking: This feature adjusts the uniform spacing between all characters in a block of text. It’s useful for fine-tuning the overall density and readability of a line or paragraph.
- Kerning: This is a more granular adjustment, allowing you to modify the spacing between individual pairs of letters. Certain letter combinations, like "WA" or "AV," can appear visually awkward due to their shapes. Kerning allows you to manually decrease the space between such pairs, creating a more harmonious and aesthetically pleasing appearance.
These settings, along with baseline adjustments, can be previewed in real-time, giving you immediate feedback as you refine your text's appearance.
7 PROCREATE TIPS that will leave you SPEECHLESS!
Utilizing Layer Masks for Complex Text Effects
Layer masks in Procreate are a powerful tool for non-destructive editing, and they can be used creatively with text. One advanced technique involves using a layer mask to reveal or hide parts of your text, allowing for intricate designs where text appears to interact with other elements on your canvas.
To achieve this, first create your lettering on a dedicated layer. Then, tap on this layer and select "Mask" from the options menu. This applies a layer mask to your lettering's layer. When you paint black on the mask, you effectively hide parts of your lettering. Conversely, painting white reveals the lettering, and shades of gray create semi-transparency.
To make your text appear behind another element, select your text layer by tapping on it and then choosing "Select" from the subsequent menu. You can also use the automatic selection tool by tapping the selection button and then "Automatic." Once your text is selected, return to the mask on your lettering layer. Begin to paint black on the areas of the mask where you want your lettering to appear behind your text. When you are finished, deselect your selection. This process offers immense flexibility for creating layered and integrated text designs.
Procreate Brushes and Color Palettes
To further enhance your artwork, Procreate offers a vast library of brushes and color palettes. Exploring high-quality Procreate brushes can significantly improve your art by providing unique textures and effects. Similarly, utilizing curated Procreate color palettes can help you achieve specific moods and aesthetics in your designs, complementing the text you've styled and colored.
By mastering these techniques, you can transform plain text into a dynamic and integral part of your digital artwork, adding depth, style, and visual interest to your creations in Procreate.