Artboards in Adobe Photoshop offer a powerful and flexible way to manage multiple canvases within a single document. This feature is particularly invaluable for designers working on responsive web designs, app interfaces, or any project requiring variations for different devices and screen sizes. Effectively customizing and managing these artboards, especially their size, is crucial for an efficient workflow. This article delves into the various methods for changing artboard sizes in Photoshop, exploring the tools and properties that empower designers to tailor their workspace to their specific needs.
Understanding the Fundamentals of Photoshop Artboards
Before diving into resizing, it's essential to grasp what artboards are and how they function within Photoshop. Artboards can be conceptualized as distinct canvases or containers residing within a single Photoshop document. Each artboard acts as an individual workspace where images, objects, text, and other design elements can be placed and organized. They are fundamentally different from traditional Photoshop canvases in that they allow for the creation and management of multiple design areas within one source document.
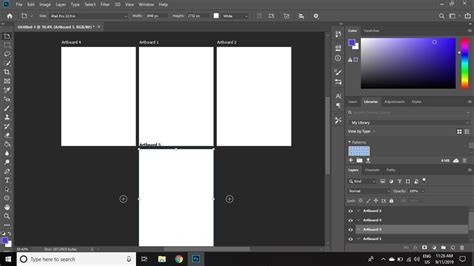
The primary purpose of employing artboards in Photoshop is to facilitate the creation and organization of designs tailored for various devices, screen dimensions, and orientations, all consolidated within a single Photoshop document. This consolidation streamlines the design process, enabling designers to maintain consistency and efficiently iterate on different layouts.
To begin utilizing artboards, one can initiate the process by navigating to File > New. Within the New Document dialog box, a crucial step is to select "Artboard" from the "Document Type" pop-up menu. From this point, designers have the option to choose from a comprehensive library of over 35 Artboard Size presets, meticulously curated to suit specific devices and common screen resolutions. This pre-selection of sizes can significantly expedite the initial setup of a project.
Organizing and Managing Artboard Content
Once artboards are established, the Layers panel becomes an indispensable tool for managing their contents. Layers and layer groups can be readily added and organized within each artboard, providing a structured approach to design. The Layer panel offers intuitive controls for managing, rearranging, and editing these layers, making it easier to navigate and refine complex designs.
Artboard behaviors in Photoshop describe the actions available for organizing, moving, and managing artboards and their contents. When elements are dragged between artboards, they automatically align with the ruler's starting point, ensuring predictable placement. For duplicating layers to a different artboard, the process involves right-clicking a layer in the Layers panel, selecting "Duplicate Layer," and then choosing the target artboard for placement. Guides, essential for precise alignment, can be dragged from the rulers onto an artboard. Crucially, these guides move with the artboard and can be duplicated along with it, maintaining their relative positioning.
The visibility of artboard names can be toggled by navigating to View > Show > Artboard Names. To focus the view on a specific artboard, one can select "Filter layers by type > Artboard" in the Layers panel, which restricts the visible layers to those belonging to the selected artboard. To prevent layers from unintentionally nesting into or out of artboards and frames, the option "Prevent auto-nesting into and out of Artboards and Frames" can be selected within the Layers panel. For fixing an artboard's position on the canvas, the "Lock position" option serves this purpose. Finally, if the need arises to dissolve an artboard back into its constituent elements, selecting the artboard and choosing Layer > Ungroup Artboards will achieve this.
Methods for Resizing Artboards
Photoshop offers a variety of methods to resize artboards, catering to different user preferences and workflow styles. Whether you prefer direct manipulation with tools or precise control through panels, Photoshop provides the flexibility you need.
1. Using the Artboard Tool
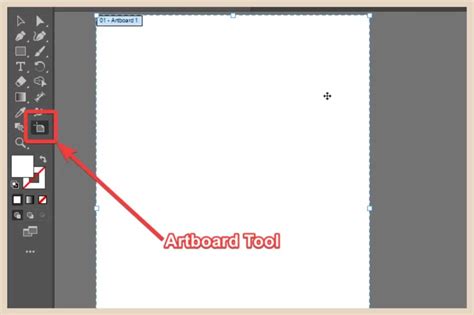
The Artboard Tool is central to many artboard-related operations, including resizing. This tool is typically nested behind the Move Tool in the Photoshop toolbar.
Step-by-step instructions:
- Select the Artboard Tool: Locate and select the Artboard Tool (shortcut:
V). It's often grouped with the Move Tool. - Activate Resize Handles: Click directly on the artboard you wish to resize. This action will reveal resize handles around its perimeter.
- Drag to Resize: Click and drag any of the corner or edge handles to adjust the width and height of the artboard. As you drag, the artboard's dimensions will update, and its contents will scale proportionally by default.
The same Artboard Tool can also be used to move artboards by clicking and dragging the artboard itself. If you encounter difficulties with the tool's responsiveness, such as finding it hard to grab the edges or select closely positioned items without zooming in significantly, resetting Photoshop's preferences might be necessary.
2. Utilizing the Properties Panel
The Properties panel offers a more precise and numerical approach to artboard resizing. This method is particularly useful when exact dimensions are required.
Step-by-step instructions:
- Select the Artboard: Ensure the artboard you want to modify is selected. You can do this by clicking on its name label or by using the Artboard Tool to click on the artboard itself.
- Open the Properties Panel: If the Properties panel is not already visible, navigate to
Window > Properties. - Adjust Dimensions: Within the Properties panel, you will find fields for "Width" and "Height." Enter your desired dimensions directly into these fields. The artboard will immediately resize to match the specified values.
The Properties panel also provides access to other artboard settings, such as its name, color, and alignment options, making it a comprehensive hub for artboard management.
3. Resizing by Dragging Edges and Corners (Direct Manipulation)
This method is similar to using the Artboard Tool but can sometimes be more intuitive for users accustomed to direct manipulation of design elements.
Step-by-step instructions:
- Select the Artboard: Click on the artboard you wish to resize. This will highlight it and may reveal resize handles.
- Drag Handles: Directly click and drag the edge or corner handles of the artboard to adjust its size. The artboard and its contents will resize accordingly.
It's important to note that the behavior of content scaling during direct manipulation can sometimes be influenced by the "Prevent auto-nesting" setting in the Layers panel.
4. Resizing Multiple Artboards Simultaneously
For projects involving numerous artboards that need to be resized uniformly, Photoshop offers a way to batch-resize.
Step-by-step instructions:
- Select Multiple Artboards: In the Layers panel, Shift-click or Ctrl-click (Cmd-click on Mac) to select all the artboards you want to resize.
- Use the Properties Panel: With multiple artboards selected, the Properties panel will display options that apply to all selected artboards. Adjust the "Width" and "Height" values. All selected artboards will then resize to these new dimensions.
This feature is a significant time-saver when dealing with systematic design adjustments across different screen sizes.
Advanced Artboard Management and Optimization
Beyond basic resizing, understanding how to manage and optimize artboards can further enhance your workflow.
Creating and Duplicating Artboards
To add a new artboard, you can either create a new document (File > New) and select the "Artboard" option, or use the Artboard Tool to click on the canvas and add one within an existing document. Presets for various devices are readily available.
Duplicating an artboard is a straightforward process. Select the artboard in the Layers Panel, and then click the "Duplicate Artboard" icon at the bottom of the panel. This creates an exact copy of the artboard and its contents, which is useful for creating variations of a design.
Rearranging Artboards
Artboards can be easily rearranged within the document. Select the Artboard Tool, then click and hold on the artboard you wish to move, and drag it to its new position.
Exporting Artboards
When it's time to export your designs, Photoshop provides comprehensive options. You can choose from various file formats, including PDF and PNG, and customize export settings to meet specific needs. The "Export As" dialog allows you to set dimensions, resolution, and scaling options. For optimizing artboards for web use, the "Save for Web (Legacy)" option offers advanced controls for file formats, quality, and compression.
How to Export Artboards in Adobe Photoshop as Multi-Page PDF Files
Optimizing Performance with Artboards
Working with multiple artboards, especially complex ones, can sometimes impact performance. Leveraging Photoshop's Advanced GPU Drawing Mode can significantly improve responsiveness. To activate this, navigate to Photoshop > Preferences > Performance. Under "Graphics Processor Settings," enable "Use Graphics Processor" and select "Advanced" from the "Drawing Mode" dropdown menu. Note that older GPUs may not support this feature.
Integrating Vector Assets
For designers who use Adobe Illustrator, integrating vector assets into Photoshop artboards is seamless. Simply copy a vector object from Illustrator and paste it into a Photoshop artboard. When prompted, choose "Smart Object" as the paste option. This ensures that the vector graphic can be scaled and edited non-destructively within Photoshop.
Addressing Common Resizing Challenges
A common frustration for users, particularly after updates like Photoshop 2017, is the perceived difficulty in precisely grabbing the edges of artboards for resizing. This can be exacerbated by the software's sensitivity settings. If you find yourself struggling with this, ensure you are using the Artboard Tool and that the resize handles are visible. If the issue persists, resetting Photoshop's preferences is often the recommended solution.
Similarly, selecting items that are close to each other can be tricky, often requiring significant zooming. While there isn't a direct preference to change the "selection sensitivity" in the way one might expect, zooming in is the most reliable method. However, ensuring that your artboards are well-organized and that layers are properly grouped can make selection easier even at lower zoom levels.
By understanding and utilizing the various tools and techniques for resizing artboards in Photoshop, designers can create a more efficient, organized, and adaptable workflow, ultimately leading to better design outcomes.