The ability to manipulate text and place it along custom paths is a cornerstone of creative design, opening up a vast array of project possibilities. Whether you're crafting personalized apparel, unique mugs, or eye-catching wood signs, mastering the art of curved text in Silhouette Studio can significantly elevate your designs. This guide will walk you through the process, from basic text entry and path creation to advanced adjustments and final conversion, empowering you to bring intricate text designs to life.
The Foundation: Text Creation and Path Generation
Before any text can be curved, it first needs to be created and a path needs to be established for it to follow. In Silhouette Studio, this process is straightforward and intuitive, forming the bedrock of all curved text designs.
Typing Your Text
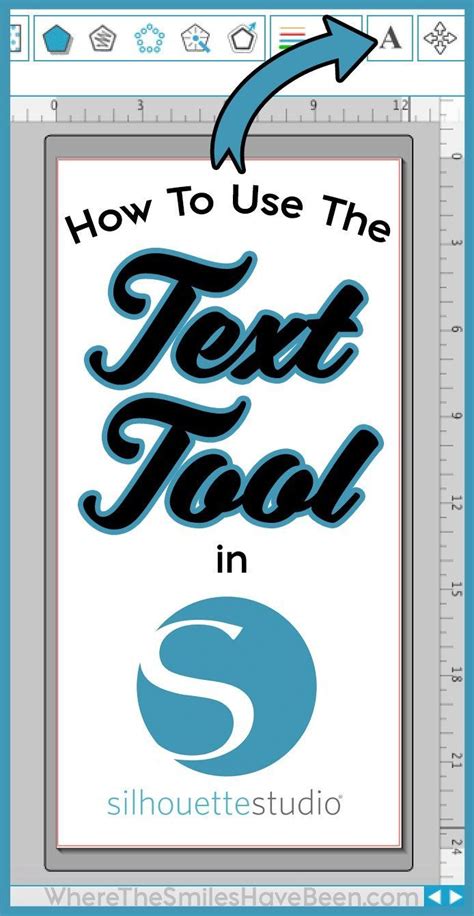
Begin by accessing the text tool, typically represented by an "A" icon in the left-hand menu bar. Clicking this tool activates the text input mode. From there, you can type out your desired words or phrases. Once your text is entered, you have the flexibility to choose your preferred font and adjust its size using the drop-down menus located at the top of the workspace. For curved text projects, it is often advisable to select a non-script font. Script fonts, with their flowing and intricate letterforms, can sometimes appear "wonky" or lose their legibility when forced to conform to a tight curve, whereas simpler, bolder fonts tend to maintain their clarity and aesthetic appeal. A font like Bebas Neue, for instance, is a popular choice for its clean lines and readability.
Crafting the Path
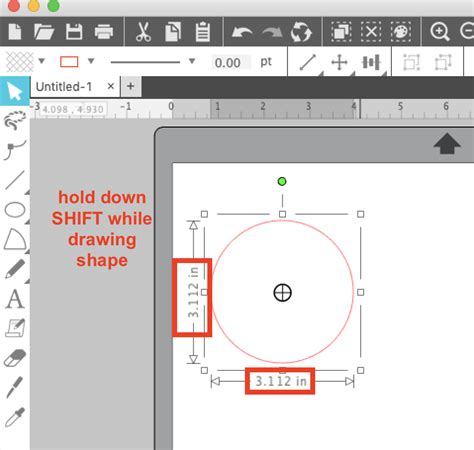
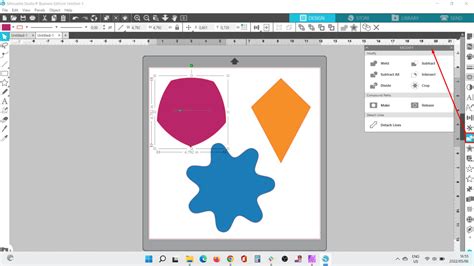
The next crucial step is to create the shape or "path" that your text will curve around. Silhouette Studio offers a robust set of drawing tools for this purpose. To create a perfect circle, for example, navigate to the drawing tools icon on the left-hand panel and select the Ellipse tool. While the default setting creates an ellipse, holding down the Shift key while clicking and dragging will constrain the tool to draw a perfect circle. This same principle applies to other shape tools, such as the Rectangle tool, where holding Shift will create a perfect square. Once the shape is drawn, you can resize it to your specific project needs. This shape will serve as the guide for your text's curvature.
The Art of Curving Text
With your text and a path in place, you can now proceed to curve the text. This involves a specific interaction between the text object and the chosen path.
Applying Text to a Path
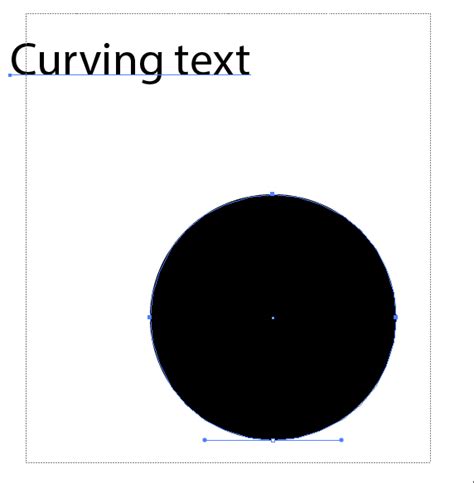
To begin curving your text, you'll need to enter a special editing mode for the text object. This is typically achieved by double-clicking on the text you wish to curve. Upon double-clicking, a green bounding box will appear around the text, indicating that it is in edit mode. Within this bounding box, usually in the bottom-left corner, you will find a small black circle with a four-pointed arrow icon. This is your primary manipulation point.
Click and drag this four-pointed arrow. As you drag, you will guide the text onto the outline of the shape you previously created. The text will "snap" to the path, conforming to its curvature. For instance, if you've drawn a circle, the text will now follow the circumference of that circle.
Adjusting Position and Spacing
Once the text has snapped to the path, you may need to make further adjustments to its position and appearance. Double-clicking the text again will bring back the green bounding box and the four-pointed arrow, allowing you to reposition the text along the curve.
A key adjustment tool is the slider bar, typically found on the left side of the screen, often represented by a vertical double arrow. Hovering your mouse over this slider or the line it represents will often reveal another four-pointed arrow. This slider allows you to fine-tune the text's placement relative to the path. You can use it to move the text closer to or further away from the center of the shape, effectively adjusting its distance from the baseline. This is particularly useful for positioning text on the inside or outside of a shape's outline.
Furthermore, when text is curved, especially around tighter radii, the spacing between individual letters (kerning or character spacing) may need adjustment to prevent overlap or to achieve a more aesthetically pleasing look. While the text is still on the path, you can often access font settings to adjust character spacing. Navigating to the font menu and finding the character spacing option at the bottom allows you to increase or decrease the space between letters. This ensures that even with a tight curve, your text remains legible and visually appealing.
Learn the Knockout Method for Silhouette Studio - IN UNDER 3 MINUTES!
Refining and Finalizing Your Curved Text Design
After achieving the desired placement and spacing, the final steps involve converting the editable text into a more permanent, cut-ready format.
Converting Text to a Compound Path
When your curved text is positioned exactly as you envision it, the next step is to convert it into a compound path. This process transforms the individual letters into a single, unified shape that can be cut by the Silhouette machine. To do this, first select all the text you have curved. Then, navigate to the top menu and choose "OBJECT" followed by "MAKE COMPOUND PATH."
Alternatively, you can utilize the "Modify" panel, usually located on the right side of your screen. Within this panel, select the "MAKE" option under the "COMPOUND PATHS" section.
It's crucial to understand that once the text is converted to a compound path, it can no longer be edited as text. The individual letters and font size cannot be adjusted. The text is now treated as a graphic shape. This is why it is essential to ensure your text is perfectly positioned and formatted before executing this conversion. The base shape, which was originally the path, will revert to its cut shape appearance, typically with a red outline, indicating it's ready for cutting.
Applying to Various Shapes
The method of curving text around a path is not limited to circles. This technique is versatile and can be applied to virtually any shape you can create or import into Silhouette Studio. Whether you're using pre-made "Flexishapes" like hearts, stars, or custom-drawn lines, the process remains the same: create your shape, type your text, double-click the text to activate the manipulation handle, drag the text onto the shape's outline, and adjust as needed.
For instance, if you wanted to create a label for a handmade gift, you could draw a simple oval or a custom shape, curve your text around it, and then use the "Print and Cut" feature to print the design onto sticker paper or precut labels. This allows for the creation of professional-looking, personalized labels that add a thoughtful touch to any item.
Comparison with Other Software: Cricut Design Space
While Silhouette Studio offers a robust set of tools for curving text, it's beneficial to understand how this functionality compares to other popular design software, such as Cricut Design Space.
In Cricut Design Space, curving text is also possible, but the functionality is often described as more "primitive and limited" compared to Silhouette Studio. While the process of typing text and applying a curve is straightforward, users often find that Design Space tends to spread letters out excessively, necessitating repeated adjustments to kerning and letter spacing. The options for convex or concave curves are available through a slider, and it's possible to create a full circle, but the overall control and flexibility are perceived to be less refined. Many users who work extensively with curved text often opt to create their text manipulations in more advanced graphic design software like Adobe Illustrator and then import the resulting SVG files into Design Space.
In contrast, Silhouette Studio provides a more granular level of control. The ability to precisely position text along the path using the four-pointed arrow and the dedicated slider bar, along with the fine-tuning of character spacing within the font menu, offers a more intuitive and powerful workflow for achieving complex curved text designs. The "snap to path" feature in Silhouette Studio is also often praised for its accuracy and ease of use.
Project Possibilities with Curved Text
The ability to curve text in Silhouette Studio unlocks a multitude of creative project ideas:
- Personalized Apparel: Create custom designs for t-shirts, hoodies, and bags with text that follows the contours of a design element or the garment itself.
- Custom Mugs and Drinkware: Design eye-catching text that wraps around mugs, water bottles, or tumblers.
- Wood Round Signs: Craft elegant text for home decor signs, featuring phrases or names that arc over or under decorative elements.
- Labels and Stickers: Design unique labels for handmade products, gifts, or organizational purposes.
- Party Decorations: Create custom banners, cake toppers, or party favors with text that adds a special touch.
- Keychain Designs: Incorporate curved text into acrylic or wooden keychain designs for a personalized flair.
By mastering the techniques outlined in this guide, you can significantly enhance your design capabilities and produce professional-quality results for a wide range of crafting and personalization projects. The process, while requiring a few specific steps, is ultimately accessible and highly rewarding, allowing you to add a dynamic and engaging element to your creations.