Photoshop's brush tools are the cornerstone of digital artistry, offering unparalleled flexibility for painting, retouching, and countless other creative tasks. At the heart of this flexibility lies the ability to precisely control brush size and hardness. While seemingly straightforward, mastering these adjustments can significantly enhance workflow efficiency and the quality of your output. This guide delves into the various methods for altering brush size and hardness, from intuitive shortcuts to customizable preferences, ensuring you can adapt to any workflow, be it on a graphic tablet or with a traditional mouse and keyboard.
The Intuitive Dance: Mouse and Tablet Control
One of the most widely appreciated methods for adjusting brush size and hardness in Photoshop relies on a combination of mouse clicks and cursor movement, often enhanced by a graphic tablet. This approach offers a fluid, on-the-fly control that many artists find indispensable.
For adjusting brush size, the common shortcut involves holding down the Alt key (Windows) or Option key (Mac), followed by a right-click, and then dragging the mouse horizontally. Dragging to the right increases the brush size, while dragging to the left decreases it. This method is particularly favored by tablet users, as the right-click can often be mapped to a pen button, allowing for a seamless adjustment without removing the pen from the tablet surface.
Similarly, brush hardness can be adjusted using a related gesture. While holding down the Alt key (Windows) or Option key (Mac) and performing a right-click, dragging the mouse vertically will alter the brush's hardness. Dragging downwards increases hardness, resulting in a sharper, more defined edge, while dragging upwards decreases hardness, creating a softer, feathered edge. This vertical drag is crucial for differentiating it from the horizontal drag used for size.
It's important to note that the effectiveness of these shortcuts can sometimes be influenced by the type of keyboard layout and specific Photoshop versions. For users with non-US keyboard layouts, where bracket keys might require multiple key presses, Photoshop might not always register these inputs correctly for custom shortcuts.
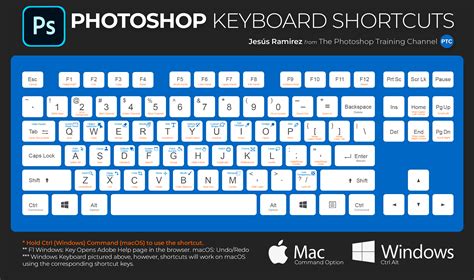
Keyboard Shortcuts: Precision at Your Fingertips
For those who prefer the directness of keyboard input, Photoshop offers several shortcut keys to modify brush attributes. These can be particularly useful when working without a tablet or when precise, incremental changes are required.
The most direct keyboard shortcuts for brush size involve the bracket keys. Pressing the right bracket key (]) will increase the brush size, and pressing the left bracket key ([) will decrease it. Holding down these keys allows for continuous adjustment until the desired size is reached. These keys provide a quick and accessible way to modify brush size without needing to access menus or use the mouse.

While the bracket keys directly control size, the curly bracket keys ({ and }) can be used for controlling brush hardness. Pressing the right curly bracket (}) increases hardness, and the left curly bracket ({) decreases it. This allows for a similar rapid adjustment of the brush's edge definition.
However, it's worth remembering that these keyboard shortcuts, especially when integrated with other modifier keys, can sometimes conflict with other Photoshop functions or operating system behaviors. As some users have reported, issues can arise where pressing certain key combinations might unexpectedly trigger other tools, such as the Eyedropper tool or open the Brush Settings panel, disrupting the intended workflow.
Customizing Your Workflow: Keyboard Shortcuts and Preferences
Photoshop's strength lies in its customizability, and this extends to brush control shortcuts. For users who find the default key combinations uncomfortable or incompatible with their hardware, the ability to remap these shortcuts is invaluable.
Within Photoshop, you can access the Keyboard Shortcuts menu by navigating to Edit > Keyboard Shortcuts. Here, under the "Shortcuts For:" dropdown menu, select "Tools." This section lists various tool-specific shortcuts, including those related to brush size and hardness. You can then assign new key combinations to these actions, tailoring them to your specific needs and keyboard layout. This is particularly helpful for users with international keyboards that may not have readily accessible bracket keys.
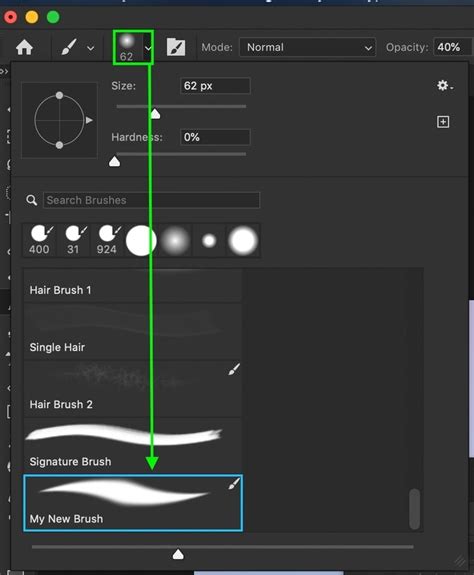
Furthermore, the Options Bar, which appears at the top of the screen when the Brush Tool is selected, provides a visual interface for adjusting brush size and hardness. A slider labeled "Size" allows for direct manipulation of the brush diameter, and a separate slider controls "Hardness." While this method is less immediate than shortcuts, it offers a clear visual representation of the current settings and is useful for fine-tuning.
For those who utilize pressure-sensitive graphics tablets, specific settings within Photoshop can be configured to leverage this technology. The Opacity and Size attributes of a brush can be pressure-sensitive. When enabled via icons in the Options Bar, a compatible pen and tablet will control the opacity and size of the brush stroke based on the pressure applied. This feature is fundamental for achieving natural-looking brushwork, mimicking traditional media. To customize the shortcuts for toggling these pressure-sensitive options on or off, the Keyboard Shortcuts menu can again be utilized.
Advanced Brush Control and Workflow Enhancements
Beyond basic size and hardness adjustments, Photoshop offers a suite of features that enhance brush control and streamline complex painting tasks.
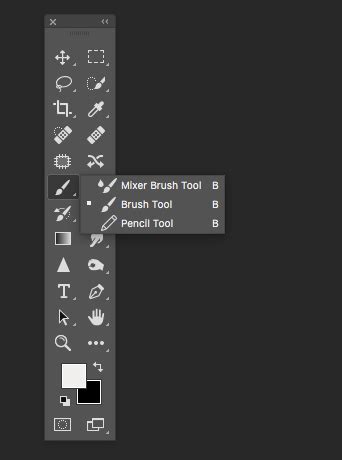
Brush Tool Blend Modes and Flow: For advanced control over paint application, Photoshop's brush tools offer various blend modes and a "Flow" setting. Tapping a numeric key on your keyboard allows you to set the brush's Opacity percentage (e.g., '5' for 50%, '0' for 100%). Tapping two numbers quickly sets an exact percentage (e.g., '5' then '4' results in 54%). Similarly, the Mixer Brush tool has specific shortcuts where Shift + tapping a numeric key changes the "Flow" value. To quickly cycle through a painting tool's blend modes, hold the Shift key and tap the "+" or "-" keys to move forward or backward through the list.
Creating Dotted Lines and Precise Strokes: To achieve a "dotted" line effect rather than a solid stroke, navigate to the Brush panel and select Brush Tip Shape. Here, you can adjust the Spacing slider to introduce gaps between brush marks. Experimenting with "Roundness" and "Angle" in this panel can further diversify the appearance of these dotted strokes.
For creating perfectly straight lines, simply hold down the Shift key while dragging your brush stroke. For more complex, fluid, and precise strokes, the Pen Tool can be used to create a path. Once the path is defined, ensure your desired painting tool is configured with the correct settings (brush size, opacity, etc.). Then, from the Paths panel fly-out menu, select "Stroke Path" and choose your tool. To simulate pressure sensitivity on a stroked path, check the "Simulate Pressure" option before stroking.
How To Apply Brush Stroke on a Path in Photoshop | Pixim Creator
Custom Brushes and Preset Management: Photoshop allows you to define your own custom brushes based on selected areas of an image. Use any of Photoshop's selection tools to isolate the desired area, then go to Edit > Define Brush Preset. You can save these custom brushes with their unique attributes in the Brush Presets panel. After modifying a saved brush, you can re-save it to update the preset. Photoshop also displays the seven most recently used brushes and indicates if the currently used preset has been modified, aiding in workflow management.
Eraser Tool Variants: The Eraser tool itself has a "Block" mode that presents an eraser in a square shape. Holding Option (Mac) | Alt (Win) with the Eraser tool active allows you to erase using the History states. By default, Photoshop captures a snapshot of the document upon opening at the top of the History panel. You can change the "History" state from which the Eraser paints by clicking in an empty well to the left of the desired state in the History panel.
Paint Bucket and Gradients: The Paint Bucket tool can fill with either the Foreground color or a Pattern, selectable from the Options bar. To fill a transparent area with the foreground color, set the Paint Bucket's blend mode to "Behind." The Gradient tool offers multiple styles (Linear, Radial, Angle, Reflected, and Diamond), and the Gradient Editor allows for precise color stop adjustments by double-clicking on a stop.
Troubleshooting Common Issues
Despite the robust nature of Photoshop's tools, users sometimes encounter unexpected behavior with brush shortcuts. A common point of confusion arises when the Alt/Option + Right-Click + Drag shortcut, intended for brush resizing, instead triggers the Eyedropper tool or opens the Brush Settings panel. This can often be due to a subtle conflict within Photoshop's shortcut mapping or an issue with how modifier keys are registered, especially on certain operating systems or with specific hardware configurations.
Users have reported that updating Photoshop versions can sometimes alter or break existing shortcuts. For instance, a change in how Control+Option+Drag interacts with other shortcuts has been noted between versions. In such cases, re-checking the Keyboard Shortcuts menu for the relevant tool actions is the first step. Deleting any pre-existing assignments for the Eyedropper tool within the Keyboard Shortcuts panel has also been suggested as a solution to prevent it from overriding brush adjustments.
For users experiencing issues with Wacom tablets not correctly registering brush resize/hardness commands, sometimes downgrading the Wacom driver to a previous version has resolved the problem. Additionally, ensuring that the "Vary Round Brush Hardness based HUD" vertical movement option is correctly configured in Preferences can sometimes help. It's also advised to try performing the Alt/Option + Right-Click + Drag shortcut directly on the image canvas rather than in empty areas, as this can sometimes yield more consistent results. When troubleshooting, always ensure your Photoshop version and graphics tablet drivers are up to date, or if a recent update caused the issue, consider rolling back to a stable previous version.