If you've ever found yourself staring at your InDesign workspace, wondering why the measurements seem off or just don’t match what you’re used to, you're not alone. Changing units in Adobe InDesign is a common task that can make a world of difference in how you approach your design projects. Understanding and manipulating these settings is fundamental for precise layout and efficient workflow, ensuring that your designs translate accurately from screen to print and across different design contexts. This guide will delve into the various ways to adjust measurement units, offering clarity and control over your InDesign environment.
Navigating the Ruler System
To start changing the measurement units in InDesign, first locate the rulers on your document window-these are typically positioned along the top and left sides of your workspace. They provide a visual guide to help align objects accurately within your layout. These rulers are not just static indicators; they are dynamic tools that can be customized to reflect the specific needs of your project. The visual representation of measurements on these rulers is directly tied to the unit settings you choose.
Adjusting Ruler Units: The Preferences Panel
Now comes the fun part: adjusting those pesky unit settings! The primary method for changing your ruler units is through the InDesign Preferences dialog box. To access this, you'll typically navigate to "Edit" > "Preferences" on Windows or "InDesign" > "Preferences" on macOS. Within this extensive dialog box, you'll find options for both horizontal and vertical ruler units.
You can choose from various options like inches, centimeters, millimeters, points (pt), picas (pc), or even pixels, depending on what suits your project best. Each unit system has its own strengths and is traditionally associated with different types of design work. For instance, inches and centimeters are commonly used in print design for physical dimensions, while points and picas are the standard in typography and desktop publishing due to their precise subdivisions. Pixels are, of course, essential for digital and web design.
The "Ruler Units" section within the Preferences allows for independent setting of horizontal and vertical rulers, offering flexibility. This means you could, for example, have your horizontal ruler in inches and your vertical ruler in centimeters, though this is rarely practical for most design tasks. The default setting usually aligns both rulers to the same unit system.
Understanding Tick Marks and Divisions
Within the Preferences, you'll also notice settings related to tick marks. These are the small lines that divide the ruler into smaller increments. You can often control the density and appearance of these tick marks, which can aid in visual estimation of distances. While not directly changing the unit itself, the way these divisions are presented can impact how easily you can read and interpret measurements on the rulers. The labeled tick marks provide clear numerical indicators, while major tick marks highlight more significant divisions, making it easier to gauge distances at a glance.
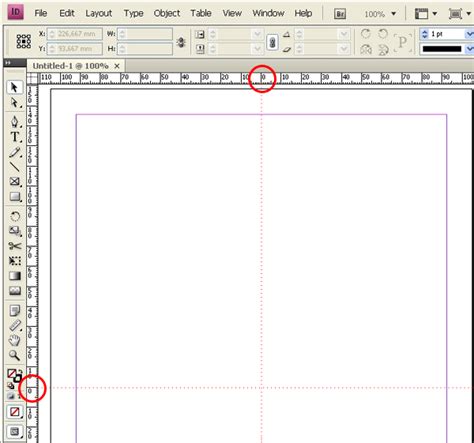
The Zero Point: Setting Your Origin
The zero point refers to the origin of both horizontal and vertical rulers, from which measurements start. By default, the zero point is usually at the top-left corner of your document page. However, you have the flexibility to change this origin. When you move the zero point, it moves to the same relative location in all spreads. This can be incredibly useful for specific design scenarios.
You can change the default zero point for rulers as well as the scope of the horizontal ruler. Select "Spread" to set the ruler origin at the top-left corner of each spread. This is particularly helpful when designing multi-page documents where you want consistent alignment across facing pages. Selecting "Page" will set the ruler origin at the top-left corner of each individual page, which is the most common setting. Alternatively, you can select "Spine" to set the ruler origin at the center of the spine, a useful option for book design or layouts where the center fold is a critical reference point.
To manually adjust the zero point, you can click and drag from the intersection of the two rulers (where they meet in the top-left corner of the document window) to a new location on your page or spread. This allows for precise control over where your measurements begin.

Temporary Unit Adjustments for Value Input
Additionally, if you're entering values directly into fields (like in the Control panel or Transform panel) but want them temporarily displayed in another unit system, InDesign offers a convenient shortcut. You can often type values with unit suffixes, and InDesign will interpret them correctly. For example, if your document is set to inches but you want to enter a value of 50 millimeters, you can simply type "50mm" into the field, and InDesign will convert it to the document's primary unit. This bypasses the need to constantly switch your global ruler preferences for minor adjustments.
This feature is invaluable for designers who collaborate with others using different unit preferences or who work with assets that have pre-defined dimensions in specific units. It allows for seamless integration of diverse elements into a single project without compromising accuracy.
Japanese Measurement Units: Q and Ha
In some specialized contexts, particularly within Japanese typesetting and layout, you might encounter units like "Q" and "Ha." These are units used in a Japanese manual or automatic photo composer to show font size, tracking, or leading length. While less common for international designers, understanding their existence is important for comprehensive knowledge. The "Q" unit, for instance, is a quarter of a point, offering extremely fine control over typographic spacing. "Ha" is another unit related to character width and spacing in Japanese typography. While InDesign primarily operates on the more globally recognized units, awareness of these specialized systems can be beneficial when working with Japanese clients or legacy documents.
Typography: Units of Typographic Measurement
Beyond the Basics: Why Unit Choice Matters
The choice of measurement units in InDesign is not merely an aesthetic preference; it directly impacts the precision, efficiency, and accuracy of your design work.
Print Design: For projects intended for physical output, such as brochures, posters, or books, units like inches, centimeters, millimeters, points, and picas are paramount. Inches and centimeters provide a tangible sense of physical size, crucial for ensuring that a design fits within specific print dimensions or templates. Points (1/72 of an inch) and picas (12 points) are indispensable for typography. Type sizes are almost universally specified in points, and the precise measurement of leading (line spacing) and kerning (space between characters) often benefits from the fine granularity offered by points and picas. This ensures that text is legible, aesthetically pleasing, and adheres to typographic best practices.
Digital and Web Design: When designing for screens, pixels become the primary unit of measurement. Pixels represent the smallest controllable element on a digital display. Using pixels ensures that your designs render correctly at specific resolutions and screen sizes, which is critical for user interface (UI) and user experience (UX) design. While some designers might still use inches or centimeters for conceptualizing layouts, the final output for web or app interfaces will invariably be in pixels. Understanding pixel density (e.g., Retina displays) also plays a role, as designs may need to be created at higher pixel densities to appear sharp on modern devices.
Cross-Media Projects: For projects that span both print and digital mediums, such as a marketing campaign that includes both a printed flyer and a web banner, careful consideration of units is essential. Designers often work with a master layout in a preferred unit system and then adapt it for different outputs. The ability to switch units within InDesign, and to input values with unit suffixes, greatly facilitates this process, minimizing errors and ensuring consistency across platforms.
The Impact on Workflow and Precision
The selection of appropriate units can significantly streamline your workflow. If you are accustomed to working with picas for typographic elements, having your rulers set to picas will allow for quicker and more intuitive adjustments to text frames and spacing. Conversely, if you are laying out a large-format banner in meters, setting your rulers to centimeters or millimeters will provide the necessary precision without dealing with unwieldy decimal numbers.
Moreover, the precision offered by different units can be critical for certain industries. In packaging design, for instance, millimeter accuracy is often non-negotiable to ensure that a product fits its container or that dielines are perfectly aligned. In architectural or engineering diagrams produced in InDesign, even finer units might be employed to maintain exacting standards.
Advanced Considerations: Grid and Guides
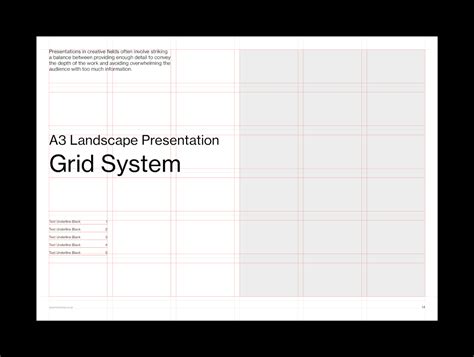
While ruler units are fundamental, InDesign also offers powerful tools like grids and guides that work in conjunction with your chosen units. The Document Grid, accessible through Preferences, allows you to define a baseline grid or a document grid based on your preferred units. This grid can be set to specific increments, further enhancing alignment and consistency. For example, setting a baseline grid in points ensures that text lines up consistently across columns, even if the text sizes vary. Similarly, custom guides can be drawn and precisely positioned using the ruler units, serving as visual aids for layout.
Conclusion: Empowering Your Design Process
In conclusion, mastering the ability to change units in Adobe InDesign is not just a technicality; it's a fundamental skill that empowers designers to work with greater precision, efficiency, and confidence. Whether you are a seasoned professional or a budding designer, understanding how to leverage InDesign's unit settings-from the primary ruler preferences to the nuances of zero point adjustment and temporary unit input-will undoubtedly enhance your design process and ensure your projects meet the exact requirements of their intended medium and audience. By tailoring your InDesign workspace to your specific project needs, you unlock a more intuitive and accurate design experience.