Procreate, a powerful digital art application, offers a versatile toolkit for artists of all levels to transform their line art into vibrant, finished pieces. Many beginners find themselves daunted by the prospect of adding color without compromising the integrity of their carefully crafted linework. This tutorial delves into the core techniques for coloring line art in Procreate, from foundational methods to advanced enhancements, ensuring your creations are not only visually appealing but also optimized for various applications, such as custom product design.
Setting Up Your Canvas for Success
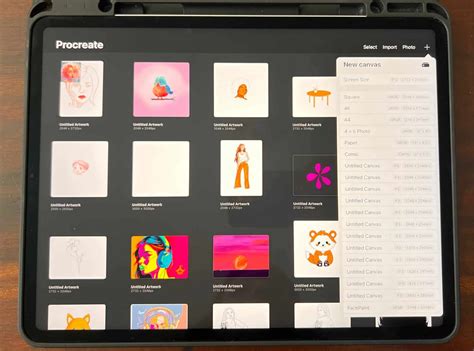
Before diving into the coloring process, it's crucial to establish a canvas that meets your project's specific needs. For instance, if you're designing for print, such as a custom phone case, optimizing your canvas dimensions and resolution is paramount. A common recommendation for product use is a canvas size of 7.5 x 15.5 centimeters with a 600 DPI (dots per inch). This high resolution ensures sharp, detailed prints. However, remember that these are just guidelines; always consult with your manufacturer for their specific requirements when creating designs for products. The principle of setting up an optimized canvas extends to any project, whether it's for web display or physical merchandise.
The Art of Composition: Telling a Visual Story
Beyond the technical aspects of canvas setup, consider the narrative your artwork conveys. As emphasized in earlier tutorials, composition plays a vital role in guiding the viewer's eye and creating an engaging experience. Think about how each element within your illustration contributes to a larger story. For example, a character holding an object, then interacting with it, and finally moving away with it, creates a sense of progression and narrative flow. The positioning of elements, even small ones, is critical. If your eye is drawn away from the main subject by these smaller details, it might be necessary to reposition them to maintain focus and enhance the overall flow of the creation. The strategic placement of elements ensures that the viewer's gaze moves naturally through the artwork, creating a dynamic and captivating visual journey.
Crafting Your Color Palette
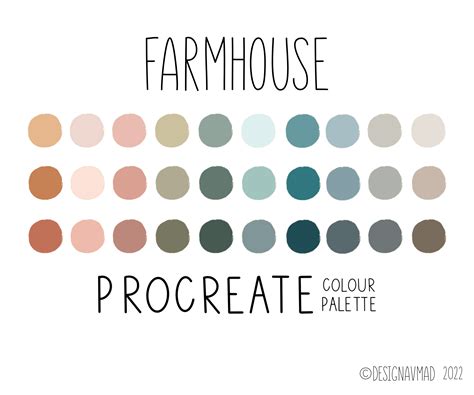
The selection of colors is a deeply personal and creative process. Your color palette can draw inspiration from various sources, including existing artwork or even the subject matter itself. For instance, if you're illustrating bees, you might opt for traditional black and yellow, or explore a more unconventional pastel palette to achieve a unique aesthetic. A helpful tip for managing your chosen colors is to create custom palettes within Procreate. This involves navigating to the Palettes menu, tapping the '+' icon, and selecting "Create New Palette." You can then save your chosen swatches by tapping on empty squares. Furthermore, Procreate allows you to import custom palettes, either from .swatches files or directly from images on your iPad, offering immense flexibility in color selection.
Method 1: Painting Directly on a New Layer - The Expressive Approach
This method is often the most intuitive for artists who prefer a more organic, painterly feel, akin to traditional media like markers or watercolors. It allows for natural shading, blending, and the rendering of textures, making it ideal for expressive illustrations.
Steps:
- Lock Your Line Art: To prevent accidental edits to your linework, open the Layers panel by tapping the double-square icon. Swipe your line art layer to the left and select "Lock."
- Create a New Multiply Layer: Tap the '+' button in the Layers panel to create a new layer above your locked line art. Tap the small 'N' icon on this new layer to access its Blend Mode settings and change it to "Multiply." This blend mode ensures that your colors will appear through the linework without obscuring it.
- Choose Your Brush: Access the Brush Library by tapping the paintbrush icon. Experiment with different brushes across categories like Inking, Painting, and Airbrushing until you find one that suits your style. For a loose, transparent effect with excellent layering capabilities, a custom brush like the "Watery Marker" can be highly effective.
- Select Your Color: Tap the color circle in the top-right corner to open the Color menu. You can pick colors using the color wheel, or employ the sliders (Disc, Classic, Value, or Harmony tabs) for precise control. Saving colors to custom palettes, as mentioned earlier, is highly recommended for project consistency.
- Paint Your Design: Begin painting directly onto the Multiply layer. This layer will interact with your locked line art, allowing your colors to fill the shapes naturally.
Pros:
- Offers a painterly, natural, and expressive aesthetic.
- Excellent for achieving depth through shading, blending, and texture.
- Mimics the feel of traditional art mediums.
Cons:
- Can be more time-consuming.
- Requires a steadier hand, though Procreate's stabilization features can assist.
- Making significant color changes later can be more challenging.
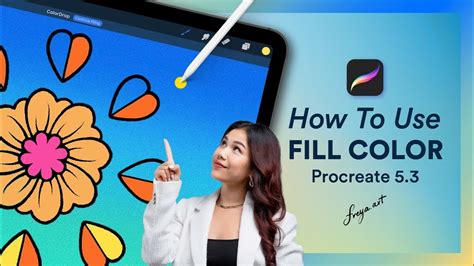
Method 2: Color Drop (Fill Tool) - Precision and Efficiency
The Color Drop tool is Procreate's powerful drag-and-drop fill function, exceptionally well-suited for clean, flat coloring. This method is particularly beneficial for designs where precision is key, such as fashion flats or graphic illustrations.
Option A: Closed Shapes with a Reference Layer
This option is ideal when your line art forms completely enclosed shapes.
Steps:
- Ensure Closed Shapes: Verify that your line art has no gaps in its outlines.
- Lock Line Art Layer: As with the previous method, lock your line art layer by swiping left and selecting "Lock."
- Create a New Fill Layer: Tap '+' to add a new blank layer above your locked line art.
- Color Drop: Drag the active color from the top-right circle and drop it into the desired area. You can also drag swatches directly from your Palettes menu. It's important to note that you'll need to apply the Color Drop to each separate closed area individually. For instance, if coloring a t-shirt, you would fill the body and sleeves as distinct sections.
Option B: Open Shapes with a Filled Outline Layer
This method is more forgiving for sketches with intentional gaps or textured line quality, which are common in fashion sketches and can add character.
Steps:
- Lock Sketch Layer: Lock your line art layer by swiping left and selecting "Lock."
- Create a New Layer Below: Tap '+' to create a new layer and drag it below your locked sketch layer.
- Draw an Outline Shape: Select a color and draw an outline that encompasses the area you wish to fill. This outline doesn't need to perfectly match the sketch lines but should fully contain the desired color area.
- Color Drop: Drag the active color from the top-right circle and drop it into the outline you just created. The color will fill the shape defined by your outline.
Pros:
- Extremely fast and precise.
- Maintains separation between linework and color, allowing for easy edits.
- Excellent for quickly generating multiple colorways of the same design.
Cons:
- Requires meticulously closed outlines for Option A.
- Can result in less natural-looking fills for fabric textures compared to painting.
Common Mistakes to Avoid with Color Drop:
- Spilling Across the Canvas: This typically occurs when outlines are not fully closed. Always zoom in and meticulously patch any gaps with a brush before attempting Color Drop.
- Residual Color Halos: If you attempt to fill on the same layer as your line art, previous colors might linger. Always use a separate layer for your fills to ensure clean results.
Bonus Features for Enhanced Coloring
Procreate offers several helpful features to streamline and elevate your coloring process.
Vertical Symmetry Guide
For symmetrical designs, such as garments or characters, the Vertical Symmetry Guide can save significant time.
Steps:
- Navigate to Actions (wrench icon) > Canvas.
- Toggle on Drawing Guide, then tap Edit Drawing Guide.
- Select Symmetry, and under Options, choose Vertical.
- Your layer will now display "Assisted," indicating that any strokes you make will be mirrored on the opposite side.
Mirror Lettering in Procreate (Symmetry Tool Tutorial) #procreatetutorials #procreate
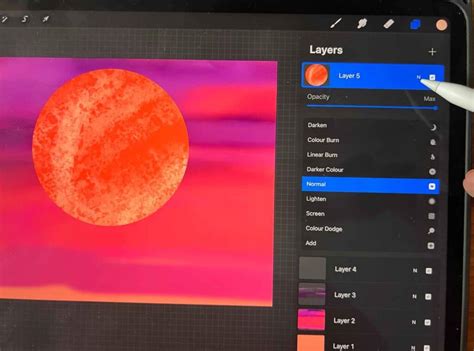
Adding Depth: Shadows and Highlights
Once your base colors are laid down, you can add shadows and highlights to bring your artwork to life and create a sense of dimension.
Steps:
- New Layer: Create a new layer above your base color layer.
- Clipping Mask: Tap on the new layer and select Clipping Mask. This ensures that whatever you draw on this layer will only appear within the boundaries of the layer directly below it, acting like a stencil.
- Blend Mode: Tap the 'N' icon on the new layer to access Blend Modes. Choose Multiply for shadows or Overlay/Screen for highlights.
- Paint: Using darker tones on a Multiply layer or lighter tones on an Overlay/Screen layer, paint to add depth and form to your illustration.
- Separate Layers: For maximum control, create separate layers for shadows and highlights. This allows for independent adjustments, different blend modes, and easier erasing if needed.
Recoloring Made Easy: Adapting Your Designs
Fashion designers and illustrators frequently need to present the same sketch in multiple colorways. Procreate's layer features make this process remarkably efficient.
Replacing Colors
- Using ColorDrop: For areas filled with Color Drop, simply drag a new color from the color circle and drop it into the existing fill. This will instantly replace the previous color, allowing for rapid experimentation with different palettes.
Testing Multiple Color Options
- Clipping Mask Method: To explore various color combinations without altering your original fills, start by setting your primary fill layer to white. Then, create a new layer above it and apply a Clipping Mask. Now, drag any color into this clipped layer, and it will only appear within the white shape below. You can repeat this process on multiple new layers to test an array of colors, each "clipped" to the original white base.
By mastering these techniques, you can confidently color line art in Procreate, transforming your sketches into polished, professional illustrations ready for any application, from personal projects to commercial designs. The ability to efficiently recolor and add depth ensures your creative workflow is both fluid and effective.