Pixlr, a versatile online photo editor, offers a suite of tools designed to enhance your creative workflow, whether you're a seasoned professional or just beginning your digital art journey. This guide delves into the specifics of copying and editing elements within your images using Pixlr, with a particular focus on the powerful Clone Stamp tool and the intelligent Remove Object Tool. We aim to provide a clear understanding for users of all skill levels, from those needing basic photo touch-ups to advanced users seeking precise manipulation techniques.
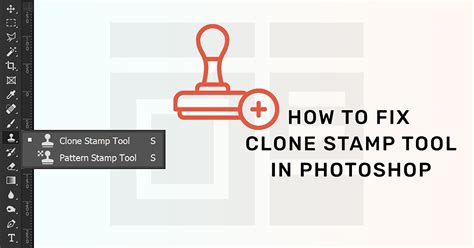
Understanding the Clone Stamp Tool: Precision Copying
The Clone Stamp tool in Pixlr Editor is a fundamental yet incredibly potent instrument for image manipulation. At its core, it performs a simple yet crucial function: it copies image details from one area and allows you to paste those details into another location on the same layer. This capability extends far beyond basic duplication, enabling sophisticated retouching and creative compositing.

How the Clone Stamp Tool Works
To effectively utilize the Clone Stamp tool, it's essential to grasp its operational mechanism. You begin by selecting a source area you wish to copy - this is your "sample point." Once sampled, you can then "paint" this sampled detail onto another part of your image. This allows for the seamless replication of textures, patterns, or even entire objects.
The tool's interface is intuitive. After selecting the Clone Stamp tool, your options will typically appear at the top of your image canvas. To define your sample point, you'll position your pointer over the exact pixels you want to copy. Then, by holding down the Alt key (or the Command key on a Mac), your mouse pointer will transform into a target, indicating that you are ready to pick your source area. A single click at this point samples the pixels beneath your pointer.
Once sampled, you move your brush to the desired destination area. By holding down the mouse button and painting, you'll begin to apply the copied pixels. This process is akin to using a rubber stamp, where the sampled area is repeatedly imprinted wherever you brush.
Advanced Techniques and Options
The power of the Clone Stamp tool is amplified by its brush options. You have access to all the standard brush settings, including size, hardness, opacity, and flow. This allows for a high degree of control over the cloned area. For instance, using a soft-edged brush is often recommended unless you specifically desire a sharp, defined line where the cloning occurs. This helps in creating natural-looking blends, especially when retouching photos or removing blemishes.
You can even leverage custom brushes you've previously created and saved, further expanding the tool's versatility for unique artistic effects.
The "Aligned" Option: A Deeper Dive
One aspect of the Clone Stamp tool that can sometimes cause confusion is the "aligned" option. Understanding its function is key to mastering the tool.
When "aligned" is not selected, your sample point remains fixed at the initial location you chose. This means that every time you use your brush, you are effectively pasting the exact same original area repeatedly. This can be useful for precise, repetitive cloning but can quickly lead to unnatural-looking results if not managed carefully.
Conversely, when "aligned" is selected, the sample point moves relative to your brush strokes. As you paint, the sampling area moves in tandem with your brush. This is incredibly useful for covering larger areas or for creating more organic, flowing cloned sections, as it dynamically re-samples from the source as you move. It's generally the preferred setting for most retouching tasks, as it allows for a more continuous and natural transfer of image data.
Remove objects with the Clone Stamp tool - Pixlr Editor Tutorial
Practical Applications of the Clone Stamp Tool
The Clone Stamp tool is exceptionally versatile and can be applied in numerous scenarios.
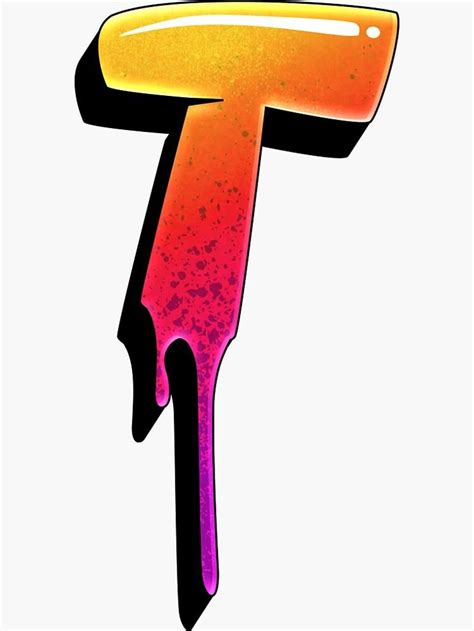
Adding or Duplicating Elements: Imagine you have a design with a specific text element, like the "T" in a graffitied oil drum example. If the background behind the "T" is relatively uniform, you can use the Clone Stamp tool to sample the "T" and then paint it elsewhere, effectively duplicating it. This is ideal for creating repeating patterns or adding symmetrical elements.
Removing Unwanted Objects or Distractions: The Clone Stamp tool is a powerful tool for "erasing" imperfections by painting over them with surrounding pixels. If there's unwanted graffiti on the oil drum, you can sample the background color and texture of the drum and then paint over the graffiti, effectively making it disappear. This is a common technique for cleaning up photographs or removing blemishes.
Natural Blending and Retouching: When manipulating images, natural-looking blends are crucial. The Clone Stamp tool, especially with soft brushes and careful sampling, can be used to smooth out transitions, blend different parts of an image, or cover up areas where elements have been removed or added. This is invaluable for portrait retouching, landscape enhancements, and generally making composite images look more believable.
Restoration Work: For damaged photographs, the Clone Stamp tool is indispensable. It allows you to sample good areas of the image and carefully reconstruct missing or damaged parts, bringing old photos back to life.
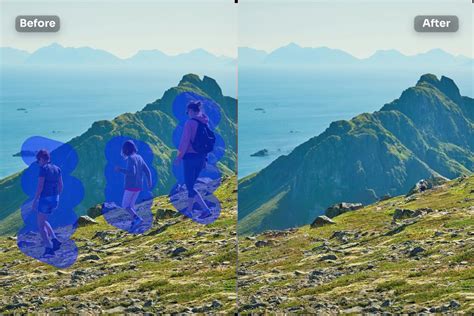
Pixlr's AI-Powered Remove Object Tool: Effortless Object Removal
While the Clone Stamp tool offers granular control, Pixlr also incorporates advanced artificial intelligence to simplify complex tasks. The AI-powered Remove Object Tool is designed to quickly and easily remove unwanted objects or distractions from your photos with minimal effort. This tool is a testament to Pixlr's commitment to making sophisticated editing accessible to everyone, from beginners to seasoned professionals.
How the Remove Object Tool Works
The Remove Object Tool leverages advanced AI algorithms to precisely detect and remove specified objects. The process is remarkably straightforward:
- Select the Tool: Choose the Remove Object Tool from Pixlr's editing options.
- Outline the Object: Use your cursor to draw a rough outline around the object you wish to eliminate. You don't need to be perfectly precise; the AI is designed to intelligently interpret your selection.
- Initiate Removal: Once you've outlined the object, you typically click a "Remove" or "Apply" button.
- Seamless Blending: Pixlr's AI then works its magic. It analyzes the surrounding pixels and seamlessly blends the background to fill the space where the object was, creating a natural-looking result.
Benefits of the Remove Object Tool
- Speed and Efficiency: This tool dramatically reduces the time spent on object removal compared to traditional manual methods, such as meticulous cloning.
- Ease of Use: Its intuitive interface makes it accessible even for users with no prior editing experience.
- Intelligent Background Reconstruction: The AI's ability to analyze and reconstruct the background ensures that the removal is not only clean but also contextually appropriate, maintaining the integrity of the image.
- Versatility: The tool is designed to handle a wide range of objects and backgrounds, from people in the distance to stray items in a product shot.
Supported File Formats
Pixlr's Remove Object Tool, like many of Pixlr's features, supports a wide array of common photo formats. This ensures that you can work with your existing image files without needing to convert them. Supported formats typically include:
- JPG
- PNG
- BMP
- WebP
- TIFF
Once your edits are complete, you can download your enhanced image in various formats, including JPG, PNG, PDF, or WEBP, offering flexibility for different use cases.
Pixlr's Support Ecosystem: Enhancing Your Experience
Beyond its powerful editing tools, Pixlr offers a robust support system to help users maximize their creative potential. Whether you're encountering a specific design problem, seeking inspiration, or looking to learn new techniques, Pixlr provides resources to guide you.
Tutorials and Learning Resources
Pixlr hosts a wealth of tutorials, often presented in "mind-blowingly easy" formats, designed to teach you how to create your best artistic work. These tutorials cover a natural learning curve, ensuring that users can progressively build their skills. For ongoing tips and tricks on designing with Pixlr, following their YouTube channel is highly recommended, as new videos are released weekly, keeping users updated with the latest techniques and features.
Community Interaction
Pixlr fosters a vibrant community where users can connect with fellow Pixlr enthusiasts from around the globe. This platform is an excellent place to:
- Post Questions: Get answers to specific editing challenges or workflow queries.
- Learn Design Tips and Tricks: Share and discover new techniques from other users.
- Discuss Latest Updates: Stay informed about new features and improvements.
- Get Inspiration: See what others are creating and spark your own creativity.
- Report Bugs: Help the Pixlr team identify and fix any issues, contributing to the platform's improvement.
This interactive environment ensures that users are never alone in their editing journey, providing a collaborative space for growth and problem-solving. By combining powerful, intuitive tools with comprehensive learning resources and an active community, Pixlr empowers users to achieve their desired image editing outcomes with confidence and creativity.