Adobe InDesign has long been the industry standard for professional page layout and design. Its robust features allow designers to create everything from single-page flyers to intricate, multi-chapter books. One of InDesign's most powerful tools for managing long-form content is the "Book" feature, which enables users to group multiple InDesign documents into a single project. This tutorial will guide you through the process of creating and managing a book file in InDesign, from setting up individual documents to synchronizing styles and exporting your final publication. We will explore how to structure your project for efficient workflow, maintain consistent formatting across chapters, and handle page numbering and sections effectively.
Understanding the Power of InDesign Book Files
InDesign's Book feature is essentially a collection of individual InDesign documents that are grouped together to form a complete publication. This approach offers significant advantages when working on extensive projects, such as novels, catalogs, or technical manuals.
Instead of managing one massive InDesign file, which can become unwieldy and prone to performance issues, the Book feature allows you to break down your project into smaller, more manageable chapters or sections. These individual documents can then be linked within a single "book" file. This not only makes the editing and organization process much smoother but also unlocks a range of powerful functionalities.
The core benefit of using a book file lies in its ability to share styles, swatches, parent pages, and other design elements across all the documents within the book. This ensures a consistent visual identity throughout your publication. Furthermore, you can sequentially number pages across chapters, print selected documents, or export the entire collection to a PDF. When you create a book file, it appears in the dedicated Book panel, providing a central hub for managing all your linked documents.
When and Why to Utilize a Book File
The decision to use a book file versus a single, large InDesign document depends on the scope and complexity of your project. For shorter documents like brochures or single-chapter articles, a single InDesign file is usually sufficient. However, for projects involving multiple chapters, extensive sections, or repetitive elements, a book file becomes an indispensable tool.
Consider a scenario where you're working on a novel with twenty chapters. Managing all twenty chapters within one InDesign file would be cumbersome. Pages might take longer to load, and navigating through the document could be slow. By using the Book feature, you can create a separate InDesign document for each chapter. These documents are then added to a book file. This division offers several key advantages:
- Improved Performance: Individual documents are smaller and therefore load and process faster, leading to a smoother editing experience.
- Enhanced Collaboration: Multiple individuals can work on different chapters simultaneously, with each person managing their respective InDesign file. This significantly speeds up the production timeline.
- Simplified Organization: Reordering chapters, adding new ones, or removing existing ones becomes a simple drag-and-drop operation within the Book panel.
- Efficient Style Management: A "style source" document can be designated, allowing you to easily synchronize styles, swatches, and master pages across all linked documents, ensuring uniformity.
- Streamlined Export: The entire book can be exported as a single PDF, with sequential page numbering and consistent formatting maintained across all chapters.
- ePub Optimization: For ePub exports, breaking a book into chapters can result in faster loading times for e-readers, as each chapter is loaded independently.
While the Book feature is highly beneficial for print projects, it's important to be aware of its limitations, particularly concerning endnotes. In InDesign's book mode, endnotes can only be placed at the end of each individual document. This can be a drawback for projects that rely heavily on extensive citations, as the placement of endnotes at the end of each section might disrupt the overall narrative flow.
Creating Your First InDesign Book File
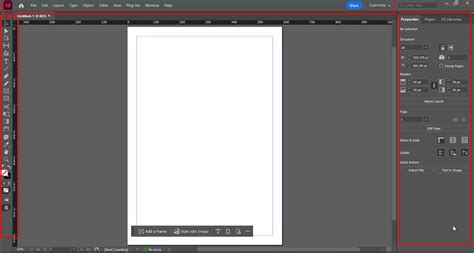
Embarking on the journey of creating an InDesign book file is a straightforward process.
- Initiate a New Book: Open Adobe InDesign. From the Welcome Screen, navigate to the "Create New" list and select "Book." Alternatively, you can go to
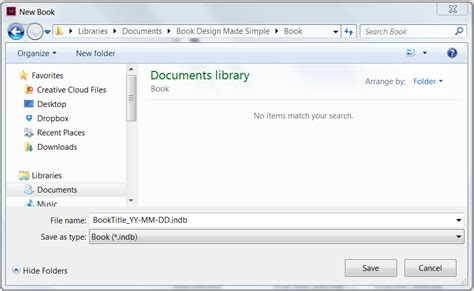
File > New > Book. - Name and Save: You will be prompted to provide a name for your book file and choose a location to save it. Once you click "Save," a small, currently empty Book panel will appear. This panel will serve as your central control for the entire project. The book file will have the
.indbextension.
Structuring Your Book: From Chapters to Master Pages
Before diving into adding documents, it's crucial to consider how your book will be structured. For longer works, dividing the content into chapters is a common and effective approach. Each chapter will typically reside in its own InDesign document.
Designing Your Book's Foundation: Document Setup
The first step in creating the content for your book is to set up the individual InDesign documents that will form its chapters. A good practice is to start with the document that will contain your primary formatting styles.
- New Document Creation: Go to
File > New Document. - Intent and Page Count: Ensure the "Intent" is set to "Print." For the "Number of Pages," you can start with a single page for your style source document, or a more realistic number if you're creating a chapter layout.
- Page Size and Margins:
- Print Size: Select "Custom…" from the "Page Size" dropdown menu to define your book's dimensions.
- Paperback/Softcover: For a typical paperback, you might set a custom page size like 5 x 8 inches. Crucially, pay attention to the margins. The "Inside Margin" (the margin closest to the book's binding) should generally be more generous than the "Outside Margin" to account for the pages being drawn into the binding and the fold.
- Hardback/Hardcover: Hardback books, especially those with stitch binding, may require even more generous inside margins. For perfect-bound hardbacks, an additional 5mm on the inside margin is recommended, regardless of the overall page size.
- Bleed: Include a bleed if any of your pages will have content that extends to the edge of the paper, such as full-page images or colored backgrounds. A standard bleed is 3mm on all sides, but for book printing, you might set
Top 5 mm, Bottom 5 mm, Inside 0 mm, Outside 5 mm. You typically won't need a bleed on the inside edge.

Establishing Consistency with Master Pages
Master Pages are the backbone of consistent design in InDesign. They allow you to create reusable layouts for elements that appear on multiple pages, such as headers, footers, and page numbers.
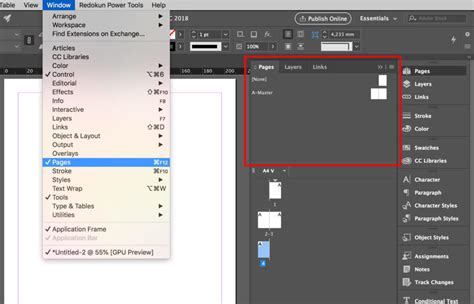
- Open the Pages Panel: Go to
Window > Pages. - Access Master Options: At the top of the Pages panel, you'll see a section for Master Pages, usually starting with "A-Master." Click on the top-right corner of the Pages panel to open its dropdown menu and select "Master Options for A-Master…"
- Define Chapter Start Masters: This Master Page can be designated for pages that begin a new chapter.
- Create Body Masters: For the majority of your book's pages (the body text), you'll need a separate Master Page. To create one, click the top-right corner of the Pages panel again, select "New Master…", set the "Prefix" to "B" and name it "Body â Master."
- Adding Page Numbers: On your "Start of Chapter â Master," use the Type Tool (T) to create a text frame. Position it centrally across the margins of the left-hand page. Choose your desired font (e.g., Fournier Std), size, and set the alignment to "Centered" in the Character Formatting panel. Then, go to
Type > Insert Special Characters > Markers > Current Page Number. This inserts a dynamic page number glyph. Copy and paste this text frame to create a second page number frame for the right-hand page. - Incorporating Running Headers: For running headers, create two new text frames on your Master Page using the Type Tool (T). Place these at the top of the left and right pages, applying the same formatting as your page numbers.
- Using Guides: You can pull down Guides from the Rulers (
View > Show Rulers) onto your Master Pages to mark where text frames for chapter titles or other elements should be placed.
Managing Page and Section Numbering
Accurate page and section numbering is crucial for any book. InDesign provides robust tools to manage this, allowing for both simple sequential numbering and more complex section-based numbering.
Implementing Section Numbering
You can define how pages, chapters, and paragraphs are numbered within your book. Each document within a book file can have its own numbering settings.
- Access Numbering Options: In the Pages panel, select the page you want to start a new section from (e.g., Page 1). Click the top-right corner of the Pages panel and select "Numbering & Section Options…"
- Configure Section Start: In the "Numbering & Section Options" dialog box, check the "Start Page Numbering at:" box and set the desired starting number (e.g., 1).
- Choose Numbering Style: Under "Style," select your preferred numbering format from the dropdown menu (e.g.,
i, ii, iii, iv...for Roman numerals, or1, 2, 3, 4...for Arabic numerals). - Repeat for New Sections: To create subsequent sections, repeat this process for the first page of each new section. For instance, if you want your first 12 pages to be in Roman numerals and then switch to Arabic numerals starting from page 13 (which might be the start of Chapter 1), you would set the Roman numeral section to start at
iand end at page 12, then on the page that begins Chapter 1, you would set the Arabic numeral section to start at1.
By default, InDesign automatically updates page and section numbering in the Book panel when you add, remove, or reorder documents. If the numbering appears incorrect after an update, check your "General preferences" to ensure that "Absolute Numbers" are not being displayed instead of "Section Numbers."
If a document is missing or cannot be opened, the page range in the Book panel will display as "?", indicating that the true page range is unknown. It's essential to resolve missing documents before updating numbering to ensure accuracy.
Adding and Managing Documents in Your Book
Once your initial book file and individual chapter documents are set up, you can begin populating your book.
Adding Documents
- Open the Book File: If your Book panel isn't already open, navigate to
File > Openand select your.indbfile. - Add Document: Click the "+" icon at the bottom of the Book panel. This will open a dialog box where you can navigate to and select the InDesign documents you wish to add. Click "Open."
- Drag and Drop: You can also drag and drop InDesign documents directly from your file explorer into the Book panel.
Organizing Your Book
The Book panel allows for easy rearrangement of your documents. Simply click and drag a document name to a new position in the list to reorder chapters or sections.
Opening and Editing Documents
To open an individual document from the Book panel for editing, simply double-click on its name. The document will open in its own InDesign window.
Removing and Replacing Documents
- Remove: To remove a document from the book, select its name in the Book panel and click the "-" icon at the bottom.
- Replace: To replace an existing document with a new one, select the document you wish to replace, then click the "Replace Document" icon (an upward-pointing arrow) at the top of the Book panel. Navigate to and select the new document.
Synchronizing Styles and Master Pages
One of the most powerful features of InDesign's Book functionality is its ability to synchronize styles, swatches, parent pages, and other elements across all linked documents. This ensures a consistent look and feel throughout your publication.
The Role of the Style Source
When you create a book file, one of the documents is designated as the "style source." By default, this is the first document added to the book. This document acts as the master for all shared elements. You can change the style source at any time.
The Synchronization Process
Synchronization is key to maintaining uniformity. When you synchronize, InDesign checks the elements in the style source document against the other documents in the book.
- Close All Documents: Before synchronizing, it is crucial to close all the individual InDesign documents within the book.
- Select the Style Source: In the Book panel, click the empty box next to the document you want to designate as the style source. A small icon will appear, indicating it's the selected source.
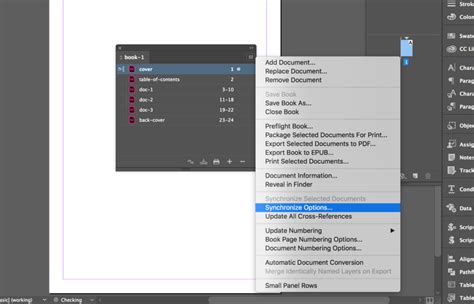
- Initiate Synchronization: Click the "Synchronize" icon (a circular arrow) at the bottom of the Book panel. InDesign will then automatically open each document, apply the synchronized elements, save the changes, and close the document.
Synchronizing Specific Elements
You can control which elements are synchronized by clicking the "Synchronize Options" icon (a gear or settings icon) in the top-right corner of the Book panel, or by holding down the Alt (Windows) or Option (Mac) key while clicking the Synchronize button. This allows you to choose whether to synchronize:
- Styles: Paragraph styles, character styles, object styles, table styles, cell styles.
- Swatches: Colors and gradients.
- Parent Pages: Master pages.
- Variables: Document variables.
- Presets: Print presets.
- Cross-Reference Formats: Formats for cross-references.
- Conditional Text Settings: Settings for conditional text.
- Numbered Lists: Settings for automatic numbering.
If items from the style source are not found in the documents being synchronized, they are added. Conversely, if a style exists in a document but not in the style source, it will be removed during synchronization unless it's part of a style group that is synchronized.
Synchronizing Parent Pages
Parent pages are synchronized in a similar fashion to other elements. Parent pages with the same name (e.g., "A-Parent") as those in the style source will be replaced. This is particularly useful for documents that share common design elements like running headers and footers.
Important Note: Any parent page items that are overridden on document pages after you synchronize parents for the first time will become detached from the parent. Therefore, it's highly recommended to synchronize parent pages at the beginning of your design process and to use only one consistent style source for this purpose. Synchronizing from different style sources can lead to unexpected detaching of overridden parent page items.
Creating a Book Cover and Interior Pages Template
When designing a book, it's often beneficial to create templates for both the cover and the interior pages. This ensures a cohesive design language from the very first page to the last.
Interior Page Template
As outlined in the "Designing Your Book's Foundation" section, setting up your document dimensions, margins, and bleed is the first step. Then, creating and applying Master Pages with elements like page numbers and running headers establishes your basic interior page template. You can then use the first chapter as a model, applying your defined styles and master pages.
Book Cover Template
Creating a book cover involves setting up a document that accommodates the front cover, spine, and back cover.
- Document Setup: Create a new InDesign document. Set the Width and Height according to your desired book dimensions (e.g., 5 inches wide by 8 inches high). Crucially, set the "Number of Pages" to 3.
- Spine Width: The middle page (Page 2) will serve as the book's spine. Its width will depend on the total page count and paper stock thickness of your book. You'll need to calculate this based on your printer's specifications.
- Adding Artwork: Use the Rectangle Frame Tool (F) to create image frames for your cover artwork. You can also add text frames for the title, author's name, and publisher.
- Applying Effects: InDesign's Effects panel (
Object > Effects > Transparency) can be used to create sophisticated visual treatments, such as gradient fades for background elements. - "Fake" Bleed: To ensure edge-to-edge content on your cover, extend all background elements across the edges of all three pages (front cover, spine, and back cover) to create a "fake" bleed. This ensures that when the pages are trimmed, there are no unprinted white edges.
- Layers: Utilize layers effectively to organize different elements of your cover, such as background images, text, and optional elements like barcodes.
Exporting Your Book
Once your book is complete and meticulously checked, the final step is to export it into a distributable format, typically PDF for print.
- Export Command: Go to
File > Export. - Format Selection: Choose "Adobe PDF (Print)" from the "Format" dropdown menu.
- Save and Configure: Select a location and filename for your PDF. In the subsequent PDF export dialog box, you can configure various settings, such as compression, marks and bleeds, and color management, to meet your printer's specifications.
It's often a good practice to export your cover and interior pages as separate PDF files, especially if they have different bleed or trim requirements.
HOW TO LAYOUT YOUR BOOK IN INDESIGN!
Conclusion
The InDesign Book feature is an indispensable tool for anyone working on multi-part publications. By understanding how to create, manage, and synchronize documents within a book file, you can streamline your workflow, maintain design consistency, and produce professional-quality books with greater efficiency. From setting up individual chapter documents and mastering page numbering to synchronizing styles and exporting your final project, InDesign provides a comprehensive environment for bringing your literary creations to life.