Clip Studio Paint (CSP) offers a robust set of tools for managing your canvas, including precise methods for cropping and resizing. While the concept of "cropping" might seem straightforward, CSP approaches it by altering the canvas dimensions rather than directly cutting away parts of an image. This distinction is crucial for understanding how to effectively manipulate your artwork's boundaries. Whether you're importing photos, adjusting an existing illustration, or preparing a piece for a specific output, mastering canvas manipulation is a fundamental skill. This guide will walk you through the various methods and considerations for cropping and resizing in CSP, ensuring a clean and efficient workflow.
Understanding Canvas Manipulation in Clip Studio Paint
Unlike some other applications where "cropping" implies discarding parts of an image, in Clip Studio Paint, the process is centered around modifying the canvas itself. This means that even when you shrink the canvas, the original artwork is not permanently deleted; it simply becomes a window into a potentially larger drawing. This non-destructive approach offers flexibility, allowing you to expand the canvas later if needed, without losing previously created elements.
Cropping via Canvas Size Adjustment
The primary method for "cropping" in Clip Studio Paint involves adjusting the canvas size. This is achieved through the "Change Canvas Size" function, accessible via the Edit menu.
When you choose Edit > Change Canvas Size, a dialog box appears, presenting fields for Width and Height. To crop, you will reduce these numerical values. The crucial element here is the reference point, often referred to as an anchor point in other software. By default, this is set to the center of the canvas.
Imagine your canvas as a piece of paper pinned down at a specific point. When you reduce the width, half of the reduction is taken from the left side and half from the right, relative to the reference point. If the reference point is in the center, the canvas shrinks symmetrically.
To achieve a crop that removes content from only one side, you need to reposition the reference point. The dialog box typically displays a 3x3 grid, representing different anchor points. If you want to remove, for example, 100 pixels from the left side of the canvas, you would set the reference point to the right side of this grid. This effectively "pins" the canvas on the right, and the reduction in width is then applied to the left. Conversely, if you increase a dimension, new pixels are added to the side opposite the reference point.
As you input new numerical values for width and height, Clip Studio Paint provides immediate visual feedback. The software highlights the new canvas dimensions in real-time, allowing you to see the effect of your changes with each keystroke. This dynamic preview is incredibly helpful for visualizing the outcome before committing to the adjustment, especially when you're still estimating the precise dimensions required.
Utilizing the Slider and Incremental Adjustments
For those who prefer a more visual approach than typing numbers, the "Change Canvas Size" dialog also offers alternative input methods. To the right of the Width and Height fields, you'll find chevrons. Clicking these chevrons reveals a slider.
This slider allows for direct manipulation of the canvas dimensions. As you drag the slider, the highlighted canvas area updates instantly. While this can be intuitive, the slider's sensitivity can be a challenge. Even slight movements can result in significant changes to the canvas size, especially if you are working with smaller dimensions. The slider's maximum range extends to 50,000 pixels in either direction, which can be overwhelming if your artwork is significantly smaller.
More precise control is available through further chevrons located next to the slider. Single chevrons allow for pixel-by-pixel adjustments, while double chevrons enable increments of 100 pixels. These incremental controls offer a good balance between visual guidance and numerical accuracy, making them useful for fine-tuning the canvas boundaries.
Alternative Cropping Methods: Selection Tools
While adjusting canvas size is the primary method for definitive cropping, selection tools offer a way to isolate and extract specific portions of an image, which can then be used in various ways. This method is closer to the traditional "cropping" experience found in other applications.
Using the Lasso Tool
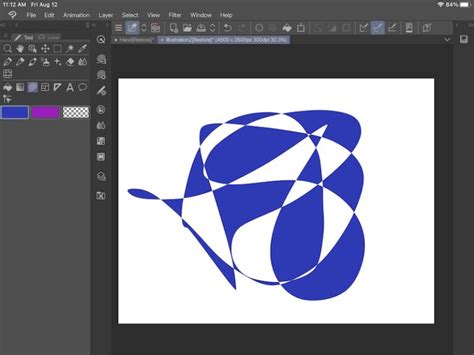
The Lasso tool is ideal for freehand selections. You can draw an irregular shape around the area of the photo or illustration you wish to keep.
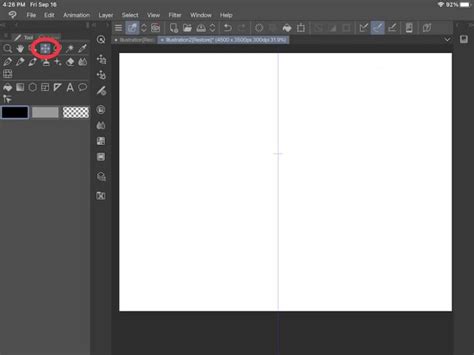
- Select the Lasso Tool: Locate the Lasso tool in the tool palette, typically on the left side of your screen. It is often represented by a dashed line forming a square or a freehand shape.
- Draw Your Selection: Click and drag to draw a selection around the desired area. For a clean crop, try to be as precise as possible.
- Invert Selection and Erase: Once your selection is made, you can invert it (
Select > Invert SelectionorCtrl+Shift+I/Cmd+Shift+I). This selects everything outside your initial lasso. Then, you can simply press theDeletekey or use an eraser tool to remove the unwanted parts. - Alternatively, Cut and Paste: Instead of inverting and erasing, you can "cut" the selected area (
Edit > CutorCtrl+X/Cmd+X). This removes the selected portion from its current layer. You can then paste it into a new layer or a new document (Edit > PasteorCtrl+V/Cmd+V). This effectively isolates the cropped portion.
Using the Magic Wand Tool
The Magic Wand tool is excellent for selecting areas with distinct edges or solid colors.
- Select the Magic Wand Tool: Find the Magic Wand tool in the tool palette.
- Click on the Area: Click on the area you want to select. The tool will select contiguous pixels of similar color. You may need to adjust the tool's tolerance settings in the Tool Options to achieve the desired selection.
- Refine and Cut/Copy: Similar to the Lasso tool, once you have your selection, you can invert it and erase, or cut/copy the selected area to paste elsewhere.

Advanced Cropping and Canvas Management Features
Clip Studio Paint boasts a wealth of features that enhance the drawing and editing experience, many of which indirectly relate to or can be used in conjunction with canvas manipulation. While not direct cropping tools, understanding these can streamline your workflow.
- Crop / Extend Canvas (Ver. 2.0): This feature, introduced in version 2.0, offers a more direct and visual way to crop and extend the canvas. It allows you to draw a rectangle directly on your canvas to define the new boundaries, simplifying the process of resizing.
- Filters for Lens Distortion: Tools like
Fisheye perspective rulerand various lens distortion filters can be used creatively to manipulate perspective and form, which might influence how you decide to crop or resize your canvas. - Quick Filters and Quick Effects: These provide rapid application of various image adjustments and effects. While not cropping tools themselves, they can be used on isolated selections or entire layers before or after canvas manipulation.
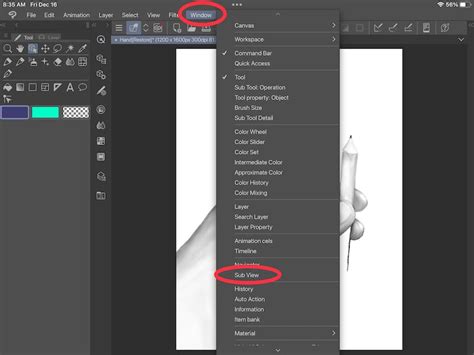
- Layer Comps Palette: This palette (
Window > Layer Comps) allows you to save different states of your layers, including visibility, position, and opacity. This is invaluable for experimenting with different compositions or variations of your artwork, which might involve different cropping strategies. You can also batch export layer comp settings, useful for preparing multiple versions of an image. - Batch Export Layer Comp Settings: This feature allows you to export multiple versions of your artwork based on saved layer compositions, which can be useful if you're experimenting with different aspect ratios or crops for various platforms.
Integrating with Other Tools for Enhanced Results
The power of Clip Studio Paint lies in its integrated toolset. When approaching tasks like cropping, consider how other features can assist:
- Smart Shape Tool: For geometric selections or guides that can inform your cropping decisions.
- Paint on 3D Models / 3D Object Material Registration: If you're working with 3D assets, you might crop or resize your canvas to best fit the rendered output of those models.
- POSEMANIACS Integration / Hand Pose Scanner / 3D Hand Model / 3D Head Model: These tools are crucial for character artists. When incorporating posed 3D models, you might crop your canvas to focus on specific poses or character elements.
- Realistic Mixing / Color Match: These color-related tools can be used to ensure that any imported photos or elements you crop into your artwork blend seamlessly with your existing palette.
- Shading Assist: This feature can help generate shading based on existing lines, which might be applied to cropped sections of an image.
The ULTIMATE Guide To 3D Models | In Clip Studio Paint
Beyond Basic Cropping: Canvas Management for Workflow
Clip Studio Paint offers features that enhance the overall creative process, which indirectly support effective canvas management:
- Save Recovery Data for Every Operation: This safety net ensures that even if you make a mistake during canvas resizing or cropping, you can revert to a previous state.
- Record Daily Creative Hours: While not directly related to cropping, tracking your time can help you understand how much time is spent on different aspects of your workflow, including image preparation.
- Compatible with CLIP STUDIO TABMATE 2: This accessory can provide shortcuts for various functions, potentially including canvas manipulation tools, speeding up your workflow.
- Audio Scrubbing: While primarily for animation, audio scrubbing can be a part of a larger multimedia project where canvas dimensions are critical for integrating different media types.
By understanding that Clip Studio Paint treats "cropping" as canvas resizing, and by utilizing the various selection and adjustment tools, you can achieve precise and efficient results. The key is to experiment with the Change Canvas Size function, paying close attention to the reference point, and to leverage selection tools for isolating specific areas when needed. The continuous evolution of Clip Studio Paint, with features like the 2.0 Crop / Extend canvas tool, further refines these capabilities, making it a powerful environment for artists of all levels.