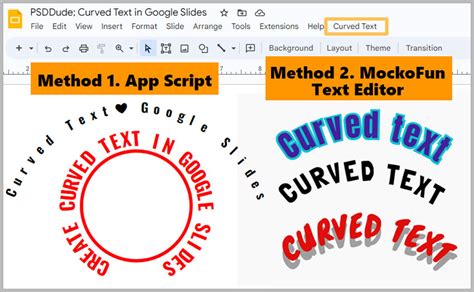
Google Drawings, often overshadowed by its more robust sibling, Google Slides, possesses a hidden gem for creative text manipulation: the ability to curve text. While not as straightforward as a dedicated text-bending tool, Google Drawings offers a surprisingly flexible approach to altering linear shapes and symbols into aesthetically pleasing curves. This capability can significantly elevate your designs, from crafting unique logos to adding dynamic flair to presentations and infographics. This article will guide you through the process, exploring the nuances of the curve tool and how to integrate these visually appealing text effects into your projects.
Unveiling the Curve Tool in Google Drawings
At its core, Google Drawings is a canvas for visual creation, and its line tools are central to this. To begin manipulating text into a curved form, you first need to understand how to insert and modify lines. The process starts with locating the "Insert" button, a prominent feature on the toolbar. Hovering your mouse over this button reveals a dropdown menu, offering various shape and line options.
For the purpose of creating curved text, the "Curve Line" is your primary tool. To access it, navigate to "Insert," then select "Line," which will present another submenu. Within this submenu, you will find the "Curve Line" option. Selecting this tool transforms your cursor into a crosshair symbol, indicating that you are ready to draw on your canvas.
The "Curve Line" tool operates by allowing you to click and drag to create points, which then connect to form a line. Each click creates a new point, and the line segment between points can be manipulated. By strategically placing and adjusting these points, you can sculpt the line into virtually any curved shape imaginable. This foundational understanding is crucial, as we will later adapt this line-drawing technique to incorporate text.
Incorporating Text with the Curve Tool: A Step-by-Step Approach
While Google Drawings doesn't have a direct "curve text" button, it provides a workaround that leverages the "Curve Line" tool. The strategy involves creating the desired curve first and then placing text along that path.
Insert a Curve Line: As described above, navigate to "Insert" > "Line" > "Curve Line." Click and drag on your canvas to create a curved path that approximates the shape you want your text to follow. Don't worry about perfection at this stage; you can adjust the curve later.
Add Text: Once your curve is in place, select the "Text box" tool from the toolbar. Click and drag on your canvas to create a text box. Type the text you wish to curve into this text box.
Positioning and Alignment: Now comes the delicate part. You need to position the text box so that its text appears to be following the curve you've drawn. This often involves trial and error. You might need to resize the text box and the text itself to ensure it fits neatly along the curve. Experiment with aligning the text to the start or end of the curve.
Coloring and Styling: To enhance the visual appeal, you can add color to your curve line shape. Locate the "Fill Color" option, usually represented by a paint bucket icon, and choose your preferred hue. You can also adjust the thickness and style of the line using the "Border weight" and "Border color" options.
Advanced Techniques and Workarounds for Curved Text
While the direct "Curve Line" method provides a manual way to achieve curved text, there are other, often more efficient, approaches, especially when integrating with other Google Workspace applications like Google Slides.
Leveraging WordArt and Google Drawings for Google Slides
Google Slides, much like Google Drawings, lacks a native feature to directly curve text. However, a common and effective workaround involves using WordArt in conjunction with Google Drawings.
Create WordArt: Within Google Slides, go to "Insert" > "Word art." A box will appear, prompting you to type your desired text. Enter your text and press 'Enter'. This creates a stylized text element.
Copy WordArt: Select the WordArt text you just created and copy it.
Paste into Google Drawings: Open a new tab in your browser and navigate to Google Drawings. Paste the copied WordArt text into the Google Drawings canvas.
Curve the Text: Now, you can employ the "Curve Line" tool in Google Drawings to create a curved path. Then, position your pasted WordArt text to follow this curve. You can also use the "Size & Rotation" settings to subtly manipulate the text's orientation to better fit the curve.
Copy Back to Slides: Once you are satisfied with the curved text in Google Drawings, copy it and paste it back into your Google Slides presentation. You can then resize and position it as needed.
It's important to note that when you paste WordArt from Google Slides into Google Drawings and then back, the text might not remain fully editable in its original WordArt format within Slides. You might need to treat it as an image or a group of shapes.
Utilizing External Design Tools
For more sophisticated curved text effects, external design tools offer a plethora of options. Platforms like Canva are exceptionally user-friendly and provide dedicated features for creating curved text.
Start a New Design in Canva: Open Canva and create a new design. You can choose a template or start with a blank canvas.
Find Curved Text Templates: Search the template library for "Curved Text" to discover pre-designed elements or styles.
Design Your Text: Alternatively, select the "Text" option and type your desired text. Then, look for an "Effects" or "Transform" option, which typically includes a slider or input field to control the curvature.
Download and Insert: Once you have designed your curved text, download it as an image (PNG or JPG) and then insert it into your Google Drawings or Google Slides presentation.
How to make curved text in Canva
While this method is often the easiest for achieving professional-looking curved text, it does involve using a third-party tool and requires importing an image, which means the text will not be directly editable within Google's suite.
Formatting Limitations and Best Practices
When employing these techniques, particularly the workarounds, it's crucial to be aware of potential formatting limitations. As mentioned, text pasted from external tools or manipulated extensively might lose its direct editability.
Key considerations for using curved text effectively:
- Readability: While curved text can add visual interest, excessively extreme curves can significantly hinder readability. Always prioritize clarity. Ensure the text remains legible from a reasonable viewing distance.
- Presentation Style: Consider the overall tone and style of your presentation or design. Curved text can lend a playful, creative, or dynamic feel. However, it might be out of place in a formal, minimalist, or highly technical document.
- Judicious Use: Like any design element, curved text can lose its impact if overused. Employ it strategically to highlight key phrases, titles, or elements that benefit from a unique aesthetic. Sparingly used, it can draw attention; overused, it can become distracting.
- Experimentation: Don't be afraid to experiment with different degrees of curvature, font choices, and color combinations. What works for one design might not work for another.
Beyond Text: Curving Shapes and Symbols
The "Curve Line" tool in Google Drawings isn't limited to text. It's a powerful instrument for altering any linear shape or symbol into a curved aesthetic. This opens up a world of possibilities for logo design, custom icons, and unique graphic elements. You can insert basic shapes, convert them to editable paths, and then use the curve tool to mold them into entirely new forms. This flexibility allows for a high degree of customization, enabling you to create visuals that are truly one-of-a-kind.
Google Drawings, therefore, serves as a foundational tool for those looking to add a touch of artistic flair to their digital creations. By mastering the curve tool and understanding the available workarounds, you can transform static text and shapes into dynamic, eye-catching elements that enhance the overall impact of your projects. The key lies in understanding the tool's capabilities and limitations, and applying them thoughtfully to achieve your desired visual outcome.