While Apple's Pages application is a powerful tool for document creation and layout, it notably lacks a direct feature for curving text or placing it along a path. This limitation can be a significant hurdle for designers and users who wish to incorporate dynamic text elements into their projects, such as placing text around the circumference of a circle or following a custom curve. Despite this absence, various workarounds and external solutions exist, offering creative avenues to achieve the desired curved text effects.
The Core Limitation: Pages' Text Handling
Pages, at its core, is designed for straightforward text flow and object manipulation. Its text boxes and frames are primarily intended for linear text entry and arrangement. The application does offer features like text wrap, which allows text to flow around shapes, and the ability to place text within shapes. However, these functionalities do not extend to bending text itself to conform to a specific curve or path. This is a fundamental design choice within Pages, and unlike some more advanced graphic design software, it does not provide a built-in "text on a path" tool.
One common frustration arises when users attempt to group a curved line with text. While Pages allows for the creation of curved lines and the insertion of text, once these elements are grouped, the text can become difficult or impossible to move in conjunction with the diagram or shape it is intended to complement. This renders the curved line feature, in this context, somewhat less useful for integrated design elements.
External Graphics Applications: The Primary Solution
The most effective and widely recommended method for achieving curved text in Pages is to utilize external graphics applications that possess this functionality. These applications are specifically designed for more intricate graphic design tasks and offer robust tools for manipulating text.
Popular External Tools for Curved Text:
Affinity Designer 2: This professional-grade vector graphics editor is frequently cited as a capable solution. It allows users to precisely control text placement and curvature, making it ideal for creating text that follows custom paths, including the circumference of a circle. Many tutorials are available on YouTube demonstrating how to achieve this specific effect within Affinity Designer 2. The user experience often involves creating the text path and then flowing the text along it, offering a high degree of control.
How to Curve Text Affinity Designer 2
GIMP (GNU Image Manipulation Program): As a free and open-source raster graphics editor, GIMP offers a powerful suite of tools for image manipulation and graphic design. It supports the concept of "text on a path," enabling users to draw a path and then have text follow that path. While it might have a steeper learning curve for beginners compared to some commercial alternatives, its capabilities are extensive and it remains a viable free option.
Pixelmator: This powerful image editor for macOS and iOS provides a range of tools that can be leveraged for graphic design tasks. While not its primary focus, it offers features that can be adapted to create curved text effects, often through a combination of path tools and text manipulation.
Adobe Photoshop CC: With its advanced features, Photoshop CC can also be used for curving text. Notably, Photoshop CC has the capability to import 3D files. This opens up a workflow where text and surfaces are bent in a 3D program and then imported into Photoshop for further refinement, including adjustments to lighting, viewing angles, and surface imagery. This 3D approach is particularly useful when experimenting with different views or generating multiple projections quickly, as it bypasses the need to manually bend flat text repeatedly.
The general workflow when using these external applications involves:
- Creating the desired curved path or shape.
- Using the application's text tool to place text along that path.
- Fine-tuning the text's position, spacing, and style.
- Exporting the curved text as an image file (e.g., PNG, JPG) or a vector graphic (e.g., SVG).
- Importing this graphic into Pages to be placed within the document.
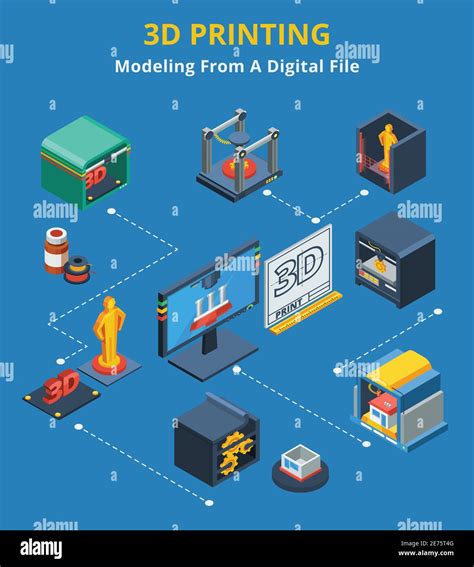
The 3D Modeling Approach: Advanced Bending
For highly stylized or complex curved text effects, a 3D modeling approach can be exceptionally effective. This method doesn't necessarily require modeling the entire scene in 3D. Instead, the focus is on creating the 3D surfaces onto which flat images and text can be placed.
The process typically involves:
- Creating a 3D Surface: Using a 3D modeling program, a suitable surface is designed to achieve the desired bend or curvature. This surface acts as a canvas for the text.
- Applying Text and Images: The text and any associated images are then applied to this 3D surface. The key is that the text and images themselves can remain entirely flat.
- Bending via 3D Program: The 3D software then handles the bending of the surface, and consequently, the text and images placed upon it, into the desired three-dimensional form.
- Importing into Graphics Software: Once the 3D scene is set up and the desired view is achieved, it can be exported and imported into applications like Photoshop CC.
- Refinement in Photoshop: Within Photoshop, further adjustments can be made to the lighting, viewing angle, and even the surface image itself. This allows for extensive experimentation and fine-tuning of the final visual output before it is incorporated into a Pages document.
This 3D workflow is particularly advantageous when rapid iteration and exploration of different visual perspectives are required. It leverages the power of 3D rendering to achieve complex distortions that would be exceedingly difficult, if not impossible, to replicate with traditional 2D graphic design tools alone.
Workarounds Within Pages: Limited but Possible
While Pages lacks a direct "text on a path" feature, some users have devised creative, albeit often time-consuming, workarounds for smaller text elements.
Manual Arrangement of Individual Letters:
One suggested method involves drawing individual letters using Pages' shape tools or by using favorite fonts. These letters can then be copied and pasted as objects. By carefully arranging these individual letter objects in a curving line, a curved text effect can be simulated. This approach is described as time-consuming but can be effective for short pieces of text, such as an address. It also allows for complete control over font choice and styling. This method requires meticulous placement and alignment of each letter to achieve a smooth curve.
Using Comic Life: An Alternative Application
Another discovered method involves using an application called "Comic Life." This software is designed for creating comic-style layouts and often includes features that facilitate text manipulation, potentially including curved text. By creating the curved text in Comic Life and then exporting it as an image, it can be imported into Pages. This highlights how leveraging specialized applications, even those outside the typical graphic design sphere, can offer unique solutions.
Understanding Text Wrap and Shape Integration
Pages' "Text Wrap" feature is often misunderstood or misused when users are trying to achieve curved text. Text wrap dictates how the surrounding text in a document flows around an object or shape. It does not, however, affect the text within or attached to that object.
When a user states, "I can't think of any easy way to do that [turn off Text Wrap for the entire document]," it often stems from confusion about how text wrap interacts with anchored objects or text within frames. In typical page layout scenarios, body text is often managed separately from text placed in specific boxes or frames for design purposes. If the primary goal is to have text within shapes or flowing in specific, non-linear ways, the body text might be disabled or managed differently.
The process of pasting text into a shape and having it appear "neatly formatted within the shape" requires direct interaction. If text appears in its own text box above the shape, it indicates that the text was not pasted directly into the shape. The correct procedure is usually to:
- Select the shape.
- Double-click inside the shape to activate the text insertion point.
- Paste the text.
If pasting doesn't work as expected, typing directly into the shape after double-clicking is often a more reliable method.
Conclusion: Embracing External Tools for Curved Text
In summary, while Pages offers a user-friendly environment for many document creation tasks, the ability to curve text is a notable omission. Users seeking this functionality must look to external graphics applications. Tools like Affinity Designer 2, GIMP, Pixelmator, and even advanced workflows involving 3D modeling and Photoshop provide robust solutions. For simpler needs, manual arrangement of individual letters can serve as a workaround, though it is labor-intensive. Understanding the limitations of Pages' text wrap and shape integration is also crucial when troubleshooting text placement issues. Ultimately, the most effective path to achieving sophisticated curved text in conjunction with Pages involves leveraging the specialized capabilities of other software and then importing the finished graphic elements.