In the dynamic and often intricate world of digital art and photo manipulation, the ability to correct mistakes or revisit previous creative decisions is paramount. Adobe Photoshop, a powerhouse in image editing, provides a robust system of undo and redo functionalities that act as a crucial safety net for users. Whether you're a beginner navigating your first edits or a seasoned professional pushing the boundaries of creative expression, understanding these commands can significantly enhance your workflow, boost confidence, and ultimately lead to more polished and successful projects. From simple keystrokes to advanced panel management and non-destructive editing techniques, Photoshop offers a layered approach to managing your creative journey.
The Fundamentals: Basic Undo and Redo Shortcuts
At its core, undoing an action in Photoshop is as straightforward as a simple keyboard command. This fundamental shortcut is designed to be your immediate recourse when an edit doesn't align with your vision or was made in error.
To undo your last action, simply press Ctrl + Z on Windows or Command + Z on macOS. This command instantly reverts the most recent change made to your image. It's a quick and intuitive way to step back from a decision, allowing for immediate correction without disrupting your flow.
If, after undoing an action, you decide that the undone change was, in fact, desirable, or if you simply wish to reapply what you just reversed, Photoshop also provides a redo command. To reapply the last undone action, use Shift + Ctrl + Z on Windows or Shift + Command + Z on macOS. This allows for seamless toggling between states, enabling you to experiment freely with different options.
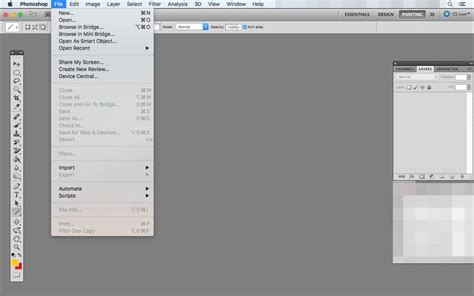
These basic shortcuts are not exclusive to the keyboard; they are also accessible through the application's menu bar, offering an alternative for those who prefer visual navigation. By navigating to Edit > Undo, you can achieve the same result as Ctrl+Z. Similarly, Edit > Redo mirrors the Shift+Ctrl+Z shortcut. While the menu options are readily available, mastering the keyboard shortcuts is highly recommended for maximizing efficiency, especially during intensive editing sessions where every second counts.
Stepping Back: Multiple Undos and Toggle Last State
While the basic undo command is invaluable for single-step corrections, Photoshop's capabilities extend to managing a sequence of edits. Continuing to press Ctrl + Z (or Command + Z) will allow you to step backward through multiple previous actions, effectively retracing your steps chronologically. This feature is essential when you need to revert a series of adjustments or correct a mistake that was made several operations ago.
For users who appreciate a quick way to compare the immediate impact of their last action, Photoshop offers a "Toggle Last State" function. This command allows you to quickly evaluate the effect of the last change you made on the overall image. While this could be accomplished by alternating between Undo and Redo, a slightly simpler and more direct method exists. Using the keyboard shortcut Ctrl + Alt + Z on Windows or Command + Option + Z on macOS, you can toggle the last change on and off. This is particularly useful for making a rapid assessment of a recent modification without committing to a permanent undo.

Legacy Undo Functionality: A Nod to the Past
Photoshop's evolution has seen changes in its core functionalities, including the undo command. For long-time users familiar with earlier versions of Photoshop, there's an option to revert to the "Legacy Undo Mode." Prior to Photoshop CC version 20.0 (released in late 2018), the primary Undo command functioned similarly to the current "Toggle Last State" feature. In those older versions, stepping backward through multiple history states was a separate command.
If you prefer this older behavior, you can enable "Legacy Undo Shortcuts." To do this, navigate to Edit > Keyboard Shortcuts. Within the dialog box that appears, select the option to "Use Legacy Undo Shortcuts." After enabling this preference, you will need to restart Photoshop for the changes to take effect. With legacy undo shortcuts turned on, Command/Control + Z will now toggle the last change you made on and off. The "Step Backward" function, which allows you to move through multiple history states, is then accessed using Alt + Control + Z (Windows) or Command + Option + Z (Mac). This option provides a comfortable transition for users accustomed to the previous undo paradigm, ensuring that their established workflows remain intact.
The Power of the History Panel
When the need arises to undo more than just the last few actions, the History Panel becomes an indispensable tool. Accessible via Window > History, this panel provides a chronological log of every significant action performed during your current editing session.
As you edit your image, each distinct change-such as applying a filter, adjusting colors, or using a brush tool-is recorded as a "history state." By simply clicking on any of these recorded states within the History Panel, you can instantly revert your image to how it looked at that precise moment. This is significantly more efficient than repeatedly pressing Ctrl+Z when you need to go back many steps.
Beyond its primary function of undoing multiple changes, the History Panel offers additional powerful features. You can create "snapshots" of your image at specific points in time. By clicking the camera icon at the bottom of the History Panel, you create a bookmark for a particular editing state. These snapshots appear at the top of the panel and allow you to quickly jump back to a saved point, even if it's far down your editing timeline. Creating snapshots before undertaking complex or experimental multi-step modifications provides a robust safety net, allowing for easy reversion if the results are not satisfactory. Furthermore, creating multiple snapshots enables a fast and effective way to compare different versions or stages of your edit.
It is crucial to understand that history states and snapshots are stored in Photoshop's working memory (RAM) and are not saved with the image file itself. Once you close an image or shut down Photoshop, these states are lost, and the ability to undo previous changes disappears. This underscores the importance of adopting non-destructive editing practices, which will be discussed later.
By default, the History Panel is configured to record a set number of history states. This count can be adjusted in Edit > Preferences > Performance, under the "History States" module. While increasing this number allows for a longer undo history, it can also impact Photoshop's performance, especially on older or less powerful machines. Conversely, on slower systems, reducing the number of history states can help improve overall responsiveness. Finding a balance between a sufficient undo history and optimal performance is key.
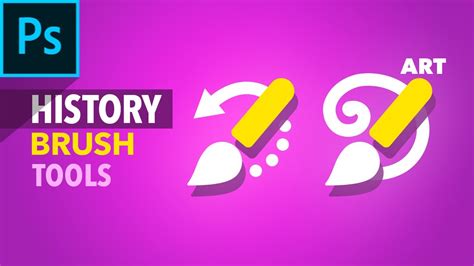
The History Brush: Selective Undoing
The History Brush tool offers a more granular approach to undoing changes, allowing you to apply past states to specific areas of your image. Imagine you've applied an adjustment that affects the entire image, but you only want to reverse its effect in a particular region, such as a brightly lit sky or a detailed texture. The History Brush is the perfect tool for this task.
To use the History Brush, you first need to designate the history state to which you want to revert. In the History Panel, to the left of each history state, there is a small box. Click in this box next to the desired state; a brush icon will appear, indicating that this is the state the History Brush will paint back. Once this is set, select the History Brush tool from the toolbar. You can then paint over the specific areas of your image where you want to undo the changes, effectively restoring those pixels to their appearance at the selected history state. Like any brush tool, the History Brush's size, hardness, opacity, and blending mode can be adjusted to fine-tune its application.
The Limitations of Destructive Editing and the Power of Non-Destructive Workflows
While the undo and History Panel functionalities are incredibly powerful, they are fundamentally tied to a linear progression of edits. This means that if you realize a mistake made several steps back, you must undo all the subsequent actions to reach that point. This can be frustrating and time-consuming, especially if you've made numerous edits after the initial error. Furthermore, as mentioned, once the session is closed, these undo capabilities are lost. This is where the concept of non-destructive editing becomes paramount in Photoshop.
Destructive editing involves making changes directly to the pixels of an image. Once these changes are applied, the original pixel data is overwritten, making it difficult or impossible to revert without using the undo commands within the same session. In contrast, non-destructive editing involves making changes in a way that preserves the original image data, allowing for modifications, reversals, or complete removal of edits at any time, even after saving and reopening the file.
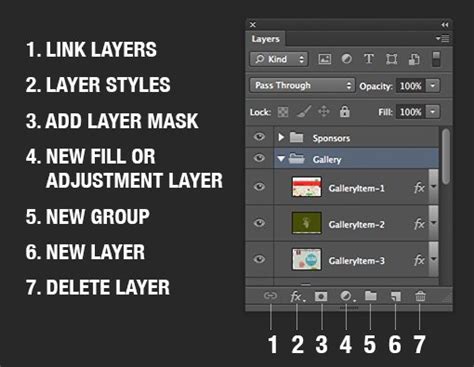
Layers: The Foundation of Non-Destructive Editing
The most fundamental element of non-destructive editing in Photoshop is the use of layers. Instead of applying adjustments directly to the background image, you create new layers to house your edits. This isolates changes, allowing you to modify, move, hide, or delete them without affecting other parts of your image.
A good practice when starting any significant editing project is to duplicate the background layer. This ensures that you always have an untouched copy of your original image to return to. For subsequent edits, such as cloning, healing, or complex retouching, it's advisable to create separate layers for each type of operation. This granular control makes it significantly easier to undo, redo, or refine specific aspects of your work.
The visibility of layers can be toggled by clicking the eye icon next to each layer in the Layers Panel. This allows you to quickly compare the image with or without a particular layer's effect, similar to the "Toggle Last State" function but with the added benefit of being non-destructive and applicable to any number of layers.
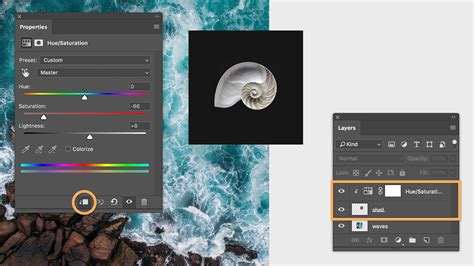
Adjustment Layers: Flexible Image Enhancements
Many image adjustments that were traditionally destructive can now be performed non-destructively using Adjustment Layers. Tools found under the Image > Adjustments menu are also available as adjustment layers, which can be accessed from the Window > Adjustments panel.
When you apply an adjustment using the traditional menu, the changes are permanently applied to the pixels of the active layer. However, by using an adjustment layer, the same adjustment is applied to a separate layer above your image layer. This offers several advantages: you can modify the intensity of the adjustment at any time by double-clicking the adjustment layer, you can apply layer masks to control where the adjustment affects the image, you can change the opacity of the adjustment layer, and you can even delete the adjustment layer entirely without affecting your original image data. This flexibility is invaluable for fine-tuning brightness, contrast, color balance, saturation, and many other image properties.
Layer Masks: Precision Control Over Adjustments
Layer masks are a critical component of non-destructive editing, working in conjunction with layers and adjustment layers. A layer mask allows you to selectively reveal or conceal the contents of a layer. By painting with black on a mask, you hide parts of the layer; painting with white reveals them; and shades of gray create partial transparency.
For instance, if you've used an adjustment layer to darken an image but want to preserve the brightness in a specific area like the sky, you would use a layer mask. You would paint over the sky area with black on the mask, effectively "masking out" the darkening effect in that region. This is a far more robust and flexible approach than using the destructive History Brush, as the mask itself can be edited and refined at any time, allowing for precise control over where and how your adjustments are applied.
Workflow Enhancements with Third-Party Tools
While Photoshop's built-in features are comprehensive, specialized hardware can further streamline the undo/redo process and overall workflow. Devices like the TourBox are designed to assign Photoshop's numerous commands, including Undo, Redo, and Revert, to customizable buttons and dials. This allows for rapid access to these essential functions without needing to move your hand away from your primary input device. For instance, a TourBox can significantly enhance workflow efficiency by making it effortless to cycle through history states or toggle last actions. For those interested in exploring such productivity tools, options like the TourBox Lite are available, offering a streamlined experience for creative professionals.
Reverting to the Last Saved State
In situations where you need to discard all unsaved changes and revert your image to its last saved version, Photoshop provides a direct command. The shortcut for this operation is F12. This is a drastic step, essentially resetting the image to its state when it was last saved to disk, and all subsequent unsaved edits will be lost. It's a powerful tool for a complete reset but should be used with caution, as it cannot be undone by the standard undo command.
Understanding the Limits of History States
The number of "History States" Photoshop can track is a configurable setting found in Edit > Preferences > Performance. While you might set this to a high number, such as 1000, it's important to note that Photoshop's ability to undo is ultimately limited by your computer's available RAM and processing power. For very large and complex files, especially those exceeding 1GB in size, the system may struggle to maintain an extensive history. This is another compelling reason to embrace non-destructive editing techniques, as they provide a more persistent and reliable method for managing changes, independent of the undo history limitations.
By understanding and implementing these various undo, redo, and non-destructive editing techniques, Photoshop users can approach their creative work with greater confidence, knowing that every edit is manageable and reversible.