Creating seamless repeat patterns in Photoshop has become remarkably accessible, largely due to the ingenious Pattern Preview tool. This comprehensive tutorial is designed to walk you through the process of designing a flawless, repeating pattern with unprecedented speed, making it ideal for both digital and print projects. Regardless of whether you are a novice to the world of graphic design or a seasoned professional, you will undoubtedly appreciate the ease with which your creative visions can be transformed into tangible designs.
Understanding the Essence of Photoshop Patterns
At its core, a pattern in Photoshop is an image that possesses the inherent capability to be tiled repeatedly. The strategic utilization of patterns can significantly expedite your design workflow, circumventing the need to meticulously craft intricate objects that could otherwise be efficiently constructed using a repeatable image template. Beyond their time-saving attributes, patterns serve to imbue your work with intriguing design elements, adding depth and visual interest. Within Photoshop, you have the flexibility to create your own custom patterns, leverage the pre-existing patterns that are bundled with the software, or download and integrate extensive pattern libraries from a variety of online sources.
Getting Started: Setting Up Your Document and Activating Pattern Preview
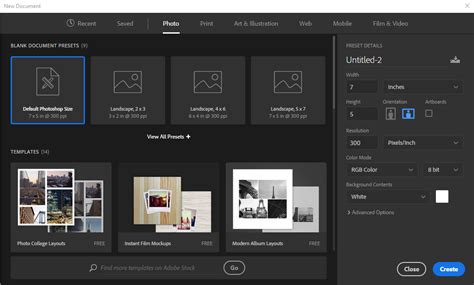
The journey to creating a seamless pattern begins with proper document setup. To initiate this process, open Adobe Photoshop and create a new document. This can be achieved by navigating to File > New or by utilizing the keyboard shortcut Ctrl+N (on Windows) or Cmd+N (on Mac). For the purpose of pattern creation, it is advisable to set dimensions that are sufficiently large to accommodate your design elements, with a common starting point being 3000 pixels by 3000 pixels.
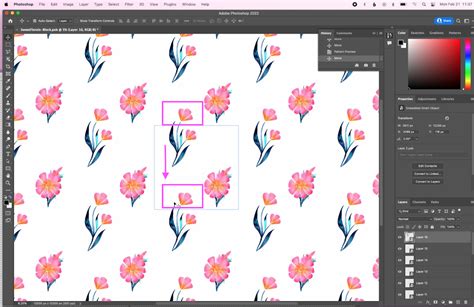
Once your document is established, the next crucial step is to activate the Pattern Preview mode. This is accomplished by going to View > Pattern Preview. Upon activation, a brief informational pop-up message will appear, explaining the functionality of this feature. Click "OK" to proceed. You will immediately observe your canvas being duplicated and presented in a tiled format, providing a real-time visualization of how your design will repeat infinitely.
Designing Your Pattern Elements
With Pattern Preview active, you are now equipped to begin crafting the individual elements of your pattern. You can either utilize existing artwork or commence drawing your design from scratch. Photoshop offers a versatile array of tools to facilitate this process. The Brush Tool (B) is ideal for freehand painting and creating organic textures. For more precise and scalable elements, the Shapes or the Pen Tool can be employed to add vector-based graphics.
If your workflow involves incorporating existing artwork, it is highly recommended to place each distinct element on its own separate layer while operating within the Pattern Preview mode. This organizational strategy significantly simplifies the process of repositioning and refining individual components as you develop your pattern. As you introduce new elements to your canvas, you will witness their automatic replication across the tiled preview, offering immediate feedback on their placement and overall visual impact.
Pattern Preview is designed to be compatible with a wide range of layer types, including standard raster layers, shape layers, paint strokes, and type layers. However, for enhanced control and flexibility, particularly when performing transformations such as scaling, rotating, or distorting pattern elements, employing Smart Objects is a highly advantageous approach. To convert a layer into a Smart Object, right-click on the layer within the Layers panel and select "Convert to Smart Object" from the contextual menu. This conversion ensures that any transformations applied to the layer are non-destructive, allowing for adjustments without compromising image quality.
Refining and Defining Your Master Pattern Tile
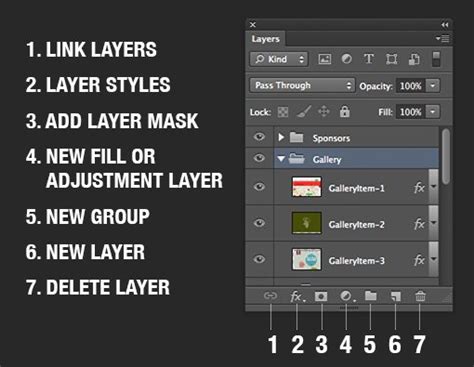
As your design elements come together, take the time to refine their composition and arrangement. Grouping related layers (using Ctrl+G or Cmd+G) can greatly improve organization, especially in complex patterns. This is also an opportune moment to add color variations, shading, or textures to your elements, further enhancing the visual appeal of your pattern.
Once you are satisfied with the arrangement and aesthetic of your design elements within the preview, the next step is to formally define this composition as a reusable pattern. This is achieved by navigating to Edit > Define Pattern. A dialog box will appear, prompting you to assign a descriptive name to your pattern. Choose a name that will help you easily identify it later, and then click "OK." This action registers your current design as a pattern tile within Photoshop's pattern library.
Applying Your Custom Pattern
The true power of creating custom patterns lies in their application. You can apply your newly defined pattern to a new document or integrate it into an existing design. One of the most straightforward methods is using the Paint Bucket Tool (G). Select this tool, and in the options bar at the top of the screen, change the "Fill" option to "Pattern." From the Pattern Picker that appears, select the custom pattern you just created. Clicking anywhere on your canvas will then fill the selected area with your pattern.
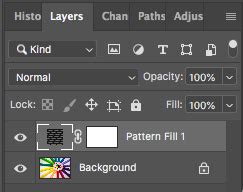
A more versatile and non-destructive method for applying patterns is through the use of a Pattern Fill Layer. To do this, go to Layer > New Fill Layer > Pattern. This will open the Pattern Fill settings, where you can select your desired pattern. Within this dialog box, you have the ability to adjust the scale of the pattern using the Scale slider, effectively zooming in or out of the repeating design. You can also modify the angle of the pattern.
Exploring Advanced Pattern Application Techniques
Beyond the basic fill methods, Photoshop offers several advanced techniques to integrate patterns seamlessly into your designs.
The Fill Command: Precise Pattern Application
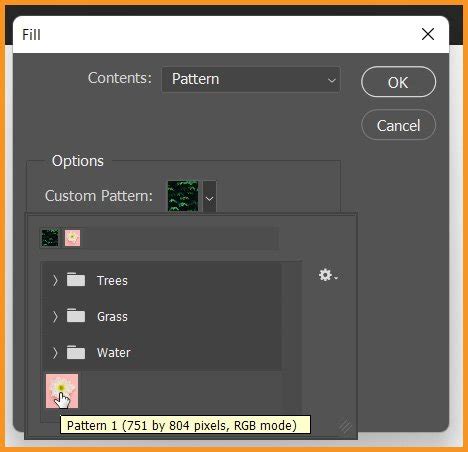
The Fill command provides a direct way to apply a pattern to a specific selection. You can use selection tools like the Rectangular Marquee Tool (M) to define an area on your canvas. Then, go to Edit > Fill (or press Shift+F5). In the Fill dialog window, under the "Use" option, choose "Pattern." This will activate the "Custom Pattern" option, where you can select your desired pattern. The Fill command is efficient for covering entire canvases or specific sections, and importantly, it allows the pattern to reside on its own layer, enabling independent modifications without affecting other design elements.
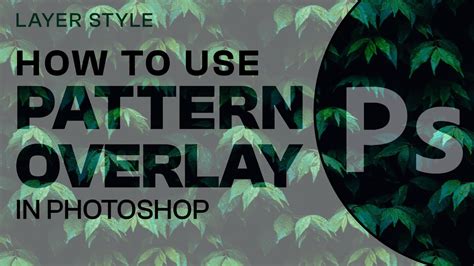
Pattern Overlay: Layer Styling for Dynamic Effects
For more dynamic and easily adjustable pattern applications, the Pattern Overlay layer effect is invaluable. To apply it, double-click on the layer you wish to style to open the Layer Styles dialog. Select "Pattern Overlay" from the list on the right. Within the Pattern Overlay options, you can choose your desired pattern from the dropdown menu. A key advantage of this method is the flexibility it offers; you can easily toggle the visibility of the pattern, delete it, or tweak its settings without altering the underlying content of the layer. To fine-tune the placement of the pattern overlay, ensure the "Preview" option is checked. Then, on your canvas, you can click and drag within the area of the pattern overlay to reposition it.
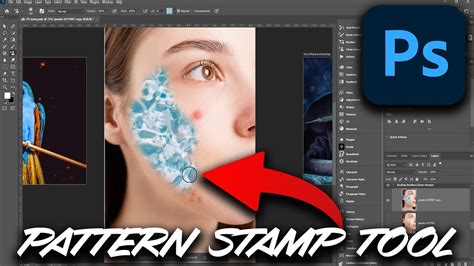
Painting with Patterns: The Pattern Stamp Tool
When you desire to apply a pattern in a more irregular or artistic fashion, the Pattern Stamp Tool (S) is the ideal choice. This tool functions similarly to the Brush Tool, but instead of applying brush strokes, it paints with your selected pattern. You can set the pattern for the Pattern Stamp Tool through the Options Bar. This method offers a high degree of control, especially when used in conjunction with a graphics tablet. While it may require more time compared to the Fill command or Pattern Overlay, it allows for organic and unique applications of patterns, enabling you to achieve specific artistic effects by adjusting the tool's Opacity and Flow settings.
Leveraging Preset Patterns and Libraries
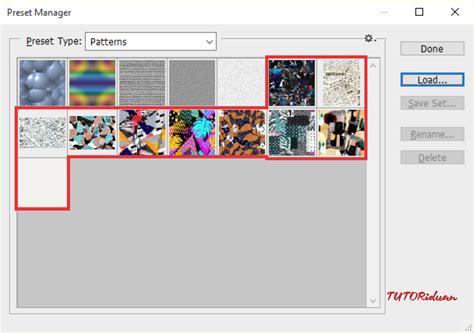
Photoshop comes equipped with a selection of preset patterns, and you can expand this collection by loading pattern libraries. To access and manage these patterns, navigate to Edit > Preset Manager. By default, the Preset Manager displays brushes. To view patterns, change the "Preset Type" dropdown menu to "Patterns." If you have not loaded any additional pattern libraries, you might see a limited selection.
To load bundled pattern libraries, click on the triangle icon at the right of the pattern display area. This will reveal a menu of preset patterns. Select an option, such as "Patterns," "Patterns 2," or "Rock Patterns." When prompted whether to replace current patterns, choose "Append" to add the new set to your existing collection rather than overwriting them.
Installing and Creating Pattern Libraries
Installing downloaded Photoshop pattern libraries is a straightforward process. Open the Preset Manager (Edit > Preset Manager) and click the "Load" button. Locate your downloaded pattern file (typically with a .PAT extension) on your computer. For older versions of Photoshop, pattern library presets can often be found within the Photoshop installation directory under Adobe Photoshop [Version] > Presets > Patterns.
Creating your own pattern libraries is an excellent way to organize your custom-made patterns or to share them with others. Within the Preset Manager, filter the view to show only "Patterns." Select the patterns you wish to include in your library by holding down Ctrl (or Cmd on Mac) and clicking on each one. Once selected, click the "Save Set" button. You can then save this set as a .PAT file, which can be easily installed on other computers.
Integrating Noun Project Icons for Unique Patterns
For designers seeking to create highly specific and visually rich patterns, integrating icons from resources like The Noun Project can be exceptionally beneficial. The Noun Project offers a vast library of icons, accessible directly within Photoshop via an Adobe Add-On. This integration allows you to search for and drag icons onto your canvas, streamlining the pattern creation process.
When creating a pattern using icons, it's often best to start with a square document, such as 1000x1000 pixels, with a transparent background. This ensures your basic "pattern tile" is a perfect square. You can then divide your canvas into quadrants using guides (View > Rulers to show rulers, then drag guides from the top and side rulers to the center). This helps in arranging your icons symmetrically.

Icons from The Noun Project can be recolored upon insertion or later. Using the Move tool (V), you can position, scale, and rotate your icons as needed. For visual consistency, it's advisable to scale icons uniformly, especially if they come from the same collection and share similar line weights. Once your arrangement is complete, define it as a pattern using Edit > Define Pattern.
Advanced Techniques and Considerations
When working with patterns, particularly those intended for manufacturing or high-quality digital reproduction, certain advanced techniques and considerations come into play.
Offset Filter for Seamlessness
For patterns that might not appear perfectly seamless upon initial creation, the "Offset" filter can be a powerful tool. Navigate to Filter > Other > Offset. You can set the horizontal and vertical offsets to half the dimensions of your pattern tile. This filter will shift your pattern, allowing you to see where edges don't quite match up. You can then manually adjust these areas to ensure a truly seamless repeat. This is particularly useful for ensuring that elements that are cut off at one edge reappear perfectly on the opposite edge.
Smart Objects for Transformative Power
As mentioned earlier, converting your pattern elements or the entire pattern tile into a Smart Object before defining the pattern or applying it offers significant advantages. Smart Objects preserve the original image data, allowing for non-destructive scaling, rotation, and distortion. This means you can repeatedly transform your pattern elements without losing quality.
Layer Styles and Effects
Beyond basic pattern application, Photoshop's Layer Styles can add depth and complexity. Effects like Drop Shadows, Gradient Overlays, and Blending Modes can create visually striking results. However, it's crucial to consider the manufacturing implications of these effects. For instance, a drop shadow might be easily rendered on screen but could be challenging or impossible to replicate accurately in certain print production processes. Always consult with your manufacturer regarding their capabilities and limitations when incorporating such effects into designs intended for physical production.
Pattern Preview vs. Offset Filter
While the Pattern Preview tool offers real-time visualization of repeating patterns as you design, the Offset filter is a post-design tool used to check and correct for seamlessness. Pattern Preview is excellent for immediate feedback during the creation process, allowing you to see how elements interact across tile boundaries. The Offset filter is more of a diagnostic and correction tool, best used when you've completed a base tile and want to ensure its perfect repeat.
Beyond Photoshop: Alternative Pattern Creation Tools
While Photoshop is a powerhouse for pattern design, other tools and software can also be employed:
Adobe Illustrator: Illustrator's dedicated Pattern Tool (
Object > Pattern > Make) offers a more vector-centric approach to pattern creation. This method is highly flexible, allowing for easy rearrangement and recoloring of vector elements within the pattern tile.Procreate (iPad): For artists working on the iPad, Procreate features a straightforward canvas tiling feature that simplifies the process of duplicating and repeating designs, making it an intuitive option for pattern generation.
Online Tools: Various web-based platforms like Patterninja, PatternPad, and Adobe Capture provide user-friendly interfaces for creating complex patterns without requiring extensive software expertise. These tools often cater to specific types of patterns or offer streamlined workflows for rapid pattern generation.
Create a Seamless Pattern in Illustrator
Final Considerations for Professional Use
When finalizing a pattern for professional use, it is always prudent to take a few extra moments to clean up your working file. This includes ensuring that all layers are properly named, grouped logically, and that any extraneous elements are removed. This attention to detail not only results in a cleaner final product but also makes future edits and collaborations much smoother. For manufacturing purposes, always confirm with your production partner about the specific requirements and limitations related to patterns, especially concerning color accuracy, effect rendering, and file formats. This proactive communication can prevent costly errors and ensure that your design is reproduced as intended.