The allure of metal, with its inherent strength, diverse finishes, and captivating reflectivity, has long been a staple in digital art and design. Photoshop offers a powerful suite of tools to replicate these metallic qualities, allowing artists to imbue their creations with a tangible sense of depth and realism. This tutorial delves into the creation of various metal patterns and textures within Adobe Photoshop, exploring techniques from fundamental gradient manipulation to advanced filter applications. Whether you're aiming for the opulent gleam of gold, the rugged texture of rust, the sleek finish of brushed steel, the functional pattern of diamond plate, or the liquid sheen of mercury, this guide will equip you with the knowledge to achieve stunning metallic effects.
The Foundation: Understanding Metallic Properties in Pixels
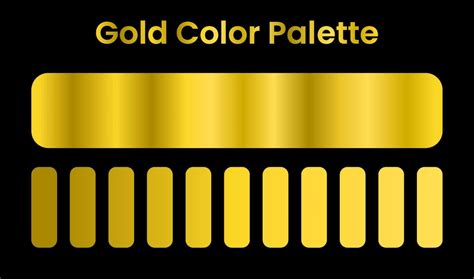
To create a convincing metallic texture in Photoshop, it's crucial to understand the visual characteristics of real-world metals. Gold, for instance, has been treasured for centuries due to its scarcity, its brilliant colour, and its easy workability into jewellery and trinkets. The most notable visual property of gold is the colour: usually a vibrant yellow which is cheerful and warming. From its appearance, we can see that there are many tones to gold. To create a realistic metallic texture for Photoshop, we need to bear in mind the high contrast-notably with the rich chocolate browns to the pale lemony white highlights. For a realistic metal texture, working on a surface with many planes is often beneficial, as it allows for more dynamic light and shadow play.
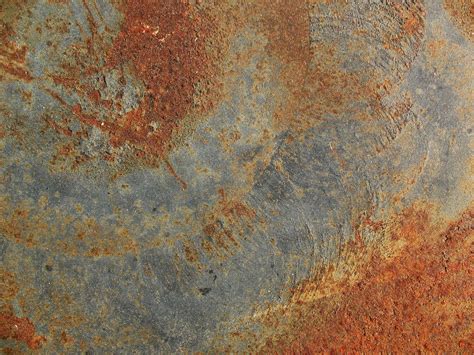
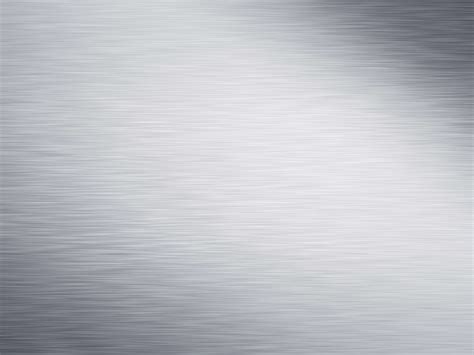
Similarly, rust, the oxidised form of iron, presents a distinct visual language. Iron oxide occurs when iron reacts with oxygen and water. If we take a close look at rust, we can see that layers of the iron are flaking off. Rust is orange/red, and the reason that most blood is red is due to the presence of oxidised iron. The surface of Mars also appears red due to the high concentration of iron at the surface. Highlights on rust tend to have an orange/yellow tone due to how the light reflects off the red wavelength. Brushed steel, on the other hand, is characterized by fine striations from polishing the metal in one direction. The contrast on brushed steel is quite low as light has a hard time bouncing off the textured surface; the colours are fairly similar in hue and intensity. Diamond plate, covered in raised diamond shapes, is designed for high traction and shows significant wear. Mercury, a liquid metal at room temperature, exhibits high surface tension, leading it to form balls. It is highly reflective and beautiful to look at, characterized by high contrast: dark darks and bright highlights, with a fairly consistent range of midtones. Due to its liquid properties, mercury texture methods work best on irregular shapes.
Crafting the Gleam: Gold and Liquid Metal Effects
Creating a simulated metallic effect in Photoshop often begins with establishing a base layer and then manipulating it with gradients and filters. For a gold effect, begin with a New Layer (Control-N) and fill it with a midtone grey. Next, create another New Layer (Control-N) and fill it with a Black to White gradient. To further refine this, a Gradient Map adjustment can be employed. In the Gradient Editor, you can change the gradient and add as many colours as you like. For a gold gradient, spacing the darks to one end of the gradient ensures it catches on the top right edge, creating that all-important contrast. This process results in a simulated metallic effect Photoshop texture, serving as a great base for a wide range of applications.
For a mercury-like effect, or other liquid metals such as gallium or chrome, the texture method works best on irregular shapes. Apply Layer Styles to a base shape, and if you're concerned about going over the edges, Control-click on the Layers panel thumbnail of the base shape to create a selection. Then, on a New Layer, with the selection active, press the Mask button at the bottom of the Layers panel. On yet another New Layer, using a Hard Edge brush, paint in a few pinpoint highlights. Add extra little ones around the edges on areas where you painted some white in the previous step to achieve a convincing liquid metal sheen.
How To Create a Realistic Metallic Effect | Photoshop Tutorial
Embracing Imperfection: Rust and Gritty Textures
To simulate the organic randomness of rust, the process involves a combination of filters and manual painting. First, ensure your Foreground and Background colours are set using a rich red brown and a rusty orange colour. Once these colours are set by double-clicking on the coloured squares at the base of the toolbar, go to Filter > Render > Clouds. This creates a base of mottled colour. Next, apply Filter > Sharpen > Unsharp Mask. The aim here is to achieve more defined edges and a little more contrast. Play with these settings until the rust texture looks gritty enough. To add organic randomness and intensify areas of corrosion, select the Brush tool (B) along with a default soft brush. On a New Layer (Control-N), set the Blend Mode to Multiply. Observe where the filters have naturally created darker spots and paint these in to intensify those areas, mimicking the natural corrosion process. This results in a believable rust texture.
Engineering Precision: Brushed Steel and Diamond Plate
Creating a smooth metal texture like brushed steel requires a different approach, focusing on subtle linear details. After applying Noise (Filter > Noise > Add Noise) and then Motion Blur (Filter > Blur > Motion Blur) with the Angle set to 0 and Distance to around 40 pixels, you begin to achieve a subtle linear texture. To refine this, a layer mask can be employed. With the texture layer active, go to Layer > Layer Mask > Reveal All. Change the Foreground color to black (#000000) and pick a large soft brush. Lower the brush opacity to 65-70% and draw over the mask in the left and right corners to subtly fade the effect. Setting the Layer Blending Mode to Overlay and Opacity to 60% further refines the brushed steel look. For added depth, another layer can be created and filled with a lighter grey, noise added (10% Amount, Gaussian Distribution & Monochromatic effect), and then set to a Linear Burn blending mode with 10% opacity. Finally, a Curves adjustment layer can be used to increase intensity: move the shadows pointer to the right and the highlights pointer to the left.
For diamond plate, you can start with a brushed metal pattern as a base. To create the pattern itself, begin by creating Horizontal and Vertical Guides at 50% in a New Document. To construct the diamond shape, it can seem tricky but is straightforward. Duplicate the base diamond shape. Then, take the Rectangular Marquee Tool (M) and cut the diamond so that each quarter is on its own layer. Move each section diagonally across from its original position. For instance, move one section to the top right and another to the bottom left. Rotate the central leaf shape 90° to mimic the reference photo of diamond plate. Once the pattern is created, it can be defined as a pattern in Photoshop (Edit > Define Pattern) for easy application to any shape or background.
Advanced Techniques and Application
The creation of metal textures in Photoshop extends beyond these fundamental examples. Using a metallic pattern Photoshop file (PAT) can streamline the process, offering seamless and tileable textures that are easier to use. These files, when installed properly, allow for one-click application of steel, silver, or iron patterns. The process of creating these PAT files involves turning metal textures into seamless, tileable images and then saving them as patterns in Photoshop.
For those who prefer not to create textures from scratch, there are numerous premium Photoshop actions available that can generate great-looking metal effects with just one click. These actions are often easy to use and customize, capable of creating engraved and embossed metal effects out of any text, vector shape, raster image, photo, and illustration. For instance, one can create a vintage metal sign in Photoshop from text, shapes, or images, complete with an old metallic look, scratches, and rust. Custom military dog tags can also be created using specific Photoshop actions. For dirty metal texture effects, using rusty metal textures with an Overlay blend mode is highly effective. The key to achieving professional results often lies in combining different textures in Photoshop to create unique and compelling backgrounds.
To create a basic metallic texture in Photoshop from scratch, a common method involves using the Noise filter, followed by applying Motion Blur, and then adding a colour gradient. While it's possible to create your own metal textures Photoshop images from scratch, many designers opt for premade textures to save time and achieve a more professional look. Photoshop metal textures are excellent graphic design assets, useful for a multitude of creative projects, including photo manipulations and digital paintings. They can also be used to create awesome logos with a metallic look.
The journey into creating metallic effects in Photoshop is an ongoing exploration of light, shadow, colour, and texture. By understanding the fundamental properties of different metals and employing the diverse tools within Photoshop, artists can achieve a vast array of realistic and stylized metallic finishes, adding a compelling dimension to their digital creations.