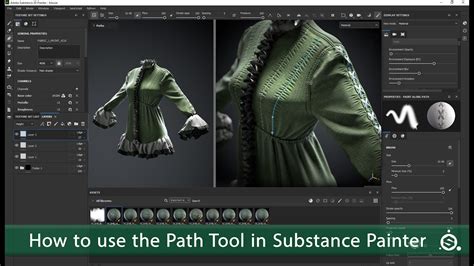
Substance 3D Painter's Paint tool is the cornerstone of digital texturing, offering a versatile and powerful way to imbue 3D models with life-like material properties. At its core, this tool allows artists to apply colors and material characteristics directly onto a 3D mesh, transforming raw geometry into visually rich surfaces. Understanding the nuances of brush parameters is crucial for achieving professional-grade results, whether you're a beginner or an experienced digital artist. This tutorial delves deep into the functionalities of Substance Painter brushes, demystifying their settings and empowering you to create stunning textures.
The Anatomy of a Brush in Substance Painter
When you select the Paint tool, the Properties panel at the top provides immediate access to two key previews: the brush preview and the material preview. The brush preview offers a visual representation of how your chosen brush will behave, dynamically updating as you adjust its parameters. This allows for immediate feedback on how changes to settings like Size, Flow, or Spacing will affect the brush stroke. Complementing this is the material preview, which showcases the properties of the material currently being applied. This could include color, roughness, metallicness, and other PBR (Physically Based Rendering) attributes.
Many of these parameters can be further refined through the use of a graphic tablet, allowing for pressure-sensitive control. This means that the intensity, size, or flow of individual stamps within a brush stroke can vary based on how hard you press the stylus onto your tablet. This dynamic interaction adds a layer of organic realism and expressiveness to your texturing workflow, mimicking the feel of traditional painting techniques.
Deconstructing Brush Parameters: A Deep Dive
Let's dissect the essential parameters that govern the behavior of Substance Painter brushes:
Brush Size
This parameter controls the overall scale of the individual stamps that make up a brush stroke. It's important to note that the brush size is relative and can be influenced by the "Alignment Size Space" parameter. This means that the perceived size of your brush can change depending on whether it's set to "Object" or "Viewport" space, offering flexibility in how you scale your brushwork across different parts of your model or project.
Intensity (Flow)
Intensity, often referred to as Flow in some contexts, dictates the opacity or intensity of the individual stamps within a brush stroke. Lowering the intensity allows for a more subtle application of the material, building up opacity gradually with multiple passes. This is invaluable for creating soft transitions, subtle wear, or delicate details. Conversely, a higher intensity results in a more opaque application of each stamp, leading to bolder strokes. The "Maximum global opacity of a brush stroke" parameter sets an upper limit on how opaque the entire stroke can become, even with multiple passes, providing another layer of control over the final look.
Spacing
The distance between the individual stamps that form a brush stroke is determined by the Spacing parameter. When set to small values, this parameter allows for the creation of continuous, smooth lines, effectively merging the individual stamps into a seamless stroke. However, it's important to be aware that very small spacing values can significantly increase computational load, as the software needs to calculate and render a much larger number of stamps. This can impact performance, especially on complex models or less powerful hardware. Finding the right balance between smoothness and performance is key.
Rotation
This parameter controls the orientation of the stamps within a brush stroke. By adjusting the rotation, you can influence how the alpha texture, which defines the shape of each stamp, is applied. This is particularly useful for rotating the alpha if it's not properly aligned, ensuring it conforms to the desired direction or texture.
Follow Path: When the "Follow Path" option is enabled, the orientation of the stamps within a brush stroke is dynamically adjusted to match the direction of the stroke itself. Substance 3D Painter achieves this by comparing the position of the previous stamp with the current one to determine the stroke's trajectory. This means that a single click with "Follow Path" enabled will not produce any visible result, as there's no preceding stamp to establish a direction. It's designed for continuous strokes where direction is established over time.
Randomization Parameters
Substance Painter offers a suite of randomization parameters that introduce variability to individual stamps within a brush stroke, adding an organic and less uniform feel to your textures:
- Random Size: Applies a random variation to the size of each individual stamp within the brush stroke. This can prevent a repetitive, machine-made look and introduce natural imperfections.
- Random Flow: Introduces random variations to the intensity or opacity of each stamp. This mimics the natural inconsistencies found in real-world painting or material application.
- Random Angle: Applies a random additional rotation to each stamp. This further breaks up uniformity and can be particularly effective for textures like dirt, grunge, or procedural noise.
- Random Position: Offsets the position of each stamp randomly. This can create a more scattered or dispersed effect, useful for textures like spray paint or speckled surfaces.
These randomization features are powerful tools for achieving a more realistic and hand-crafted aesthetic, moving away from overly perfect and sterile results.
Projection and Orientation: Aligning Stamps to the Surface
The way stamps are projected and oriented onto the 3D mesh surface is governed by specific parameters:
Tangent | Wrap (default): This is the default setting. It orients the stamp to align with the surface of the 3D mesh. The "Wrap" aspect means that if a stamp extends beyond the boundaries of the surface, it will wrap around, maintaining its orientation relative to the surface normal. This is generally the most versatile and commonly used setting.
Tangent | Planar: Similar to "Wrap," this setting also orients the stamp to align with the 3D mesh surface. However, "Planar" projection treats the surface locally as a flat plane for the purpose of stamp orientation. This can be useful in specific scenarios where you want a flatter, less conforming application of the stamp, especially on curved surfaces where "Wrap" might introduce unwanted distortion.
Ignore Non-Aligned Surfaces: This option allows you to ignore surfaces on the 3D mesh that are not aligned with the stamp's orientation. This can be useful for selectively applying textures to specific parts of a model, preventing the brush from affecting surfaces that are at a significantly different angle.
Size Space: Object vs. Viewport
The "Alignment Size Space" parameter dictates in which relative space the brush size is computed:
Object (default): When set to "Object," the brush size is synchronized with the actual scale of the 3D mesh. This means that a brush size of 100 will always represent a certain physical area on your model, regardless of your camera's zoom level. This is generally preferred for maintaining consistent texture application across different parts of a model or when working on multiple models of varying scales.
Viewport: In "Viewport" space, the brush size is linked to the viewport. Resizing the interface or zooming in and out of the scene will directly affect the perceived brush size. This can be useful for quick adjustments when you want the brush to appear a certain size on your screen, but it can lead to inconsistencies if you're not careful about maintaining a consistent viewport scale.
Alpha and Stencils: The Foundation of Brush Shapes
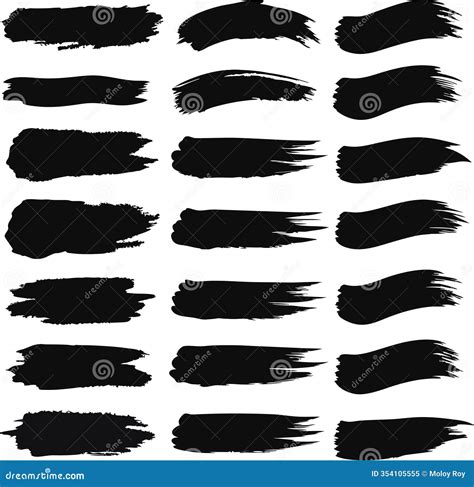
The Alpha is a grayscale mask that defines the fundamental shape of each stamp applied within a brush stroke. It's the blueprint for how the brush "looks." Substance Painter comes with a vast library of alphas, ranging from simple circles and squares to complex grunge patterns, cracks, and organic textures. You can also import your own custom alphas to create unique brush effects.
A Stencil acts as an additional, independent grayscale mask that is applied over the brush stroke. Unlike the alpha, which defines the shape of individual stamps, the stencil modulates the entire brush stroke's application. Think of it as a mask you hold up to your painting; where the stencil is dark, the brush passes through, and where it's light, the brush is blocked. This is incredibly powerful for creating specific patterns, wear effects, or artistic flourishes.
Rotating a stencil is a straightforward process: press and hold the 'S' key, then click and drag with the left mouse button. This allows you to precisely control the orientation of the stencil to match your desired effect.
Create a custom brush in Substance Painter
Materials and Channels: The Building Blocks of Surface Properties
A Material in Substance Painter is not just a color; it's a collection of different channels, each retaining specific properties that define the surface's appearance. These channels typically include:
- Base Color: The primary color of the surface.
- Roughness: Controls how rough or smooth the surface is, affecting the sharpness of reflections.
- Metallic: Determines whether the surface is metallic or non-metallic (dielectric).
- Normal: Simulates surface detail and bumps without adding actual geometry.
- Height: Provides actual displacement for more pronounced surface variations.
- Emissive: Controls the light emitted by the surface.
Clicking on a channel button in the Properties panel will select or deselect it, determining which material properties your brush will affect. For example, if you only want to paint color variations, you would select only the Base Color channel. If you want to add wear and tear, you might select Base Color, Roughness, and potentially Normal channels. This channel-based approach provides granular control over every aspect of your material's definition.
By mastering these brush parameters, alphas, stencils, and material channels, you unlock the full potential of Substance Painter's texturing capabilities. Experimentation is key, so don't hesitate to combine different settings, explore various alphas and stencils, and push the boundaries of what's possible to create truly unique and compelling 3D art.