Noisy footage can significantly detract from the professional quality of a video. Whether it stems from shooting in low-light conditions, employing a high ISO, or simply the inherent characteristics of certain camera sensors, unwanted noise often necessitates careful attention during the post-production phase. DaVinci Resolve, a powerful and versatile video editing suite, offers robust tools to tackle this challenge. This tutorial will guide you through the process of effectively reducing noise in your footage, ensuring a cleaner and more visually appealing final product. We will explore techniques applicable to various scenarios, from close-ups of individuals to expansive night-time outdoor scenes, utilizing the advanced capabilities of DaVinci Resolve Studio.
Understanding the Roots of Noise and the Resolve Workflow
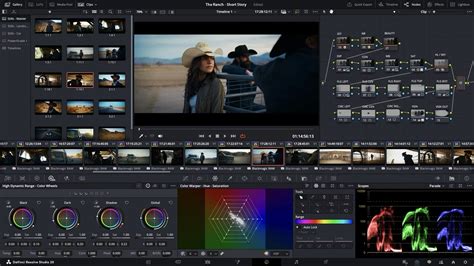
Footage might appear noisy due to dim lighting or underexposure. Some level of noise can seem natural, but when it becomes distracting, it's time to reduce it. In DaVinci Resolve, the primary tools for noise reduction are found within the Color page, accessible via the "Color" tab at the bottom of the interface. For those new to the platform, Ali, along with Will, releases weekly videos covering DaVinci Resolve, videography, and gear reviews. In an upcoming tutorial, Ali will dive deep into enhancing skin appearance, so subscribing to their channel is recommended to stay tuned for such specialized content.
The process of denoising in DaVinci Resolve involves utilizing the built-in "Noise Reduction" effect, which is part of the OpenFX standard that DaVinci Resolve fully supports. To access this effect, navigate to the "Edit" workspace and, within the Effects panel's Library tab, type "noise." You will find "Noise Reduction" listed under Resolve Effects. Dragging this effect onto a node in your node editor applies it to the selected clip.
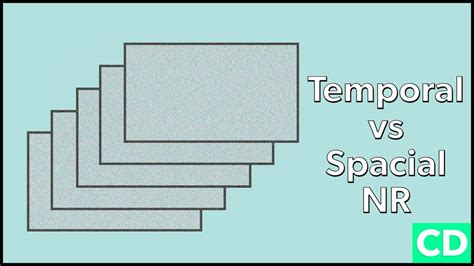
Initially, it's crucial to understand the two main types of noise reduction available: Temporal Noise Reduction (NR) and Spatial Noise Reduction. Temporal NR analyzes and samples frames before and after the current one to reduce noise in moving images, making it less processor-intensive. Spatial NR, on the other hand, analyzes a single frame to reduce noise in still areas, aiming to retain details and prevent excessive softening of the image. The general workflow often begins with Temporal NR before considering Spatial NR, especially when dealing with footage that has significant movement.
Applying Temporal Noise Reduction for Cleaner Footage
When dealing with noisy frames, analyzing frames on either side of the current one is essential. This helps in determining the level of detail, movement, and noise present in the footage. If your clip exhibits significant movement, opting for a lower number of analyzed frames is advisable. Conversely, for clips with minimal movement, a higher number can be beneficial.
Within the Noise Reduction settings, you'll find several key parameters to adjust. The "Motion Estimation" type can be changed from "faster" to "better." While this consumes more processing power, it yields superior results by providing a more accurate analysis of motion within the frame. The "Motion Range" setting indicates how much motion Resolve should consider. For a given clip, setting this to "medium" is often a good starting point.
At this initial stage, you might not see immediately visible changes. To make a difference, you need to adjust the "Temporal Threshold." This parameter allows you to fine-tune the Luma (brightness) and Chroma (saturation) sliders. By default, these sliders are linked, affecting brightness and color noise simultaneously. If you wish to adjust them independently, uncheck the "Luma Chroma Same Threshold" option. Increasing both sliders to their maximum values (100) will drastically reduce noise, but extreme settings can lead to an unnatural, overly smoothed appearance. A balance around 30 often works well, achieving noise cleanup without excessive alteration of the image's natural characteristics.
Personally, a slight blur to soften skin imperfections can be acceptable, but it's vital to avoid overdoing it to the point where the image appears artificial. For motion-related adjustments, keeping the "Motion" parameter at 50 and leaving the "Blend" setting at its default is a common practice. After these initial adjustments, comparing the "before" and "after" views will reveal a noticeable improvement in the footage's clarity.
Case Study 1: Denoising a Portrait Clip
Let's consider a specific example of a clip featuring a person. After applying the Temporal Noise Reduction effect to a node, we begin by setting the "Frames" to analyze. For this particular clip, with some discernible movement, setting the frames on either side to three is a reasonable choice. The "Motion Estimation" type is set to "better," and the "Motion Range" is kept at "medium."
Next, we focus on the "Temporal Threshold." Here, we fine-tune the Luma and Chroma sliders. If they are linked, increasing them together provides a general noise reduction. For instance, setting the linked slider to around 30-40 can effectively reduce the graininess without making the skin look plastic. The goal is subtle noise reduction. It's important to remember that zooming in significantly on the footage will inherently reduce its perceived quality, but it's necessary for a detailed evaluation of the noise reduction effect. After applying these settings, the difference between the denoised clip and the original is quite noticeable and pleasing. In this specific case, further adjustments with spatial NR might not be necessary.
Advanced Denoising with Spatial Reduction for Complex Scenes
Now, let's examine a more challenging scenario: an outdoor scene shot at night, featuring the CN Tower in Toronto. This clip is significantly noisier than the previous example. We'll again drag the "Noise Reduction" effect onto a new node. This clip has more pronounced movement than the portrait, so we'll set the frames on either side to two. As before, we change the motion estimation type to "better" and keep the motion range at "medium."
Zooming in closely allows for a detailed inspection of the noise. First, we increase the "Temporal Threshold Luma-Chroma" slider gradually. The key is subtlety; pushing this too far can result in an unnatural look. By toggling the effect off and on, you can clearly see the "before" and "after" states, confirming the effectiveness of the temporal reduction.
However, to clean this clip up even further, we can employ Spatial Noise Reduction. For demonstration purposes, we'll add another serial node by right-clicking and selecting "Add Node" > "Serial." We then drag the "Noise Reduction" effect onto this new node. Within this node, we access "Spatial Noise Reduction" and change the mode to "better." While an "enhanced" mode exists, it's generally only necessary if you're pushing the Luma-Chroma sliders very high. In most cases, "better" provides excellent results while being less demanding on processing power.
Perfect NR In DaVinci Resolve - BBC TV Colourist Insight (Noise Reduction)
Addressing Specific Noise Artifacts with Spatial NR
Next, we uncheck "Luma-Chroma Same Threshold" to adjust Luma and Chroma independently. This is particularly useful for addressing specific noise patterns. Zooming in significantly, we can observe that the blacks in the scene are not truly black; instead, they might exhibit blue, green, or red blotches. Spatial NR is highly effective at reducing and removing these color-based artifacts.
We'll adjust the "Luma" to around 13 and the "Chroma" to around 27. Observing the "before" and "after" views at this magnified level clearly shows the difference, especially in the removal of these color blotches. This demonstrates the power of spatial NR in refining the image.
Restoring Detail and Sharpness Post-Denoising
After applying both temporal and spatial noise reduction, you might notice that the image appears a bit softer. This is a common side effect of aggressive noise reduction, as the process can inadvertently smooth out fine details. To counteract this, we can add sharpness back into the image. This is achieved by adding yet another new node. Then, locate the "Blur" adjustment icon, click on it, and slightly bring down the "Radius" parameter. This action effectively sharpens the image, restoring some of the lost definition without reintroducing noise.
For those interested in learning more about sharpening techniques in DaVinci Resolve, including how to sharpen specific areas like a person's eyes, Ali recommends checking out his dedicated "How to Sharpen in DaVinci Resolve" tutorial.
Workflow Best Practices for Optimal Denoising
To summarize the best workflow for denoising footage in DaVinci Resolve:
- Enable Temporal NR: Start by choosing the number of frames (1 to 5) from the "Frames" dropdown menu. Remember that more frames mean longer render times but don't necessarily guarantee a better final output.
- Set Motion Estimation: Based on the amount of motion in your footage, select appropriate options from the "Mo. Est. Type" and "Motion Range" dropdowns. For more motion, opt for "Better" and "Larger." For less motion, "Faster" and "Smaller" might suffice.
- Adjust Luma and Chroma Thresholds: With "Luma" and "Chroma Thresholds" linked, gradually increase them until you observe noise reduction in the non-moving parts of the image.
- Handle Chroma Noise (if necessary): If your footage exhibits more chroma noise than luma noise, unlink the "Luma/Chroma" function after you've achieved a satisfactory level of luma noise reduction. Adjust the Chroma threshold separately.
- Adjust Motion Thresholds: Lower this setting to exclude more moving content from the noise reduction process, or raise it to include more. If you're still not satisfied, consider improving the "Mo. Est. Type" and "Motion Range" settings.
- Enable Spatial Noise Reduction (for stubborn noise): To further eliminate noise in the remaining areas of the image, activate spatial noise reduction by increasing the "Luma" or "Chroma Threshold" parameters.
- Select Spatial Noise Reduction Mode: Choose the "Better" option for superior results, but be aware that this might require more processing power.
- Address Excessive Chroma Noise in Spatial NR: Again, if chroma noise is more visible, unlink the "Luma/Chroma" function after the luma noise is suitably reduced and adjust the Chroma threshold.
- Adjust Radius (Spatial NR): With high luma or chroma threshold settings in spatial noise reduction, you might need to select a larger option from the "Radius" dropdown menu to enable a more thorough scene analysis.
- Blend Noise Reduction: If your noise reduction settings are suitable, but the results appear overdone, try increasing the "Blend" parameters for both temporal and spatial noise reduction. This can help to reintegrate some of the texture and naturalness.
- Preview and Render: Throughout the process, it's crucial to continuously preview your footage at different zoom levels to assess the impact of your adjustments. Once you are satisfied with the noise reduction settings, proceed to the "Deliver" tab to render your footage with the improved quality.
Remember to save your project often to avoid losing any progress.
Additional Tips and Tools
For those who find the repetitive nature of editing and color work in Resolve time-consuming, tools like TourBox can significantly speed up the workflow. TourBox is a creative controller designed for editors and content creators, featuring built-in functionalities specifically tailored for DaVinci Resolve. By enabling quick and easy adjustments, it can enhance productivity and improve the overall editing experience.
The effectiveness of noise reduction is highly dependent on the specific footage and the desired outcome. Experimentation with the various settings, combined with a solid understanding of temporal versus spatial techniques, will allow you to achieve professional-looking results in DaVinci Resolve, transforming noisy clips into polished, high-quality video content.