Inkscape, a powerful and free vector graphics editor, offers a variety of methods for duplicating objects, allowing designers to efficiently create complex patterns and designs. While simple copying and pasting are fundamental, Inkscape provides more sophisticated tools for creating multiple instances of an object, particularly for arranging them in circular patterns. This article delves into the primary techniques for duplicating objects in Inkscape, focusing on the creation of circular arrays and the powerful concept of "tiled clones" for synchronized modifications.
The Foundation: Basic Duplication
Before exploring advanced duplication techniques, it's essential to grasp the fundamental methods. The most straightforward way to duplicate an object in Inkscape is by using the "Copy" and "Paste" commands.
Copy and Paste: Select the object you wish to duplicate. Go to
Edit > Copy(or use the shortcutCtrl+C). Then, go toEdit > Paste(or useCtrl+V). This will create an exact replica of the object, placed directly on top of the original. You can then move this new copy to your desired location.Duplicate Command: Inkscape also offers a dedicated "Duplicate" command. Select your object and go to
Edit > Duplicate(or use the shortcutCtrl+D). This command, unlike simple paste, places the duplicate directly on top of the original, but importantly, it unlinks the duplicate from the original in terms of transformations. Any subsequent rotation, scaling, or skewing applied to the original will not affect the duplicate, and vice-versa. This is a crucial distinction for many design workflows.
Advanced Duplication: Tiled Clones for Synchronized Edits
A more advanced and incredibly useful feature for duplication in Inkscape is the "Tiled Clones" tool. This tool allows you to create multiple copies of an object that are linked in a specific way. When you modify the original object (the "source"), all of its tiled clones update automatically. This is particularly beneficial when you need a set of objects that should remain identical and be modifiable all at once.
The process of using Tiled Clones involves several steps:
Creating the Original Object: Begin by creating the object you want to duplicate. This could be any shape, text, or group of objects.
Accessing Tiled Clones: With your object selected, go to
Edit > Clone > Create Tiled Clone...(or use the shortcutShift+Alt+D). This will open the "Create Tiled Clones" dialog box.Configuring the Tiled Clone Settings: The dialog box offers numerous options for how the clones will be arranged and transformed. For creating a simple grid, you would configure the "Grid" tab. However, for more complex arrangements, including circular patterns, you'll explore other tabs.
- Shift: This tab allows you to set offsets for the clones in terms of X and Y axes.
- Scale: You can scale clones by different amounts.
- Rotation: This is where you can set rotations for individual clones.
- Color: Options to adjust color based on position or other factors.
- Trace: For tracing bitmaps into clones.
Applying the Tiled Clone: Once you have configured the settings to your satisfaction, click the "Create" button. Inkscape will generate the tiled clones based on your specifications.
Modifying the Source: The true power of Tiled Clones lies in their linked nature. If you select the original object (the "source") and modify it - change its shape, color, or even add new elements to it - all of its tiled clones will update instantaneously to reflect these changes. This ensures consistency across all duplicated elements.
If you later realize in your workflow that you would like certain objects to be modifiable all at once, Tiled Clones are the ideal solution. Select all your objects that you wish to replace with synchronized clones. Then, look at the status bar to count how many there are.
Replacing Existing Objects with Clones: A more advanced application of Tiled Clones involves replacing existing objects with synchronized clones. This can be achieved by carefully managing the Z-order (stacking order) of objects.
- First, ensure your "source" object is created.
- Then, create your tiled clones of this source object.
- Select all the objects you want to replace, and also select your source object.
- Use the
Object > Align and Distributepanel. Under the "Rearrange" section, you can find the "Exchange in Z-order" button. - Repeatedly hit the "Exchange in Z-order" button until all the objects you intended to replace are now replaced by the clones derived from your source object. This process requires careful selection and repeated application of the exchange command to ensure the correct objects are swapped.
- After this operation, the original objects are replaced by clones. If you edit the clone source, you should see everything works as intended, with all the replaced objects updating simultaneously.
This method of replacing objects with clones is particularly useful when you have a design with many repeated elements that you might need to alter later. It's a more involved process, but it offers immense flexibility.
A valuable resource for understanding this specific technique is a tutorial on YouTube by Unfa, which goes into more detail if you get stuck on any of the steps above.
heathenX Inkscape Tutorials: episode 004 - Using tiled clones
Duplicating Objects in a Circle: A Practical Application
One of the most common and visually appealing ways to duplicate objects is to arrange them in a circular pattern. Inkscape offers several ways to achieve this, often by combining basic transformation tools with clever duplication strategies.
Method 1: Using the Rotate and Duplicate Tool
This method is intuitive and effective for creating evenly spaced objects around a central point.
Create Your Object: Start with the object you want to duplicate. For this example, let's use a simple shape.
Establish the Rotation Center: The little crosshair in the center of the object (or its bounding box) represents the axis on which the object rotates. You can move this rotation center by selecting the object and then selecting the "Edit path by nodes" tool (
F2). You will see a small crosshair. Drag this crosshair to the desired center point for your circle. Often, this will be the geometric center of the object itself, or a point outside the object around which you want the copies to revolve.Rotate and Duplicate:
- Select the object.
- Activate the "Rotate and Scale" tool (or simply double-click the object to reveal its rotation handles).
- Hold down
Ctrlwhile rotating the object. This constrains the rotation to specific increments (e.g., 15-degree steps), which helps in achieving even spacing. - Before releasing the mouse button for the rotation, press
Enter(or click the "Apply" button in the tool controls bar). This will create a duplicate of the object at the rotated position. - Now, to repeat this action, press
Ctrl+D(Duplicate). Inkscape remembers the last transformation (rotation in this case) and applies it to the new duplicate. - Continue pressing
Ctrl+Dto create multiple copies of the object arranged in a circle.
You can now rotate this object in the shape of a circle. By repeatedly using the
Ctrl+Dcommand after an initial rotation, you can effectively stamp the object in multiple places around a circular path.
Method 2: Using the "Object to Path" and "Path Effects" (Advanced)
For more complex circular arrangements or when you need precise control over the spacing and orientation of objects along a curve, Inkscape's Path Effects offer a powerful solution. This method involves converting your object into a path and then applying a path effect that distributes copies along another path, such as a circle.
Create Your Object: Design the object you wish to duplicate.
Create a Circular Path: Draw a perfect circle using the Ellipse tool (
E). Ensure it's a path. If it's an ellipse, you can convert it to a path viaPath > Object to Path(Ctrl+Shift+C).Apply "Power Clip" or "Clipping Mask" (Alternative for Grouping): If your intention is simply to have multiple instances of an object within a circular boundary, you can group your objects and then use a clipping mask or power clip. However, this doesn't create distinct duplicated objects.
Using Path Effects (The "Power")
- Select your object. If it's a group, you might need to "Object to Path" or use a simpler object for this method.
- Convert your object to a path if it isn't already (
Path > Object to Path). - Select the circular path you created.
- Go to
Path > Path Effects.... In the Path Effects panel, click the "+" button to add a new effect. - Choose the "Power Duplicate" or "Scatter" (older versions) or "Pattern along Path" effect.
- Select your object. Apply the "Pattern along Path" effect.
- In the effect's settings, you can specify the path (your circle) to follow. You will have options to control the spacing, rotation, and number of copies.
- You can also use the "Power Duplicate" effect, which allows you to define a transformation (like rotation) and then generate multiple instances.
This method offers a high degree of control and allows for dynamic adjustments. For instance, if you modify the circular path, the duplicated objects will adjust their positions accordingly.
Method 3: Combining Transformations and Clones for Circular Arrays
This method leverages the power of Tiled Clones in conjunction with rotational transformations to create sophisticated circular patterns.
Create Your Base Object: Design the single object you want to duplicate.
Duplicate and Rotate:
- Select your object.
- Go to
Edit > Clone > Create Tiled Clone.... - In the dialog box, select the "Rotation" tab.
- Determine the total number of objects you want in your circle. Let's say you want 12 objects.
- Calculate the angle for each rotation: 360 degrees / number of objects. So, for 12 objects, it's 30 degrees.
- In the "Rotation" tab, set the "Angle" to 30 degrees.
- In the "Grid" tab, set "Columns" to 1 and "Rows" to 1. This ensures no grid-like arrangement.
- Crucially, you need to offset the center of rotation. This is often the trickiest part and requires experimentation. You'll use the "Shift" and "Scale" tabs in combination with the rotation.
- A common approach is to create a single row of clones with no shift, then apply rotation. You might need to adjust the "Center X" and "Center Y" offsets within the "Shift" tab to make the clones arrange in a circle.
Refining the Circular Arrangement:
- After creating the tiled clones, you may find they are not perfectly arranged in a circle. You might need to select the original object and adjust the "Center X" and "Center Y" values in the "Shift" tab of the Tiled Clones dialog.
- Alternatively, after creating the tiled clones, you can select the original object, move its rotation center to the desired pivot point for the circle, and then use the
Ctrl+Dmethod described earlier to create copies. This might be more straightforward for simple circular arrays.
The key is understanding how the "Shift" values interact with the "Rotation" angle to create the desired circular pattern. If you are creating a circle with 12 objects, and each object is rotated by 30 degrees, you need to ensure that the "shift" of each subsequent clone effectively moves it outwards or inwards along the radial line to form a circle.
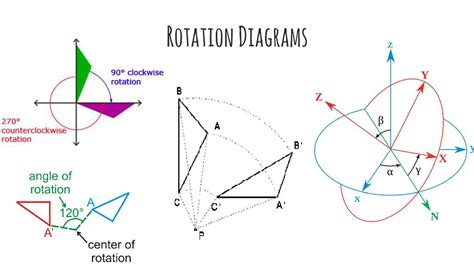
Understanding the "Clone Source" Concept
The distinction between a simple duplicate (Ctrl+D) and a clone is fundamental in Inkscape. When you create a clone using Edit > Clone > Create Clone (Alt+D), you are creating a linked copy. The original object is the "clone source," and any modification to the source will be reflected in all its clones.
This is different from Ctrl+D, which creates an independent duplicate. If you have multiple objects that you want to be modifiable all at once, creating them as clones of a single source object is the most efficient method.
Consider a scenario where you have a logo with multiple identical elements. If you create these elements as clones of a single "master" element, you can then edit that master element, and all instances of it throughout your design will update automatically. This saves significant time and ensures consistency.
To identify a clone source, select an object. If it's a clone, its information will appear in the status bar at the bottom of the Inkscape window, indicating that it's a clone and often showing a link to its source.
Replacing Objects with Clones: A Workflow Example
Imagine you've designed a complex pattern with many individual shapes that you now realize should all be linked. Here's how you can replace them with synchronized clones:
- Create Your Master Object: Design the single object that will serve as the "clone source."
- Generate Clones: Use
Edit > Clone > Create Clone(Alt+D) to create your first clone. Then, useCtrl+Drepeatedly to create duplicates of this first clone, arranging them as needed. Alternatively, use Tiled Clones for more complex arrangements. - Select All Target Objects and the Source: Select all the objects you wish to replace, and also select your master "clone source" object.
- Utilize the Align and Distribute Panel: Open the Align and Distribute panel (
Shift+Ctrl+A). - Exchange in Z-order: Under the "Rearrange" section, you'll find the "Exchange in Z-order" button. Repeatedly click this button. What this does is swap the selected objects in the stacking order. By carefully selecting your original objects and your clone source, and repeatedly applying this exchange, you can effectively replace the original objects with their corresponding clones.
- Verify: Once you believe the replacement is complete, edit your original "clone source" object. If the process was successful, all the objects that were replaced should update simultaneously.
This advanced technique allows for a high degree of non-destructive editing and is invaluable for managing complex designs with repetitive elements.

Conclusion: Versatility in Duplication
Inkscape's approach to object duplication is remarkably versatile. From the simple Ctrl+D for independent copies to the powerful, synchronized nature of clones and the intricate control offered by Tiled Clones and Path Effects, users have a robust toolkit at their disposal. Mastering these techniques, particularly the creation of circular arrays and the management of clone relationships, is key to efficient and sophisticated vector design in Inkscape. Whether you're creating intricate patterns, logos, or complex illustrations, understanding how to duplicate and manipulate objects effectively will significantly enhance your workflow and the quality of your final output.