Procreate offers a robust set of tools for managing and manipulating layers, empowering artists to refine their work with precision and flexibility. Among these essential functions, duplicating layers stands out as a fundamental technique for iteration, experimentation, and building complex compositions. Understanding how to duplicate layers, alongside other layer management features like moving, locking, and deleting, is crucial for any Procreate user, from beginners to seasoned professionals. This article will delve into the intricacies of these operations, providing a comprehensive guide to harnessing the full potential of Procreate's layer system.
The Power of Layer Duplication
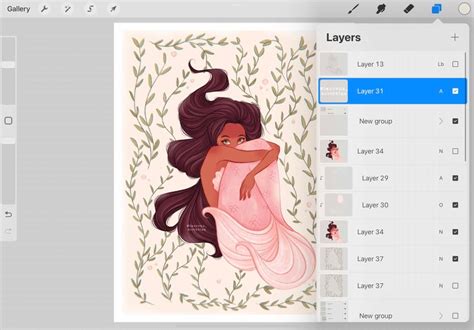
Reproducing an existing layer with Duplicate is a cornerstone of efficient digital art creation. This function allows you to create an exact copy of a layer, providing a safe space to experiment with different styles, colors, or effects without altering the original artwork. Whether you're developing variations of a character design, testing out alternative backgrounds, or simply want a backup of a particular element, duplicating a layer is the most straightforward method.
To duplicate a layer, you typically tap and hold on the desired layer within the Layers panel. A context menu will then appear, offering various options, including "Duplicate." Selecting this option instantly creates a new layer identical to the original, positioned directly above it in the layer stack. This new, duplicated layer can then be independently edited, transformed, or manipulated, offering a high degree of creative freedom.
Strategic Layer Management: Moving, Locking, and Deleting
Beyond duplication, Procreate provides essential tools for organizing and safeguarding your layers.
Moving Layers: Arranging Your Composition
Tap and hold a layer or a Layer Group to pick it up. Now you can drag it up or down in the layer order. This drag-and-drop functionality is vital for controlling the visual hierarchy of your artwork. Layers positioned higher in the panel appear in front of those below them, directly impacting how elements overlap and interact. Mastering the art of reordering layers is fundamental to building complex scenes and ensuring that each element is displayed correctly.
Locking Layers: Protecting Your Work
Protect a completed layer from accidental edits with Lock. When you lock a layer, a small padlock symbol appears next to the layer name in the Layers panel. This feature is invaluable for preventing unintended changes to elements that you are satisfied with. Locking a layer effectively makes it non-editable until the lock is removed. This is particularly useful when working with multiple layers, ensuring that a finalized background, a detailed character component, or a specific texture remains untouched while you focus on other parts of your artwork.
Deleting Layers: Streamlining Your Canvas
While often seen as a final step in the creative process, deleting layers is also a crucial part of managing your canvas efficiently. You should generally think of deletion as permanent. However, Procreate offers an Undo option, allowing you to reverse accidental deletions. To delete a layer, you can swipe left on the layer in the Layers panel and tap the "Delete" option. Alternatively, when multiple layers are selected, a "Delete" option becomes available.
Advanced Layer Selection and Grouping
Procreate elevates layer management by enabling the control and editing of multiple layers at once through layer selections. This feature significantly streamlines workflows, allowing for bulk operations.
Selecting Multiple Layers
Tap and hold a layer to pick it up, then tap other layers to pick them up as well. This allows you to select a contiguous or non-contiguous group of layers. Once selected, these layers can be moved, transformed, or deleted simultaneously. This is a powerful time-saver when you need to adjust the position or scale of several related elements or clear out unwanted layers in one go.
Your Primary layer will appear in the panel as bright blue. Your Secondary layers will appear in the Layers panel as dark blue. As soon as you’ve selected a Secondary layer, two new options appear on the top left of the Layers panel: Delete and Group. This visual distinction between the primary and secondary selected layers helps users keep track of their selections and understand which layer is the focal point of any subsequent actions.
Grouping Layers: Organizing for Clarity
Grouping layers is an indispensable organizational tool, especially in complex projects. Swipe right to select a Secondary Group. Tap to select a Primary Group. This allows you to bundle related layers together into a single, collapsible folder. Tapping on a group name allows you to rename it, making your Layers panel more intuitive and easier to navigate. To ungroup layers, open the Layers Panel and tap the group name. Then tap "Ungroup" in the pop-up menu. Grouping not only tidies up the Layers panel but also allows you to apply transformations or adjustments to an entire group of layers simultaneously, offering another layer of control and efficiency.
Working with Layer Groups
Layer groups are more than just organizational tools; they function as a single entity within the Layers panel. This means you can tap and hold a Layer Group to pick it up and move it within the layer stack, just like an individual layer. This capability is crucial for maintaining the overall structure of your artwork as you rearrange or duplicate entire sections of your composition.
Furthermore, when you select a Layer Group, you can perform actions on all the layers within it. This includes applying transformations, such as moving, scaling, or rotating, to the entire group at once. This is incredibly useful for adjusting the position or size of a character and their associated elements, or for applying a filter to a set of related objects without having to select each layer individually.
To ungroup layers, the process is straightforward. Navigate to the Layers Panel, tap on the name of the group you wish to ungroup, and then select the "Ungroup" option from the pop-up menu. This action will dissolve the group, returning all the contained layers to their individual states within the main Layers panel.
Considerations for Procreate Pocket
It's important to note that Procreate Pocket documents have a maximum number of layers that vary depending on your document size. While Procreate on iPad offers more generous layer limits, Procreate Pocket, designed for iPhone, has constraints to optimize performance on mobile devices. Understanding these limitations is key to planning your artwork and avoiding performance issues. If you find yourself consistently hitting the layer limit in Procreate Pocket, consider optimizing your workflow by merging layers where appropriate or breaking down very large projects into smaller, manageable canvases.
100 PROCREATE TIPS in 15 MIN
The Importance of Iteration and Experimentation
The ability to duplicate, move, lock, and group layers fundamentally supports an iterative and experimental approach to digital art. Duplicating a layer provides a safety net for trying new ideas. Locking layers prevents accidental disruption of established elements. Moving and grouping layers allows for continuous refinement of composition and organization. Together, these tools empower artists to explore creative possibilities with confidence, knowing that they can easily revert, rearrange, and refine their work without fear of losing progress. This flexibility is a hallmark of digital art, allowing for a fluid and dynamic creative process that is difficult to replicate in traditional mediums.
The seamless integration of these layer management features within Procreate's intuitive interface makes it an accessible yet powerful tool for artists of all levels. Whether you are a hobbyist exploring digital painting or a professional designer working on complex projects, mastering these fundamental layer operations will undoubtedly enhance your workflow and elevate the quality of your artwork. The ability to control and edit multiple layers at once, perform bulk operations, and maintain a well-organized layer stack are not just conveniences; they are essential components of efficient and effective digital art creation.