Removing unwanted elements from photographs is a fundamental skill for any photographer or digital artist. Whether it's an unsightly trash can cluttering a scenic landscape, an intrusive photobomber in a cherished portrait, or distracting power lines marring an otherwise perfect sky, Photoshop offers a robust suite of tools to achieve a clean and polished final image. This tutorial will guide you through various methods, from traditional techniques to cutting-edge AI-driven features, empowering you to take your photo editing to the next level.
The Importance of Object Removal in Photography
The ability to remove distracting objects from a photo is more than just a technical skill; it's a creative enhancement that can significantly elevate the impact of your images. Imagine capturing a breathtaking sunset, only to have a stray boat ruin the composition, or a beautiful portrait session marred by a distracting sign in the background. These elements, while minor, can pull focus away from your intended subject and detract from the overall aesthetic.
Decluttering Compositions for Professionalism
Removing unwanted objects can declutter the composition, making it feel more clean, professional, and visually appealing. This is particularly crucial for marketing and promotional materials, where a pristine image is paramount. Overlaying text or logos on a photo becomes much more effective when the background is free from distractions. For instance, a photographer might remove a distracting pole that obstructs the main subject, ensuring the viewer's attention remains precisely where it should be.
Preserving the Moment, Enhancing the Story
While some might view object removal as altering reality, it's often about refining the captured moment to better convey the intended story or emotion. Sometimes, despite best efforts in framing and shooting, certain elements are unavoidable. Knowing how to address these in post-production provides creative freedom and ensures that the final image aligns with the photographer's vision. This can range from removing temporary structures on a beach, like bright orange ropes meant to protect dunes, to eliminating unsightly trash cans or signage that detract from a beautiful landscape.
Traditional Photoshop Techniques: The Clone Stamp Tool
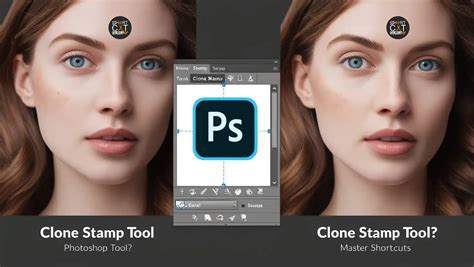
Before the advent of advanced AI, the Clone Stamp tool was a cornerstone for object removal in Photoshop. This powerful tool allows you to sample pixels from one area of an image and paint them over another, effectively covering up unwanted elements.
Understanding the Clone Stamp Tool
The core principle of the Clone Stamp tool is sampling and stamping. You select a source area of your image that you want to replicate - for example, a clean section of wall next to a distracting object. Then, you use the tool to "stamp" this sampled area onto the object you wish to remove.
Step-by-Step Guide to Using the Clone Stamp Tool
- Open Your Image: Begin by opening the photograph you intend to edit in Adobe Photoshop.
- Duplicate the Background Layer: To ensure non-destructive editing, it's crucial to work on a duplicate layer. Select your background layer in the Layers panel and press
Cmd + J(orCtrl + Jon Windows) to create a copy. Alternatively, right-click on the layer and choose "Duplicate Layer." All subsequent edits will be performed on this new layer. - Select the Clone Stamp Tool: Locate the Clone Stamp tool in the Photoshop toolbar (it looks like a rubber stamp).
- Configure Tool Settings: In the Options Bar at the top of the screen, ensure the Mode is set to "Normal" and the Opacity is at 100% for starters. You can adjust brush size and hardness as needed for your specific task.
- Sample the Source Area: Hold down the
Altkey (orOptionkey on Mac) and click on an area of the image adjacent to the object you want to remove. This is your source point. - Stamp Over the Object: Release the
Altkey and begin painting over the unwanted object with your brush. The sampled pixels will be applied to cover it. - Constant Resampling is Key: A critical tip for using the Clone Stamp tool effectively is to constantly resample. As you paint, the tool continues to sample from the original source point. To avoid repetitive patterns or unnatural-looking results, frequently re-sample from different areas around the object you're removing. This ensures that the texture and lighting of the cloned area blend seamlessly with the surrounding pixels.
- Handling Detailed Areas: For intricate areas, such as where a wall meets a couch, precise sampling is essential. Instead of sampling a large, uniform area, sample directly from the edge or detail you want to replicate. For example, to replace a plant growing against a wall, sample the wall itself right next to the plant to maintain crisp lines.
The Clone Stamp tool is remarkably flexible, capable of removing objects of any size, from the smallest blemish to larger, more complex elements. While it might seem daunting at first, consistent practice will make this technique feel intuitive.
Photoshop's Content-Aware Fill: An Intelligent Approach
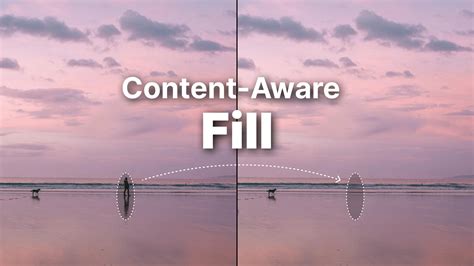
Content-Aware Fill represents a significant leap forward from manual cloning, leveraging Photoshop's intelligence to analyze the surrounding pixels and seamlessly fill in the removed area. This is particularly effective for larger, less complex objects.
How Content-Aware Fill Works
When you instruct Photoshop to use Content-Aware Fill, the software examines the pixels around your selection. It then intelligently generates new content that matches the texture, color, and lighting of the surrounding area, making the removal appear natural.
A Quick Guide to Content-Aware Fill
- Open Your Image: Load your image into Photoshop.
- Select the Lasso Tool: Choose the Lasso tool from the toolbar (shortcut
L). This allows for freehand selections. - Draw a Rough Selection: Create a loose selection around the object you wish to remove. Don't worry about being overly precise; a rough outline is sufficient. You'll see "marching ants" indicating your selection.
- Access the Fill Menu: Navigate to
EDIT > FILL. - Choose Content-Aware: In the Fill dialog box, select "Content-Aware" from the "Contents" dropdown menu.
- Confirm and Deselect: Click "OK." Photoshop will process the image. Then, press
Cmd + D(orCtrl + Don Windows) to deselect the marching ants. - Save Your Work: Save the modified image using
FILE > SAVE AS(renaming it if you wish to preserve the original).
While Photoshop's Content-Aware Fill is powerful, it's worth noting that Lightroom also offers similar fill options that have improved considerably. However, for more complex or larger object removals, Photoshop often remains the preferred choice.
The Revolutionary Remove Tool: AI-Powered Precision
Photoshop's Remove Tool, powered by artificial intelligence and machine learning, has revolutionized object removal, offering an intuitive and highly effective solution. This tool is designed to be incredibly user-friendly, often requiring no complex selections or dialog boxes.
The Power of the Remove Tool
The Remove Tool functions much like a brush. You simply paint over the object or person you want to eliminate, and Photoshop's AI analyzes the area and intelligently reconstructs the background. This process is remarkably fast and often yields superior results compared to older methods, especially for complex areas.
Using the Remove Tool Effectively
- Select the Remove Tool: Locate the Remove Tool within the toolbar. It's typically found in the same group as other healing brushes. You might need to click and hold on the Spot Healing Brush or another tool in that group to reveal it.
- Adjust Brush Size: Use the left and right bracket keys (
[and]) on your keyboard to resize the brush to comfortably cover the object you want to remove. - Paint Over the Object: Click and drag your mouse to paint directly over the unwanted element.
- Release and Observe: Once the area is completely covered, release the mouse button. The Remove Tool will automatically process the removal, filling the area with content that blends seamlessly with the surroundings.
Remove Tool - Photoshop for Beginners | Lesson 7
Non-Destructive Editing with the Remove Tool
A significant advantage of the Remove Tool is its ability to work non-destructively. By default, it might apply edits directly to the background layer, making the removed object permanently gone from that layer. To avoid this:
- Create a New Layer: Before using the Remove Tool, create a new, empty layer above your image layer in the Layers panel.
- Enable "Sample All Layers": In the Options Bar for the Remove Tool, ensure that "Sample All Layers" is checked.
- Paint on the New Layer: Now, when you paint over an object on this new layer, the edits are recorded separately, preserving your original image data.
Refining Results and Handling Complex Edges
The Remove Tool is adept at handling many scenarios, but sometimes further refinement is needed.
- Multiple Strokes: If the initial removal isn't perfect, you can paint over the same area multiple times with smaller brush strokes to clean up imperfections. Patience and careful strokes often lead to better results.
- "Remove After Each Stroke" Option: By default, the tool removes the object as soon as you release the mouse button. For larger or more complex areas, you might find it beneficial to uncheck "Remove after each stroke" in the Options Bar. This allows you to paint multiple strokes to define the area before Photoshop processes the removal, giving you more control over the process.
- Repairing Edges: The Remove Tool can also be used to repair and align edges, such as architectural lines or natural boundaries. This often requires a series of short, deliberate strokes, allowing the AI to intelligently snap sections into alignment. The trick is often to work in smaller segments rather than trying to fix an entire edge at once.
Comparing the Remove Tool with older tools like the Spot Healing Brush often reveals a marked improvement in accuracy and naturalness. While traditional tools might sometimes incorrectly sample or replicate parts of the object being removed, the AI-powered Remove Tool generally produces cleaner, more believable results.
Generative Remove in Adobe Firefly: AI Beyond Photoshop
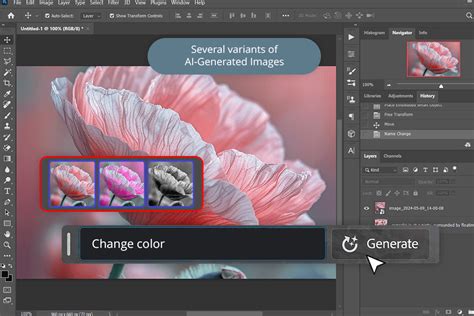
Adobe Firefly, a suite of creative generative AI tools, offers an equally powerful and often more streamlined approach to object removal with its "Generative Remove" feature. This AI-driven tool is accessible through the Firefly image editor and is designed for speed and ease of use.
How Generative Remove Works
Generative Remove utilizes advanced AI models to analyze an image and intelligently fill in areas where objects have been removed. The process is remarkably simple: you paint over the object, and the AI generates a natural-looking replacement.
A Seamless Workflow with Generative Remove
- Access Firefly: Log in to Adobe Firefly using your Adobe ID.
- Open the Image Editor: Navigate to the Firefly image editor.
- Select Generative Remove: From the Quick Actions Menu, choose "Generative Remove."
- Brush Over the Unwanted Object: Use the brush tool to paint over the object or area you want to eliminate. Adjust brush size and hardness as needed via the toolbar.
- Click Generate: Once the object is covered, click the "Generate" button.
- Review and Download: Firefly will process the request and present the result. If you are satisfied, you can download the image, copy it to your clipboard, or share it directly.
Advantages of Generative Remove
- Speed and Simplicity: Generative Remove is exceptionally fast, often completing the task in seconds. Its intuitive interface requires no prior design skills, making it accessible to a broad audience.
- Natural Results: The AI automatically fills the area with natural-looking content, ensuring the visuals remain clean and polished.
- Commercially Safe: Adobe Firefly's generative AI models are trained on licensed content, such as Adobe Stock, and public domain content. This makes the generated results commercially safe to use.
- Versatility: This tool is effective for removing a wide range of unwanted elements, from power lines and street signs in landscapes to photobombers and distracting people in busy backgrounds. It can also be used to remove text, logos, or watermarks from photos, preserving the authenticity of the image.
Choosing the Right Tool for the Job
Both Photoshop's Remove Tool and Adobe Firefly's Generative Remove offer sophisticated AI-powered solutions for object removal. The choice between them may depend on your workflow and preference:
- Photoshop's Remove Tool: Offers deep integration within the comprehensive Photoshop environment, providing a familiar workspace for those already using the software for other editing tasks. It also allows for finer control and integration with other Photoshop features.
- Adobe Firefly's Generative Remove: Provides a faster, more standalone experience, ideal for quick edits or for users who may not have extensive Photoshop experience. Its web-based nature also offers accessibility across different devices.
For traditionalists or those needing precise manual control over every pixel, the Clone Stamp tool remains a valuable skill to master. Content-Aware Fill offers a balance between automation and control for many common scenarios.
Ultimately, the goal is to achieve a clean, natural-looking image that enhances the subject and fulfills the creative intent. With these powerful tools at your disposal, removing unwanted objects from your photos has never been easier or more effective.