Creating compelling visual effects in Adobe Photoshop often involves harnessing the power of custom brushes. Among the most sought-after effects are those that simulate light particles and dust, lending an ethereal or dynamic quality to images. This tutorial delves into the intricate process of creating and utilizing Photoshop brushes for light particle effects, drawing upon various techniques to achieve professional-grade results. Whether you aim to add a subtle glow to a portrait or a dramatic explosion of light to a composite image, understanding brush creation and application is paramount.
Setting the Stage: Preparing Your Canvas and Background
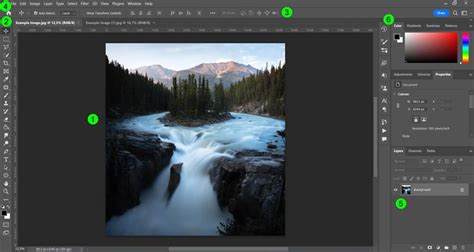
Before diving into brush creation, it's essential to establish a working environment. This begins with setting up a new document in Adobe Photoshop. Navigating to File > New or utilizing the keyboard shortcut Control-N will open the document setup dialog. The dimensions of this document can be flexible, but for brush creation, a moderately sized canvas is often sufficient.
The foundation of your particle effect will be a background image. You can source professional photographs from platforms like Envato Elements, which offers a vast library of images suitable for various themes, from mystical forests to vibrant celebrations. Alternatively, you can use your own existing images. Once you have selected your background, open it in Photoshop via File > Open. To ensure the entire image is available for manipulation, select it using the Marquee Tool (M) or by pressing Control-A.
Crafting the Light Particle Brush: From Pixels to Preset
The core of this tutorial lies in the creation of a custom brush that can generate convincing light particles. This process involves carefully defining the shape and characteristics of individual particles.
Step 1: Building the Particle Foundation
Begin by creating a new document specifically for brush design. A File > New operation is again in order. On this new canvas, create a new layer by clicking the New Layer button in the Layers panel or by using Shift-Control-N. This layer will serve as the canvas for your particle artwork.
Next, access the brush library and select a standard round brush. It is crucial to ensure that your foreground and background colors are set to black and white, respectively. The square bracket keys on your keyboard ([ and ]) are instrumental in adjusting the brush size.
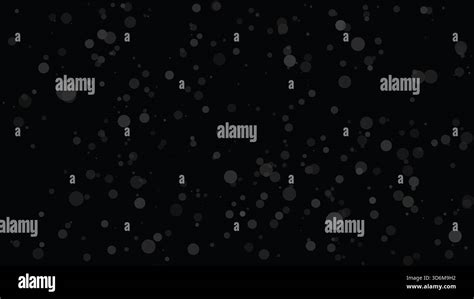
The density of your light particle brush is determined by the number of dots you place within the brush's defined area. Experiment with increasing or decreasing this number using the bracket keys. The key to a realistic particle effect is to randomize the size and location of each individual particle dot. Observe the examples provided to understand how varied placement and size contribute to a more organic look.
Step 2: Defining the Brush Preset
Once you have meticulously arranged your particle dots, it's time to transform this artwork into a reusable brush. Navigate to Edit > Define Brush Preset. You will be prompted to name your new brush. Choose a descriptive name, such as 'particle effect Photoshop brush', to easily identify it later.
Step 3: Enhancing Brush Dynamics
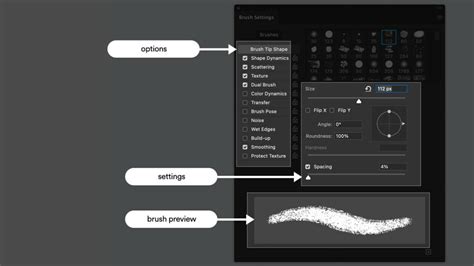
To imbue your custom brush with dynamic behavior, you'll utilize the brush settings panel. Ensure the 'particle effect Photoshop brush' is selected. Within the brush settings, activate Shape Dynamics and Scattering. For Scattering, select Both Axes to ensure particles spread in all directions. Adjusting Size Jitter to 100% in Shape Dynamics will ensure significant variation in the size of each particle spawned by the brush, contributing to a more natural appearance. The Transfer settings can also be explored to further control the opacity and flow of the particles.
Applying the Light Particle Brush: Layer by Layer Illumination
With your custom light particle brush created and configured, you can now apply it to your background image to create stunning visual effects. The strategy involves using multiple layers to build depth and dimension.
Layer 1: Back Light Particles
Create a new layer and name it 'Back Light Particles'. Select your newly defined 'particle effect Photoshop brush'. Choose a color for your particles; often, a subtle white or a color that complements the background works best. Make the size of the brush small using the square bracket keys or the brush settings. Begin painting light particles onto this layer, focusing on areas that would naturally receive ambient light or emanate a soft glow from behind the main subject.
Layer 2: Mid Light Particles
Create another new layer, this time naming it 'Mid Light Particles'. Slightly increase the size of your particle brush. Use this layer to add more prominent light particles that appear to be closer to the viewer or the main focal point of the image. The increased size and potentially a slightly brighter color can help create a sense of depth.
Layer 3: Front Light Particles
For the final layer of particle illumination, create a new layer and label it 'Front Light Particles'. Significantly increase the size of your particle effect brush. Use this layer to paint larger, more distinct light particles that appear to be in the foreground, adding a dynamic and immersive quality to the scene.
Adding Atmospheric Effects: Enhancing the Mood
To further refine the particle effect and integrate it seamlessly with the background, atmospheric adjustments can be applied.
Creating a Cold Atmosphere
To give your background layer a cold atmosphere, you can apply a blue hue. This can be achieved by creating a new layer, setting its layer mode to Overlay, and adjusting the Opacity to around 75%. Within the curve properties of this layer, you can adjust the graph for the red, green, and blue channels to achieve the desired blue tint. Keep adjusting the color of the overlay layer until you are happy with the result.
Simulating a Light Source
A simple yet effective way to add a central light source or a general glow is by creating a new layer and filling it with black using the Fill Tool (G). Then, use the Ellipse Tool (U) to draw a white oval in the middle of the canvas. Adjust the opacity of this layer to your liking to create a soft, diffused light effect that complements your particle layers.
Create LIGHT RAYS in Photoshop for Overlays & Brushes
Advanced Techniques: Dust Particles and Disintegration Effects
Beyond basic light particles, Photoshop brushes can be employed to create more complex effects like dust particles and disintegration.
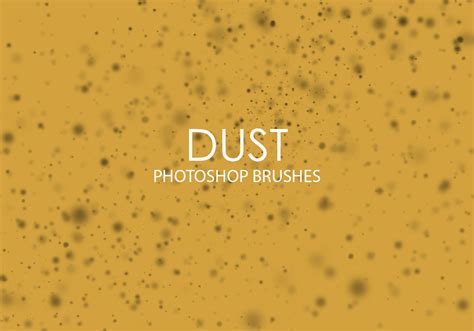
Dust Particle Brush Creation
To add dust particles, a similar brush creation process can be followed. Create a new layer and rename it 'Small Dust Particles'. Set the brush size to mimic the desired dust particle size (e.g., 10 or 20 pixels). Activate the Spacing option and set it to its maximum value (1000%) to ensure individual particles are well-separated. Enabling Shape Dynamics with Size Jitter at 100% and Scattering (Both Axes) will create a realistic distribution of dust. The Transfer settings can also be adjusted for subtle opacity variations. Applying this dust brush on a new layer allows for easy opacity adjustments (around 20%) to create a lighter, more atmospheric dust effect.
Alternatively, a more intricate dust brush can be created by starting with a new document and using black and white foreground/background colors. Using a hard or soft round brush, paint speckles of white on a black background. For finer details, select a soft round brush and paint over the texture area. To refine the dust look, use Select > Color Range, choose Highlights, set Fuzziness to 20%, and Range to 190. Then, apply a Layer Mask > Reveal Selection. Further refinement can be achieved by inverting the layer's colors (Control-I).
Simulating Light Rays and Disintegration
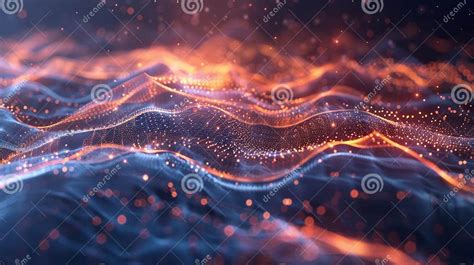
To create light rays, after covering your image with dust specs using a custom brush, make the brush slightly larger and paint in a single area of the photo. Then, navigate to Filter > Blur > Motion Blur. Experiment with the Angle and strength of the blur to achieve a convincing light ray effect.
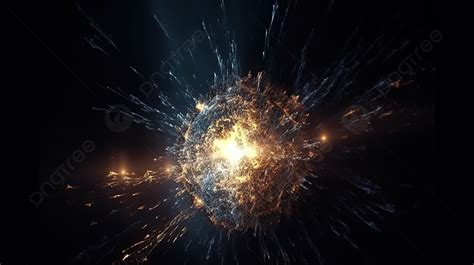
The increasingly popular disintegration effect, popularized by the Marvel Cinematic Universe, can also be achieved using different types of brushes, including splatter and dispersion brushes. The core idea often involves using brushes that mimic shattered fragments or particles to break down elements of an image. This effect is surprisingly accessible and can be implemented with careful brush selection and application.
Integrating and Refining: The Final Touches
When applying dust particles to a photo, create a new layer and choose your dust brush. Set the foreground color to white and brush over your photo. To integrate the dust more effectively, you can create a new Solid Color fill layer above your dust layer, choosing a color like #c4d7f8 (a light blue) and naming it 'Dust1Color'. Repeat these steps to create multiple dust layers with different brushes, color settings, and blending modes.
For creating a dynamic particle explosion, specific brush sets, such as the 'Dust Particles' free brush set, can be incredibly useful. These brushes are designed to simplify the process of scattering particles. When applying these brushes, consider placing them on a new layer with a white brush on a dark background (like #191919). After rasterizing text layers, a large, soft white brush with low opacity (10-20%) can be used on a layer below the text to paint a subtle light behind it, enhancing the explosion's impact.
By mastering the creation and application of custom brushes, particularly those designed for light particles and dust, you can significantly elevate the visual appeal of your Photoshop projects. The ability to control particle size, scattering, opacity, and color, combined with strategic layering and atmospheric adjustments, allows for the creation of a wide array of stunning and immersive effects. Remember to explore different brush settings and experiment with blending modes to achieve unique and personalized results.