DaVinci Resolve is a powerhouse in the realm of video editing, boasting an impressive suite of advanced audio manipulation capabilities. A fundamental and frequently encountered task for video editors involves the precise separation of audio from video. This crucial step enables independent sound editing, the effective removal of unwanted background noise, or the seamless replacement of existing audio tracks with new content. For those aspiring to achieve mastery in DaVinci Resolve, a dedicated DaVinci Resolve Course offers expert training in audio editing, mixing, and comprehensive video post-production.
Detaching Audio from Video Clips
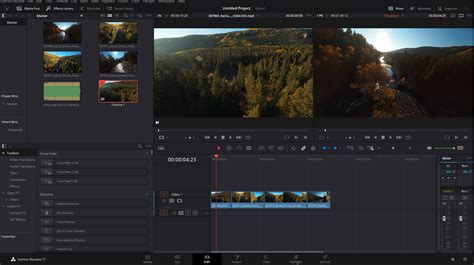
The most straightforward method to detach audio from a video clip within DaVinci Resolve is by unlinking it directly within the Edit tab. This process allows for granular control over both the visual and auditory components of your project.
Method 1: Unlinking and Deleting Audio from Video
This method is ideal when the original audio is not needed and you wish to completely remove it from the timeline.
- Open DaVinci Resolve and Navigate to the Edit Tab: Launch the software and select the "Edit" workspace, which is typically found at the bottom of the screen.
- Import Your Video Clip: Drag your video file from the Media Pool directly onto the Timeline.
- Right-Click and Select "Unlink": Locate the video clip on your timeline. Right-click on either the video or the audio portion. In the context menu that appears, find and select the "Unlink" option. This action severs the connection between the audio and video components.
- Delete the Audio Track: After unlinking, the audio track will appear as a distinct element on the timeline, usually indicated by a green waveform. Click on this audio track to select it. Once selected, press the "Delete" key on your keyboard. This will remove the audio track entirely, leaving only the video.
Pro Tip: If your intention is to retain the audio for separate editing rather than deletion, simply perform the "Unlink" step without proceeding to delete the audio track. This keeps the audio available for further manipulation.
Method 2: Muting Audio Instead of Deleting
There are instances where you might want to keep the audio track present in the timeline but prevent it from playing in the final export. The "Mute" function serves this purpose perfectly.
- Right-Click the Audio Clip: On the timeline, right-click directly on the audio clip (the green waveform).
- Select "Mute Clip": From the contextual menu, choose the "Mute Clip" option.
- Audio Remains Silent: The audio track will stay on the timeline, visually present, but it will not produce any sound during playback or in the final exported video.
Pro Tip: This technique is particularly useful when you plan to introduce new audio elements, such as background music or voiceovers, and wish to silence the original audio without permanently removing it.
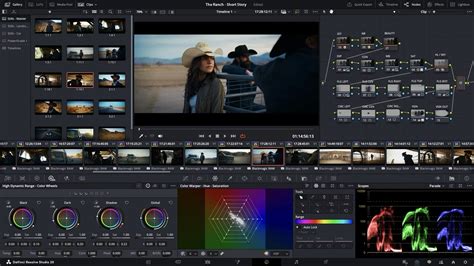
Editing Separated Audio in DaVinci Resolve (Fairlight Page)
Once the audio has been successfully separated from the video, DaVinci Resolve's dedicated audio post-production environment, the Fairlight page, becomes your primary tool for editing, enhancing, and replacing audio.
Step 1: Accessing the Fairlight Page
- Switch to the Fairlight Tab: Click on the "Fairlight" tab, located in the bottom menu of the DaVinci Resolve interface.
- Locate the Audio Track: Your separated audio track will be visible at the bottom of the Fairlight timeline.
- Utilize the Waveform Display: The waveform visually represents your audio, allowing you to pinpoint specific moments, edit points, and identify the characteristics of the sound.
Step 2: Adjusting Audio Levels and Applying Effects
The Inspector panel in Fairlight provides comprehensive control over your audio.
- Open the Inspector Panel: The Inspector panel is typically located in the top-right section of the Fairlight interface.
- Refine Audio with Volume, Balance, and Panning: Within the Inspector, you can precisely adjust the audio's volume, stereo balance, and panning to create a spatial audio experience.
- Employ the Equalizer (EQ) Tool: The Equalizer is invaluable for shaping the tonal characteristics of your audio. Use it to boost desirable frequencies or, more commonly, to cut out unwanted frequencies that contribute to muddiness or harshness.
- Noise Reduction for Cleaner Sound: A powerful feature within Fairlight is the Noise Reduction tool. This is essential for cleaning up background hiss, hum, or other ambient noise that may have been captured with the original audio.
Pro Tip: Experiment with the Noise Reduction settings to find the optimal balance between removing noise and preserving the integrity of the desired audio. Overuse can sometimes lead to a muffled or unnatural sound.
Step 3: Replacing Audio with a New Soundtrack
If the original audio is beyond repair or you intend to use entirely new audio, Fairlight facilitates seamless replacement.
- Import New Audio: Navigate to the Media Pool and import your desired new audio file (e.g., music, voiceover, sound effects).
- Place on Timeline: Drag the imported audio file onto the Fairlight timeline. Position it so that it aligns with the corresponding section of your video.
- Synchronize Audio and Video: Carefully adjust the position of the new audio track to ensure it is perfectly synchronized with the visuals. Use the waveform display of both the original (if kept for reference) and the new audio to achieve precise timing.
Pro Tip: If your new audio appears out of sync, the Waveform Display is your best friend. Visually aligning the peaks and troughs of the new audio's waveform with those of the video's original audio (or the video's visual cues) is the most accurate way to achieve perfect sync.
Best Practices for Separating and Editing Audio in DaVinci Resolve
Adhering to certain best practices can significantly improve your workflow and the final audio quality.
- Maintain Backup Copies: Always keep a backup of your original audio track. This provides a safety net should you need to revert to the original sound or use it for comparison.
- Normalize Audio Levels: Use the "Normalize Audio" function to ensure consistent sound levels across different clips or throughout a single track. This prevents sudden jumps in volume.
- Smooth Transitions with Fades: Apply "Fade In" and "Fade Out" effects to the beginning and end of audio clips. This creates smooth, natural transitions, avoiding abrupt cuts that can be jarring to the listener.
- Verify Sync Alignment: When replacing dialogue or adding external audio, meticulously check the sync alignment. Even a few frames of misalignment can be noticeable and detract from the professional quality of your video.
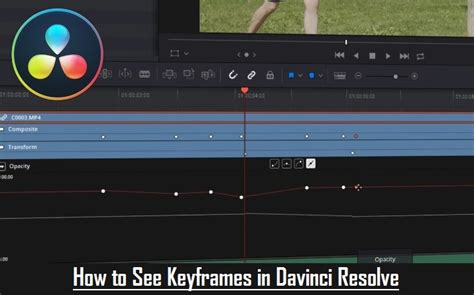
- Utilize Keyframes for Dynamic Control: For precise control over volume changes over time, use keyframes. This allows you to create gradual fades, boosts, or dips in audio volume that precisely match the on-screen action or narrative.
Pro Tip: Dedicating time to master the Fairlight audio tools will undoubtedly lead to a significant improvement in the overall sound quality of your video productions.
Why Separate Audio from Video in DaVinci Resolve?
The ability to separate audio from video is a cornerstone of professional video editing, offering a multitude of benefits:
- Noise Removal: Eliminate distracting background noise while preserving the integrity of the visual content.
- Audio Replacement: Substitute poor-quality original audio with superior recordings, clean dialogue, or a fitting musical score.
- Independent Level Adjustment: Fine-tune audio levels for different elements (dialogue, music, sound effects) independently, achieving a balanced and professional sound mix.
- Synchronization of External Sources: Seamlessly sync new voiceovers, interviews recorded separately, or other external audio sources with your video footage.
Pro Tip: Detaching audio is an indispensable technique for various production types, including interviews, podcasts, vlogs, and cinematic projects where pristine audio quality is paramount.
If the objective is to completely silence a clip without necessarily editing or replacing its audio, DaVinci Resolve offers straightforward methods to mute or delete audio tracks instantly, effectively removing sound from video. Furthermore, for tasks involving precise framing adjustments or audio replacement, understanding how to zoom in and out in DaVinci Resolve is crucial for achieving cleaner and more accurate edits.
Frequently Asked Questions About Separating Audio from Video in DaVinci Resolve
How do I separate audio from video in DaVinci Resolve?
To separate audio from video, navigate to the Edit tab, right-click on the video clip, and select "Unlink." This detaches the audio track, allowing for independent editing or deletion.
How do I delete audio from a video clip in DaVinci Resolve?
After unlinking the audio from the video, select the audio track (the green waveform) on the timeline and press the "Delete" key. This removes the sound while keeping the video intact.
Can I mute audio instead of deleting it in DaVinci Resolve?
Yes, you can right-click the audio track and select "Mute Clip." The audio track will remain in the timeline but will be silent during playback and export.
How do I replace the audio in a video using DaVinci Resolve?
First, unlink and delete the original audio. Then, import your new audio file into the Media Pool and drag it onto the timeline, aligning it with the video.
Can I edit the separated audio in DaVinci Resolve?
Absolutely. Once the audio is detached, switch to the Fairlight page. Here, you can adjust volume, apply noise reduction, and enhance the overall sound quality.
Why is my audio out of sync after separating it in DaVinci Resolve?
If audio becomes misaligned, use the Waveform Display in the timeline to manually resynchronize it with the video by adjusting its position.
How do I increase or decrease audio levels after separating sound from a video?
Go to the Inspector panel, locate the "Volume" slider, and adjust it to increase or decrease the sound level of the separated audio track.
Can I extract only the audio from a video file in DaVinci Resolve?
Yes. You can separate the audio by unlinking it. Then, in the Deliver page, export the audio track separately by choosing an audio-only format, such as WAV or AAC.
How do I add effects to audio after separating it from video?
Utilize the Fairlight page to apply effects like EQ, compression, reverb, and noise reduction to enhance the quality of your separated audio.
Can I separate multiple audio tracks from a video file in DaVinci Resolve?
Yes. If your video contains multiple audio channels, you can unlink and edit each track individually within the Fairlight page, adjusting levels and effects for each specific track.
How do I export a video without audio after separating the sound?
In the Deliver page, navigate to "Audio Settings" and uncheck the "Export Audio" option before rendering your video. This will export a video file with no sound.
Whatâs the best way to clean up background noise in separated audio?
Use the "Noise Reduction" tool in the Fairlight page to effectively remove unwanted background sounds after separating the audio.
Can I automatically sync external audio with my video in DaVinci Resolve?
Yes, the "Auto Sync Audio" function in the Media Pool can automatically match external audio with video based on their respective waveforms.
How do I separate audio from video without losing quality?
Unlinking the audio itself does not reduce quality. Ensure your project settings match the original file format to maintain optimal quality during editing and export.
20 Years of Audio Editing Tips in 10 Minutes
Final Thoughts: Achieving Professional Audio in DaVinci Resolve
DaVinci Resolve 20, and its subsequent versions, provides a comprehensive toolkit for separating, editing, and enhancing audio, empowering users to craft high-quality soundtracks for their video projects. Whether the goal is to eliminate intrusive background noise, perfectly sync external audio sources, or meticulously refine overall sound quality, the techniques discussed here will guide you toward achieving professional-grade results. For those seeking to elevate their audio and video editing proficiencies further, consider enrolling in a DaVinci Resolve Course. Such programs offer in-depth training on advanced sound design, mixing strategies, and post-production workflows, often led by industry experts. The software's robust features, from basic unlinking to complex Fairlight manipulations, ensure that creative visions can be realized without being hindered by technical limitations. With tools designed to work flawlessly, creativity can flow naturally, unburdened by tedious technicalities.