Photopea, a powerful and free online photo editor, offers a robust set of tools for image manipulation, including intricate background editing. This tutorial delves into the process of modifying large backgrounds, a common task for graphic designers, photographers, and hobbyists alike. Whether you aim to replace a sky in a landscape, isolate a product for e-commerce, or create a composite image, understanding how to effectively manage and edit large backgrounds within Photopea is crucial.
Understanding Photopea's Interface for Background Editing
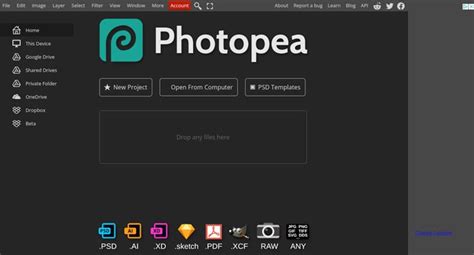
Before diving into specific techniques, it's essential to familiarize yourself with Photopea's workspace. Upon opening Photopea.com, you're greeted with a familiar interface akin to desktop photo editing software. The main canvas displays your image, while toolbars and panels provide access to various functions. For background editing, key elements include the Tools Panel (on the left), the Layers Panel (typically on the right), and the Top Menu Bar.
The Layers Panel is paramount. It allows you to work non-destructively, meaning your original image data remains intact. Each element - your original photo, a new background, or any adjustments - can exist on its own layer. This flexibility is key when dealing with large backgrounds, as it enables easy modification, repositioning, and even complete replacement without affecting other parts of your image.
Isolating the Subject: The Foundation of Background Editing
The most critical step in editing a large background is accurately isolating the subject from its original surroundings. Photopea offers several tools to achieve this, catering to different image complexities.
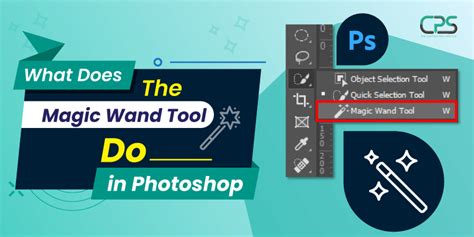
The Magic Wand Tool: For Uniform Backgrounds
The Magic Wand tool is ideal for selecting areas with similar colors. As demonstrated in the provided information, "We will demonstrate our work on this image of a tree, where we want to remove the sky. We will select the background with a Magic Wand tool. It can select an area with similar colors (blue in our case)."
To use it:
- Select the Magic Wand tool from the toolbar.
- Click on the background area you wish to remove. Photopea will create a selection based on contiguous pixels of similar color.
- "Each click removes the old selection, and creates a new one. Hold Shift to combine the new selection with an old selection." This allows you to refine the selection by adding more areas.
- "Try changing the Tolerance and Contiguous in the top menu." The Tolerance setting determines how similar the colors need to be to be included in the selection. A higher tolerance will select a wider range of colors. Contiguous ensures that only connected pixels are selected. If unchecked, all pixels of the selected color across the entire image will be selected.
This process, while powerful, can be time-consuming. "Selecting may be hard, it can take 10 seconds, or even several hours. The more time you spend, the more perfect it becomes." Precision here directly impacts the final result.
Other Selection Tools for Complex Backgrounds
While the Magic Wand is effective for simple, uniform backgrounds, more complex scenarios often require other tools:
- Quick Selection Tool: Similar to the Magic Wand, but it works by "painting" a selection. You drag the tool over the area you want to select, and Photopea intelligently tries to detect edges. This can be more intuitive for irregularly shaped subjects.
- Lasso Tools (Lasso, Polygonal Lasso, Magnetic Lasso): These tools offer manual selection methods. The standard Lasso allows freehand drawing, the Polygonal Lasso creates straight-edged selections, and the Magnetic Lasso attempts to snap to edges based on color contrast.
- Pen Tool: For absolute precision, especially with hard edges and smooth curves, the Pen Tool is unparalleled. It allows you to create vector paths that can be converted into selections. This method offers the most control but has a steeper learning curve.
- Object Selection Tool: This AI-powered tool attempts to automatically detect and select distinct objects within an image. It’s a great starting point for many complex subjects.
- Magic Cut - Remove Image Background Online: Photopea also offers specialized tools like "Magic Cut - Remove Image Background Online," designed for single-click background removal. This is a highly efficient option when the subject is clearly defined.
Removing and Replacing the Background
Once your subject is precisely selected, the next step is to remove the original background and introduce a new one.
Deleting the Original Background
After creating a selection of the background, you can remove it. "To delete a selected area, press Edit - Clear in the top menu, or Delete on your keyboard (if the layer is a Smart Object, press Layer - Rasterize first)." Rasterizing a layer converts it from a smart object (which has non-destructive editing capabilities) into a regular pixel layer, allowing direct deletion. The appearance of "the white and grey squares mean, that the area is empty," indicating transparency.
Adding a New Background
To add a new background, you can utilize the "File - Open & Place" command. "The image, that you choose, will be placed as a new layer." This new layer will typically appear above your subject layer. You can then manipulate this background layer:
- Repositioning: Click and drag the background image to fit your composition.
- Resizing: "Now, you can move the background image and resize it (by dragging its corners) and confirm the size by hitting Enter." Use the Free Transform tool (Edit > Free Transform or Ctrl+Alt+T / Cmd+Opt+T) for more precise scaling, rotation, and distortion.

Refining the Edges for a Seamless Blend
A common pitfall in background editing is the appearance of harsh or unnatural edges where the subject meets the new background. Achieving a seamless blend requires careful refinement.
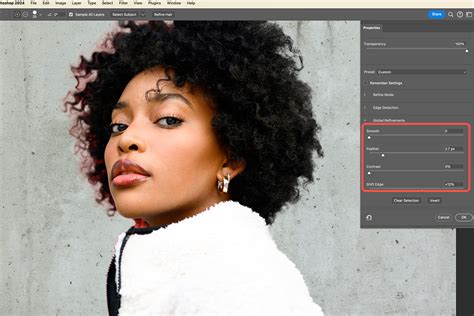
Feathering Selections
The Feather setting within the selection tools (or applied after selection via Select > Modify > Feather) introduces a soft transition between the selected area and the unselected area. A small feather radius can soften harsh edges, making the subject appear more naturally integrated into the new background. Experiment with small values (e.g., 0.5-2 pixels) to avoid an overly blurry or "halo" effect.
Layer Masks: The Non-Destructive Approach
Layer masks are indispensable for advanced background editing. Instead of directly deleting pixels, a layer mask allows you to selectively hide or reveal parts of a layer.
- After selecting your subject, add a Layer Mask to the subject's layer (Layer > Layer Mask > Reveal Selection or Hide Selection).
- A mask thumbnail will appear next to the layer thumbnail. Painting with black on the mask will hide parts of the layer, while painting with white will reveal them. Grays will create semi-transparency.
- This method is highly forgiving. You can always refine the mask by painting with black or white without permanently altering your original image data. This is crucial for large background edits where you might need to make numerous adjustments.
Blending (Blur) Brush in Photopea
For subtle transitions, the Blending (Blur) Brush can be useful. "We often paint with a small number of colors, and later, we want to blend the edges between the colors, to create a blurry effect." While primarily used for color blending, a low-opacity brush with a soft edge can be used on a layer mask to gently blend the subject's edges into the new background, especially if the background has a softer focus.
Advanced Techniques for Large Backgrounds
Handling very large or complex backgrounds often requires more sophisticated strategies.
Working with High Resolution and DPI
When preparing graphics for specific purposes, such as printing, setting the correct dimensions and resolution is vital. "Set a specific Width, Height, and DPI. Example: we have a square image from the internet, and we need to make it 9" x 3.7" at 300 DPI." You can adjust these settings in Photopea via Image > Image Size. Ensure your canvas is large enough to accommodate your new background and any elements you plan to add.
Stitching Images Together for Panoramas
If your desired background is a panorama or a very wide scene, you might need to stitch multiple images together. "Stitch Images Together Online. Did you take multiple photos and want to combine them into a panorama? Or you scanned parts of a picture and want to reconstruct the whole image?" Photopea can facilitate this by opening multiple images as layers and using blending techniques or alignment tools to seamlessly merge them into a single, large background.
Utilizing AI Features for Efficiency
Photopea integrates AI-powered features that can significantly speed up background editing. "Photopea offers many AI features (Remove BG, Magic Replace, etc)." The single-click background removal and the object selection tool are prime examples. These tools leverage artificial intelligence to automate complex selections, saving considerable time on intricate subjects.
How to remove background in Photopea (Easy & Fast) | Photopea Tutorial
Saving Your Edited Image
Once your background editing is complete, saving your work correctly is essential.
File Formats for Transparency
If your edited image needs to retain transparency (e.g., if you've isolated an object to be placed on a website with a transparent background), you must save it in a format that supports transparency. "Now, save the image as PNG (File - Export As - PNG, hit "Save")." The PNG format is widely supported and preserves transparency.
When to Use JPG
If your image has a solid background and doesn't require transparency, or if you're exporting for web use where file size is a concern, JPG is a suitable format. However, be aware that JPG is a lossy format, meaning some image quality is sacrificed for smaller file sizes. "Why images look blurry in my computer. When you create an image in Photopea, or any other editor, it looks great inside that editor. But after you save it and open it in another program, suddenly, it looks blurry." This can sometimes be due to saving as JPG at a low quality setting, or by opening the image in a program that doesn't handle color profiles or image scaling optimally.
Troubleshooting Common Issues
Even with powerful tools, challenges can arise.
Malicious Ads inside Photopea?
While Photopea is a free service monetized through advertising, "Malicious Ads inside Photopea?" is a concern some users may encounter. If you suspect an ad is malicious, it's best to report it and consider using an ad blocker or a premium account for an ad-free experience. "Photopea is monetized mainly through advertisement. Ads may cover between 5% and 15% of the screen."
Ad Blockers and Photopea
Sometimes, "Photopea says I am blocking ads, but I am not." This can be due to aggressive ad-blocking settings or conflicts with other browser extensions. Ensuring Photopea is whitelisted in your ad blocker or disabling it temporarily can resolve this. Similarly, if "Premium Account does not work," contacting Photopea support is the best course of action.
Photopea Doesn’t Work - What To Do
If "Photopea Doesn’t Work - What To Do," common solutions include clearing your browser cache and cookies, trying a different browser, ensuring your browser and graphics drivers are up to date, or checking your internet connection.
By mastering these techniques, you can confidently tackle large background editing tasks in Photopea, transforming your images with precision and creativity.
tags: #photopea #large #background #for #editing