Photopea, a powerful and free online photo editor, offers a wealth of tools for image manipulation. Among these, the ability to invert colors is a fundamental yet often overlooked feature, crucial for a variety of tasks, from correcting scanned negatives to achieving specific artistic effects. This guide delves into the nuances of color inversion in Photopea, providing detailed instructions and explanations for its effective use.
Understanding Color Inversion
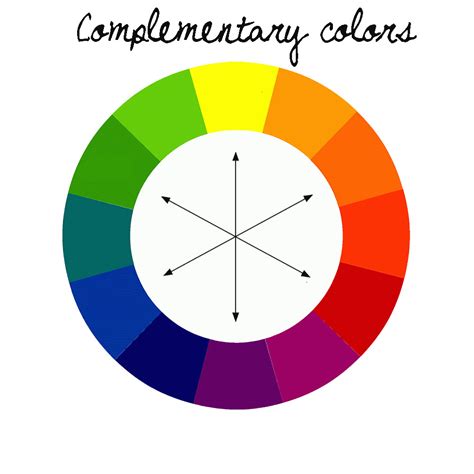
Color inversion, at its core, is the process of replacing each color in an image with its complementary color. In a digital image, colors are represented by numerical values. For example, in an RGB color model, red, green, and blue light are combined to create all other colors. Inverting a color means subtracting its value from the maximum possible value for that color channel. For instance, if the maximum value for red is 255, and a pixel has a red value of 100, its inverted red value will be 255 - 100 = 155. This process, when applied to all color channels (red, green, and blue), effectively flips the image to its negative.
This technique is particularly vital when dealing with scanned negatives, which, by their nature, display inverted colors. To transform these negatives into viewable positives, a color inversion process is essential. While dedicated software exists, Photopea provides an accessible and efficient solution for this common requirement.
Inverting Colors in Photopea: Step-by-Step
Photopea offers several methods to achieve color inversion, catering to different needs and levels of desired control.
Method 1: Using the "Invert" Adjustment Layer
This is the most straightforward and recommended method for a quick and effective color inversion.
Open your image in Photopea by going to "File" > "Open" or by dragging and dropping the image file into the Photopea workspace.
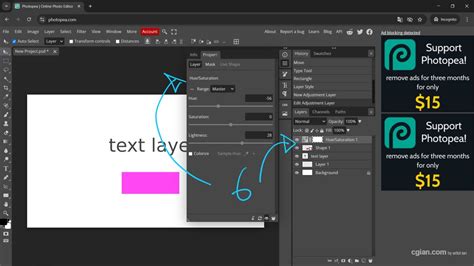
Access the Adjustments panel: If the Adjustments panel is not visible, go to "Window" > "Adjustments."
Select the "Invert" adjustment: Within the Adjustments panel, locate and click on the "Invert" icon. This will immediately apply an Invert adjustment layer to your image.
Observe the result: Your image will now appear with its colors inverted. For scanned negatives, this will transform them into positive images.
Advantages of using an Adjustment Layer:
- Non-destructive editing: Adjustment layers do not permanently alter the original image pixels. You can modify, disable, or delete the adjustment layer at any time without affecting the underlying image data.
- Flexibility: You can further refine the inversion or combine it with other adjustments for more complex editing.
Method 2: Using the "Curves" Adjustment for Precise Control
The "Curves" adjustment offers a more granular approach to color inversion, allowing for nuanced adjustments, especially useful for complex negative scans or when aiming for specific tonal outcomes.
Open your image in Photopea.
Add a "Curves" adjustment layer: Go to "Layer" > "New Adjustment Layer" > "Curves," or select "Curves" from the Adjustments panel.
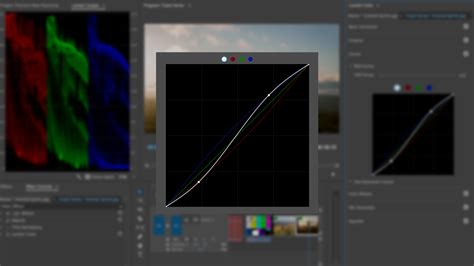
Invert the RGB curve: In the Curves properties panel, you will see a graph representing the tonal range of your image. By default, it displays the "RGB" channel.
- To invert the image, click on the bottom-left point of the curve (representing pure black) and drag it to the top-left corner (representing pure white).
- Simultaneously, click on the top-right point of the curve (representing pure white) and drag it to the bottom-right corner (representing pure black).
- Essentially, you are creating an inverted "S" shape by dragging the endpoints. This effectively maps black to white and white to black across the entire tonal spectrum.
Adjusting individual color channels (for color negatives): For color negatives, inverting only the RGB composite might not yield perfect results. You'll need to invert each color channel (Red, Green, Blue) individually.
- Select the "Red" channel from the dropdown menu in the Curves panel. Invert the curve for the red channel as described above.
- Repeat the process for the "Green" channel.
- Repeat the process for the "Blue" channel.
By inverting each color channel independently, you can accurately correct color negatives and achieve a natural-looking positive image.
When to use the "Curves" method:
- When you need precise control over the inversion process.
- For correcting color negatives where individual channel adjustments are necessary.
- To achieve specific artistic effects by selectively inverting parts of the tonal range.
Method 3: Using Image > Adjustments > Invert (Destructive)
This method directly modifies the image pixels and is generally less preferred due to its destructive nature.
Open your image in Photopea.
Select the layer you wish to invert (if you have multiple layers).
Go to "Image" > "Adjustments" > "Invert."
Disadvantages of this method:
- Destructive: This action permanently alters the pixels of the selected layer. If you make a mistake or want to revert the changes, you'll need to reopen the original file or use the Undo history (which has limitations).
- Less Flexible: It's harder to fine-tune the inversion or combine it with other adjustments compared to using adjustment layers.
Applications of Color Inversion
The ability to invert colors has a wide range of practical and creative applications:
Correcting Scanned Negatives
As mentioned, this is perhaps the most common use case. When scanning film negatives, the resulting image is a negative. Photopea's inversion tools, particularly the "Curves" adjustment for individual color channels, are invaluable for converting these negatives into viewable positive photographs. This process eliminates the need for intermediate software like GraphicConverter, streamlining the workflow.
Creating Artistic Effects
Color inversion can produce striking and surreal visual effects. Inverting a brightly colored image can lead to a psychedelic or otherworldly appearance. Experimenting with inverting specific color channels can also yield unique color palettes.
Dark Mode and High Contrast Designs
For certain design applications, inverting colors can be a quick way to create a dark mode version of an interface or generate high-contrast visuals for accessibility or stylistic purposes.
Screen Recording Issues and Color Reversal
The user's experience with screen recordings appearing in reversed colors after an iOS update highlights a potential software glitch or a setting conflict. While the exact cause on iOS might be complex, the principle of color reversal is at play. If a device or application incorrectly applies an inversion filter during recording or playback, the resulting video will appear as a negative. This situation underscores the importance of understanding how color transformations are applied and the potential for unexpected behavior in software.
Debugging and Analysis
In some technical contexts, inverting colors can aid in visual analysis. For example, it might help to highlight subtle details or patterns that are less apparent in the original color scheme.
Advanced Techniques and Considerations
Combining Inversion with Other Adjustments
The true power of Photopea lies in its layer-based editing. You can stack multiple adjustment layers to refine your inverted image. For instance, after inverting a negative, you might use a "Levels" or "Curves" adjustment to fine-tune brightness and contrast, or a "Hue/Saturation" adjustment to correct any remaining color casts.
Masking Adjustment Layers
For selective inversion, you can use layer masks. By applying a mask to an Invert or Curves adjustment layer, you can control which parts of the image are affected by the inversion. Painting black on the mask will hide the adjustment, while painting white will reveal it. This is useful if you only want to invert a specific object or area within an image.
Understanding Color Models
Photopea primarily works with the RGB color model. However, understanding CMYK (Cyan, Magenta, Yellow, Key/Black) is also relevant, especially for print design. While Photopea's "Invert" function operates on the displayed RGB values, knowledge of CMYK can be useful when preparing images for print, as inversion principles apply differently to subtractive color models.
The "Wiggling" Curves
The user's mention of "dragging curves they keep wiggling around" suggests potential issues with mouse precision or software responsiveness. When working with the Curves tool, a steady hand and careful mouse control are important. Zooming in on the curve graph can provide more precise control. If the issue persists, it might be related to system performance or mouse driver settings.
Beyond Simple Inversion: Transformations
The user's description of "Free Transform" and its capabilities (scaling, rotating, skewing, perspective, and warp) is a separate but related aspect of image manipulation in Photopea. While these tools don't directly invert colors, they are part of the comprehensive toolkit for altering an image's appearance. The "Warp" tool, in particular, allows for complex, non-linear distortions, bending the image within a defined grid of control points. This demonstrates the depth of Photopea's editing power, extending beyond simple color adjustments to intricate geometric transformations.
Conclusion
Color inversion in Photopea is a versatile tool that serves critical functions, from practical photo restoration to creative visual exploration. By understanding the different methods available, particularly the non-destructive power of adjustment layers like "Invert" and "Curves," users can effectively manipulate their images. Whether you're a photographer correcting scanned negatives or a designer seeking unique effects, mastering color inversion will significantly enhance your digital editing capabilities within Photopea.