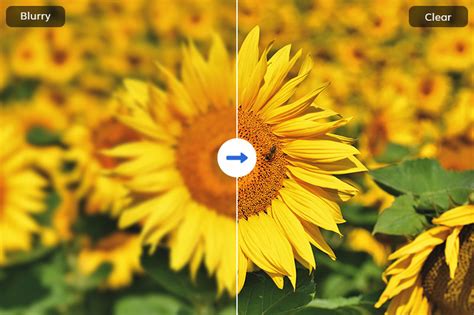
Achieving a beautifully blurred background in your photographs can dramatically enhance their impact, drawing the viewer's eye directly to your intended subject. While a shallow depth of field achieved in-camera is often desirable, it's not always feasible or practical. Fortunately, Photoshop offers a powerful suite of tools and techniques to replicate and even enhance this effect, transforming ordinary images into visually compelling compositions. Whether you're a beginner looking for a quick solution or an advanced user seeking nuanced control, this guide will walk you through the essential methods for creating a blurred background in Photoshop.
The Fundamentals of Background Blur
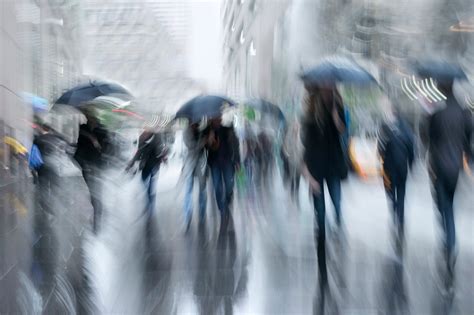
At its core, background blur, often referred to by the Japanese term "bokeh" when discussing the aesthetic quality of out-of-focus areas, serves to isolate your subject. By making the background fuzzier and less distinct, the sharp, in-focus subject gains prominence. This technique is particularly effective in portraiture, where it can mimic the high-focus look of a shallow depth of field, a characteristic often associated with professional photography.
The principle is simple: a blurred background makes the foreground appear sharper and more vivid. This can be achieved in various ways within Photoshop, from straightforward application of blur filters to more intricate masking and channel-based workflows. Understanding these different approaches allows you to select the most appropriate method for your specific image and desired outcome.
Quick and Easy Background Blur with Actions
For those who frequently need to apply background blur, creating a Photoshop Action can be a significant time-saver. An action is a recorded series of steps that can be replayed with a single click. This allows for a consistent and efficient workflow, especially when processing multiple images with a similar editing intention.
To create an action for blurring the background, the process typically involves selecting the subject, creating a mask, and then applying a blur to the remaining background.
- Open Your Photo: Begin by opening the image you wish to edit in Photoshop.
- Select the Subject: Utilize any selection tool to accurately select the part of the image that is intended to remain sharp. The Magnetic Lasso Tool, often used in conjunction with the Refine Edge option (Select > Refine Edge), can be very effective for this. Alternatively, the "Select Subject" command (Select > Subject) has become remarkably adept at automatically identifying the main focal point.
- Create a New Layer and Fill Selection: Create a new layer above your background layer and fill your selection with any color using the Paint Bucket Tool (G). This layer will serve as a visual guide for your mask.
- Create a Gradient Layer: Below the selection fill layer, create another new layer. Paint a black and white gradient on this layer using the Gradient Tool (G). The black part of this gradient will define the area that remains sharp, the white part will be blurred, and the grey transition will create a soft blend between the two. Adjust the angle and position of this gradient to achieve the desired effect.
- Prepare for the Action: Open the Actions panel (Window > Actions). Click the white card icon to create a new action, and give it a descriptive name.
- Image Resizing and Merging: Go to Image > Image Size and set the width to 5000 pixels. Select the entire canvas (Control-A) and then go to Edit > Copy Merged (Control-Shift-C).
- Channel Masking: Navigate to the Channels tab. Create a new channel and paste the merged selection. Hide both the original color layers and the new channel mask for now.
- Blurring the Background: Select the background layer and duplicate it (Control-J). Go to Filter > Blur > Lens Blur. In the Lens Blur dialog box, set the Source to Alpha 1 (or the name of the channel you created). Adjust the settings within Lens Blur to achieve your desired background blur.
This method provides a robust foundation for an automated background blur. When you want to use this action on any other photo, you would typically create the initial masks and then simply click "Play" on your recorded action. Photoshop will then repeat all the saved steps, automatically blurring the background.
Advanced Techniques for Nuanced Control
While actions offer efficiency, they may not always provide the precise control needed for every image. Photoshop also offers more granular methods for background blur that allow for greater artistic freedom and refinement.
Using Layer Masks and Blending Modes
A common and highly effective approach involves duplicating your background layer and then masking out the subject on the top layer.
- Duplicate the Background Layer: Open your image and duplicate the background layer. This ensures you have a backup and allows you to work non-destructively.
- Select and Mask the Subject: Select your main subject. As mentioned, "Select Subject" is a great starting point. Refine this selection using tools like the Quick Selection Tool, Lasso Tool, or by utilizing the "Select and Mask" workspace for intricate details like hair. Once selected, add a layer mask to this top layer. This will hide everything except your subject.
- Content-Aware Fill for the Background: On the original background layer (now below the masked subject layer), you'll need to remove the subject to avoid a "halo" effect when blurring. A powerful way to do this is by using Content-Aware Fill (Edit > Content-Aware Fill). This intelligent tool analyzes the surrounding pixels and attempts to seamlessly fill the area where the subject was.
- Applying the Blur: Now, with the subject isolated on the top layer, you can apply blur effects to the background layer.
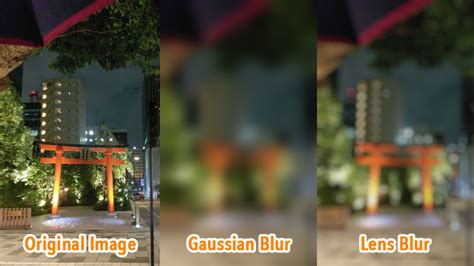
- Lens Blur: For a realistic shallow depth of field effect, the Lens Blur filter (Filter > Blur > Lens Blur) is excellent. When applying this, you can use the channel mask you might have created earlier as a source for the blur, or you can simply apply it directly to the background layer.
- Gaussian Blur: A simpler and often effective option is Gaussian Blur (Filter > Blur > Gaussian Blur). Adjust the radius to achieve the desired level of softness.
- Refining the Edges and Transition: The transition between the sharp subject and the blurred background is critical.
- Feathering the Mask: You can feather the mask of your subject layer (Select > Modify > Feather) to create a softer edge. Alternatively, within the "Select and Mask" workspace, you can use the "Shift Edge" or "Feather" sliders.
- Gradient Masks: To create a more natural fall-off of focus, you can add a layer mask to your blurred background layer and paint a gradient on it. Starting from the bottom of the image and moving upwards, a gradient can simulate how focus naturally recedes. Holding the Shift key while drawing the gradient ensures it remains straight.
Utilizing the Blur Gallery
Photoshop's Blur Gallery offers a range of dynamic and interactive blurring tools that provide a more intuitive way to create sophisticated blur effects. These include Field Blur, Iris Blur, and Tilt-Shift Blur.
- Field Blur: This allows you to place individual blur points across your image, each with its own blur intensity. This is useful for creating a non-uniform blur that might naturally occur in a scene.
- Iris Blur: This effect creates an elliptical blur that is sharpest in the center and softens outwards. You can adjust the size and shape of the ellipse, as well as the fall-off, to precisely control the area of focus. This is excellent for drawing attention to a specific element within the subject itself.
- Tilt-Shift Blur: Simulating the effect of a tilt-shift lens, this blur creates a sharp horizontal or vertical band of focus that fades into blur on either side. This can give miniature-like qualities to your subject matter and is a powerful tool for creating a dramatic sense of depth.
To use the Blur Gallery:
- Ensure your background layer is selected.
- Go to Filter > Blur Gallery and choose your desired blur type.
- An on-screen interface will appear, allowing you to manipulate the blur parameters directly on your image.
- Click "OK" when you are satisfied with the result.
The Blur Tool for Targeted Softening
For very specific areas that need a touch of blur, or for subtle refinements to an existing blur, the Blur Tool itself can be employed.
- Select the Blur Tool (it often shares a spot with the Sharpen and Smudge tools).
- Choose a brush tip and strength from the options bar.
- Drag the brush over the areas you wish to soften. The intensity of the blur is controlled by the pressure of your brush strokes. This is particularly useful for gently softening harsh edges or small distracting elements.
Considerations and Best Practices
When applying background blur, several factors can influence the final outcome and realism:
- Image Resolution and Size: When creating actions, resizing the image to a larger dimension (e.g., 5000 pixels wide) before applying filters can help preserve detail and prevent pixelation in the blurred areas.
- Maintaining Natural Grain: Blurring can sometimes strip away the natural grain of a photograph, making it appear unnaturally smooth. To counteract this, consider adding a touch of noise or grain back into the image after blurring (Filter > Noise > Add Noise) to maintain a realistic texture.
- Avoiding the "Floating" Effect: When the subject is sharply in focus against a heavily blurred background, it can sometimes appear to be "floating." To mitigate this, subtle masking and gradients, as described earlier, can help ground the subject by creating a more integrated transition.
- Subject Selection Accuracy: The quality of your subject selection is paramount. Any errors in masking will be apparent in the final blurred image. Invest time in refining your selections, especially around complex areas like hair or transparent objects.
- Depth of Field Simulation: Different blur filters simulate depth of field in distinct ways. Lens Blur is designed to mimic camera optics, while Gaussian Blur is a more general softening effect. Choose the filter that best suits the desired aesthetic.
- Content-Aware Fill Limitations: While powerful, Content-Aware Fill is not always perfect. For complex backgrounds or areas with intricate patterns, manual cloning or healing might be necessary to achieve a truly seamless result after removing the subject.
Beyond Simple Blur: Creative Applications
Background blur isn't solely about replicating a shallow depth of field. It can also be used for creative and artistic effects:
- Motion Blur: The Directional Path Blur filter can add a sense of movement to static objects or people, creating a dynamic and energetic feel.
- Radial Blur: This effect can create a zooming or spinning motion, drawing attention to a central focal point by blurring outwards from it.
- Composite Effects: Photoshop actions, readily available from professional sources like Envato Elements, can create highly stylized effects. These might include disperse photo effects where subjects break apart into glitter, magical crystal backgrounds that reflect the subject, or trendy double exposure effects that blend two images seamlessly. These pre-made actions can offer inspiration and efficiency for unique visual outcomes.
Dispersion Effect - Photoshop Tutorial
The ability to effectively blur backgrounds in Photoshop is an indispensable skill for any photographer or digital artist. By mastering the various tools and techniques, from quick actions to advanced masking and the creative potential of the Blur Gallery, you can elevate your images, guide the viewer's eye, and achieve a professional, polished look with remarkable precision. The process, while sometimes requiring careful attention to detail, is ultimately straightforward and rewarding, allowing you to transform your photographs with a single, impactful edit.