Creating a visually appealing collage wall can transform a blank space into a personalized statement. Whether you're aiming for a collection of cherished photographs, a curated display of art and mementos, or a vibrant mix of both, the process involves thoughtful planning and execution. This guide will walk you through the various approaches to building a captivating collage wall, from leveraging digital tools to the hands-on assembly of physical elements.
Embracing Digital Design for Collage Creation
In today's digital age, creating a collage wall doesn't necessarily begin with physical items. Online platforms offer powerful and intuitive tools to design your collage digitally before committing to a physical layout. Canva's photo editor, for instance, provides a seamless experience for enhancing images. You can upload your pictures and instantly add beautiful filters with one click, eliminating the need for prior editing experience.
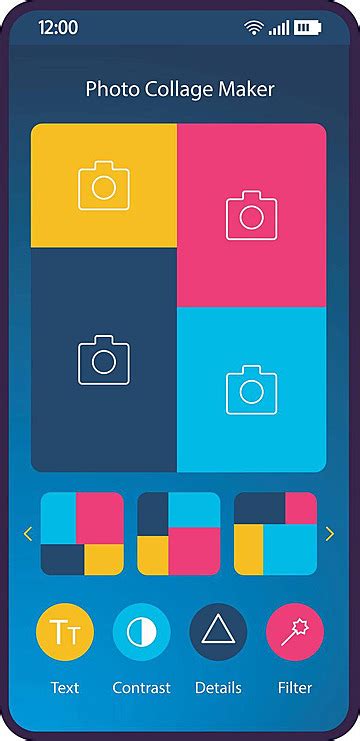
The platform allows you to increase saturation, balance contrast, change photo backgrounds, and convert colorful images into sleek black-and-white photographs using easy-to-use sliders. For added depth and definition, you can incorporate shadows or utilize the Auto Focus feature. Canva Pro users can further enhance their designs with a background remover tool to quickly erase or replace backdrops. For those with limited time, the "Auto Enhance" feature offers a quick way to bring photos to life with a simple slider adjustment. You can also explore various photo effects and filters, such as a vintage filter to add nostalgic charm. With these tools, you can perfect each image within minutes, ensuring every element contributes to the overall aesthetic of your collage.
Beyond individual image enhancement, Canva's image library offers access to millions of stock photos and illustrations, making the creation of a photo collage a cost-effective and time-efficient endeavor. Many of these resources are available for free, with premium options being exceptionally affordable. A simple search allows you to find the desired images, which can then be dragged directly into your design.
Canva's photo collage maker extends beyond simply arranging images side-by-side. It provides a suite of tools to elevate your collage without requiring advanced design skills. You can imbue your images with extra personality by adding borders, rotating them, experimenting with fonts and colors, overlaying images, and incorporating illustrations into your chosen template. Options include adding frames, adjusting tint, intensifying shadows, or blurring images to achieve specific moods - be it warm, vibrant, or faded.
Real-time collaboration is another key feature, fostering a dynamic creative process. You can collaborate on your photo collage in real-time with friends, family, and colleagues on any device, from anywhere in the world. This allows for shared input on image placement, color choices, and the addition of comments and suggestions, facilitating a collective creation process.
Once your digital masterpiece is complete, you can easily publish it for print or web. Clicking the "Download" button allows you to export your collage as a PNG or JPEG file. For printing purposes, saving as a PDF is recommended. You can also convert PNG files to PDF if you require your images in a document format. The Canva app enables you to build collages anytime, anywhere, making productive use of even brief moments, such as during a commute.
Planning Your Physical Collage Wall: From Concept to Layout
When envisioning a physical collage wall, careful planning is crucial to achieve a cohesive and impactful display. The initial step involves determining the desired scale of your collage. It's ideal if the items collectively cover about two-thirds of the open wall space. If you're hanging your collage above a sofa, ensure at least two-thirds of the space centered over the sofa is filled with items.
Selecting Your Elements
The next phase involves curating the items that will populate your collage. This can range from personal photographs to artwork, mementos, and decorative objects. If you're incorporating vintage finds, consider what new pieces will complement them and how they will work together harmoniously.
For artwork, Etsy is a valuable resource for acquiring inexpensive and quickly obtainable pieces. You can purchase a JPG file and have it printed at a local print shop, offering a very affordable option. If you're feeling stumped, begin by selecting items you like from platforms like Etsy or other poster and printable sites, and then insert them into a digital presentation tool like PowerPoint to visualize their arrangement.
The Importance of Frames and Spacing
When incorporating framed items, consider your framing strategy. Buying a whole bunch of frames can be pricey, and the process of hanging them - ensuring even spacing and a level appearance - can be a significant hassle.
A practical approach involves playing around with the frames and art on the floor next to the wall where you intend to hang them. Using painter's tape on the floor to outline the intended area can be helpful in visualizing the overall scale and composition. This step allows you to experiment with different arrangements before making any permanent marks on your wall.
Mastering the Art of Placement
A key principle in creating a balanced collage wall is ensuring art is at eye level when standing, not positioned too high above head height. The center of a collage wall should ideally be between 4 to 4.5 feet from the floor.
When it comes to hanging, precise measurement is vital. Measure where the hooks are located on the back of each frame. Then, use a sharpie to mark on wrapping paper where the nails should go, ensuring accurate placement on the wall.
Alternative Approaches: Foam Core Boards
For those seeking a more budget-friendly and less invasive method, foam core boards offer an excellent alternative. Foam core board is inexpensive, possesses a minimalist aesthetic, and is lightweight, making it easy to hang using picture hanging strips or photo mounting putty instead of nails.
Instead of placing each photo in a frame, you can adhere them directly to a square of foam core board. This method provides the look of a framed piece without the associated cost. Foam core can be purchased affordably at dollar stores or craft supply retailers. While this approach saves money, it requires effort and additional supplies, such as a large ruler and a cutting mat.
If you prefer not to invest the time in cutting and assembling, online services can provide pre-printed photo tiles. However, for those who enjoy crafting and possess basic supplies, this is a rewarding project. Be prepared that creating a large collage may involve several hours dedicated to cutting foam core boards and adhering photos.
To execute this method, a new, sharp blade on an exacto knife is essential for achieving smooth cuts in the foam core board. Cutting each 20x30 inch foam core board into six 10-inch squares is a common practice. Using a large ruler and cutting board, align the materials and apply steady pressure with your forearm to guide the knife. It's advisable to purchase a few extra boards, as some cuts may not be perfect.
Once the foam core squares are ready, use a tape runner adhesive to attach each photo to the center of a square. For precise centering, lay the photo on the foam core, then lift one side to apply adhesive underneath before pressing it down. Alternatively, you can flip the photo and apply adhesive around the edges on the back. Your photo-adhered foam core squares are now ready to be hung.
Hanging the Foam Core Collage
For hanging, you can use preferred mounting products like Command picture hanging strips or photo mounting putty. If using picture hanging strips, press together the Velcro sides of two strips, then attach one side to the back of the foam core board. It’s recommended to use two sets of strips per photo board for secure attachment.
To prepare your wall, measure and mark the desired location for your photo collage. Place masking tape on the wall at the height where the bottom row of photos will go, ensuring the tape line is level. Measure up from this line to mark subsequent rows. Mount the first photo by removing the backing from the picture hanging strips and pressing it firmly to the wall. Continue mounting photos, using the width of the masking tape roll to gauge the spacing between each piece. Once all photos are in place, carefully remove the masking tape.
Avoiding Common Pitfalls for a Balanced and Appealing Collage
Creating a successful collage wall involves more than just placing items randomly. There are several common misconceptions and stylistic choices that can detract from the overall aesthetic.
The Importance of Variety and Balance
One common mistake is to have all sayings or all objects within a collage. While personal preference plays a role, a collage composed solely of one type of item (unless it's a photo-only collage) can feel unbalanced and overwhelming. If using text-based elements, aim for a balance between longer quotes and shorter phrases or single words to avoid a cluttered appearance.

Conversely, it's beneficial to include at least one "interesting" or eye-appealing object that serves as a focal point. This could be a unique piece of art, a distinctive decorative item, or something that adds a touch of personality and intrigue to the arrangement.
Spacing and Consistency
Avoid spacing items too far apart or too close together. While there isn't a strict formula, "eyeballing it" and developing an eye for balance is key. Experimenting with the layout on the floor beforehand is invaluable for achieving optimal spacing.
Consistency in presentation is also important, particularly when using photographs. If you opt for white mats in some photo frames, maintain this consistency across all your framed photos. A mix of matted and unmatted photos within the same grouping can appear disjointed.
Scale and Proportion
Do not exclusively use small frames in your wall collage. A wall filled with only small frames can look underwhelming. Be bold and incorporate larger frames (e.g., 9x12 or 11x17 inches) alongside smaller ones to create visual interest and a more dynamic composition. The interplay of different sizes adds depth and prevents the collage from feeling monotonous.
By considering these guidelines and utilizing the available tools, you can confidently embark on the journey of creating a personalized and stunning collage wall that reflects your unique style and enhances your living space.