Creating repeating patterns is a fundamental skill for surface designers, illustrators, and anyone looking to bring their digital artwork into the physical world. Procreate, the powerful drawing app for iPad, offers several intuitive methods to achieve seamless, infinitely tiling designs. Whether you're aiming for simple polka dots or intricate floral motifs, Procreate can be your go-to tool. This guide will explore various techniques for making repeating patterns, from the most basic to more advanced approaches, and discuss how to test and utilize your creations.
Understanding the Essence of Repeating Patterns
At its core, a seamless, repeating pattern is a tile or block of design that, when duplicated and placed side-by-side or on top of itself, creates an illusion of infinite repetition without any visible gaps or seams. For this to work flawlessly, the elements or motifs positioned along the edges of the tile must perfectly align with their counterparts on the opposite side. This precise alignment is what allows the pattern to tile infinitely.
The process involves strategically placing your design elements, known as motifs, within a defined canvas area. Crucially, these motifs should not extend beyond the canvas boundaries in the initial stages. The canvas is then conceptually divided into sections, and these sections are mirrored or shifted to create the repeating effect. By understanding how these elements interact across the edges, you can build complex and visually appealing patterns.
Key Pattern Design Vocabulary
To navigate the world of pattern design effectively, understanding certain terms is essential:
- Block: This refers to the fundamental design or illustration unit that, when repeated, creates the infinite pattern.
- Tile (verb): The action of repeating your block to form the complete pattern.
- Repeat (noun): The point at which elements or motifs visibly repeat within the pattern. A pattern can feature multiple distinct motifs. The terms objects, elements, and motifs are often used interchangeably.
- Scale: This describes the relative size of the pattern's repeat. A smaller scale means more tiles in a given area, making the repeat potentially more obvious, while a larger scale results in fewer tiles.
- Colorway: A specific color scheme variation of a design or pattern. Different colorways of the same pattern are created using different palettes. In Procreate, colorways can be generated by adjusting the Hue, Saturation, and Brightness of your artwork.
- Surface Design: This encompasses artwork, patterns, illustrations, lettering, and more, specifically created to be printed on a physical surface. Surface designers produce art for a vast array of products, including clothing, home goods, stationery, and accessories.
Methods for Creating Seamless Repeating Patterns in Procreate
Procreate offers several accessible methods for creating repeating patterns. These techniques range from incredibly simple, allowing even basic shapes to become striking patterns in minutes, to more nuanced approaches that yield greater visual complexity.
The Simple Repeat Method: The Easiest Approach
This is arguably the most straightforward method for pattern creation in Procreate. It’s ideal for beginners or for quickly generating patterns from simple shapes or motifs. The core idea is to draw your motifs in the center of the canvas, ensuring they don't touch the edges. Then, you duplicate and offset these motifs to fill the space.
Steps for Simple Repeat:
- Set up your Canvas: Begin with a square canvas. A common starting point is 8” x 8” at 300 dpi, but you can adjust this based on your needs.
- Draw Your Motifs: Create your initial artwork (motifs) in the center of the canvas. Do not let any part of your drawing extend beyond the canvas edges.
- Duplicate and Offset: Duplicate your motif layer. Use Procreate's Transform tool (arrow icon) with Snapping enabled (found in the Transform settings) to move the duplicated motif precisely to the edge of the canvas. When Snapping is active, orange guides will appear as you drag, indicating when the element is perfectly aligned.
- Mirror and Repeat: To create the repeating effect, you'll duplicate your canvas content and mirror it. A common workflow involves duplicating your motif layer, using the Transform tool to move it to one edge (e.g., the left edge), and then duplicating that layer and moving it to the opposite edge (the right edge). You repeat this process for the top and bottom edges.
This method is excellent for creating patterns like simple flowers or polka dots.

More examples using the Simple Repeat method:
- Polka Dot Pattern: Creating a polka dot pattern is a prime example of the Simple Repeat method. Draw a single circle, duplicate it, and use the offset technique to tile it across the canvas.
- Geometric Shapes: Simple geometric shapes like squares, triangles, or stars can also be easily tiled using this method to create clean, modern patterns.
The Reverse Repeat Method: Adding Visual Interest
The Reverse Repeat method is particularly useful when your artwork has a more irregular shape or when you want to introduce more dynamic visual interest. This technique involves flipping your central artwork horizontally or vertically and then repositioning it using Procreate’s Transform tools.
Steps for Reverse Repeat:
- Center Your Artwork: As with the Simple Repeat, start by creating your motif in the center of the canvas, ensuring it stays within the boundaries.
- Duplicate and Flip: Duplicate your motif layer. Use the Transform tool to Flip your artwork horizontally or vertically.
- Reposition: Carefully reposition the flipped artwork. You can use Snapping to ensure precise alignment, or you can manually adjust it to create interesting overlaps or juxtapositions with the original motif. The key is to place the flipped element in a way that complements the original and contributes to the overall repeating design.
This method can lead to patterns with a greater sense of movement and complexity.
More examples using the Reverse Repeat method:
- Banana Pattern: Imagine drawing a banana. By flipping and offsetting it, you can create a pattern where bananas appear to be facing different directions, adding a playful touch.
- Flying Bird Pattern: A drawing of a bird in flight can be made more dynamic by using the Reverse Repeat method. Flipping the bird and offsetting it can create a sense of flocking or varied flight paths.
The Overlap Repeat Method: Leveraging Artwork Edges
This method is ideal for artwork that is rather large or when elements naturally overlap when moved to the corners of the canvas. Instead of fighting the overlap, you use it to your advantage to create a stunning pattern.
Steps for Overlap Repeat:
- Center and Expand: Draw your motif in the center of the canvas. Unlike the previous methods, you can allow your artwork to extend beyond the canvas edges here, or you can draw it large enough so that when you duplicate and move it to the edges/corners, it naturally overlaps with where the other pieces will be.
- Duplicate and Position: Duplicate your motif layer. Move this duplicate towards one of the corners. The goal is to position it so that it overlaps with where the "corner" piece of the pattern will be.
- Refine Overlaps: Rearrange your layers and adjust the positioning of your motifs to control precisely which parts of your artwork are overlapping. This allows you to create intentional visual effects where elements seamlessly blend or interact at the edges.
This technique can result in patterns with a unique depth and visual richness.
More examples using the Overlap Repeat method:
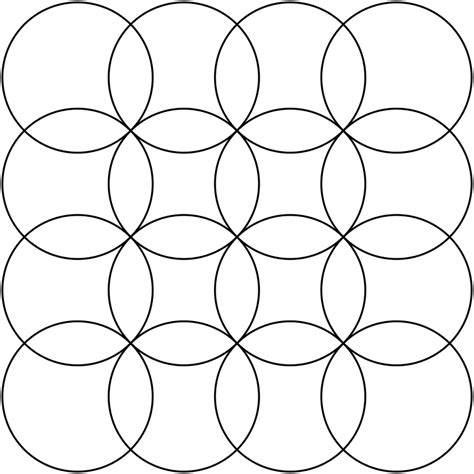
- Overlapping Circle Pattern: If you draw a large circle that extends beyond the canvas, duplicating and moving it to the corners will create overlaps. By carefully adjusting the position, you can create a pattern where circles seamlessly join.
- Abstract Brushstrokes: Large, organic brushstrokes that extend off the canvas can be layered and overlapped to create abstract, textured patterns. The way the edges of the strokes meet and blend will define the repeat.
Understanding Pattern Repeat Types
Beyond the methods of creation, patterns are often categorized by how their blocks are arranged. Understanding these types can help you choose the right approach for your design goals.
- Block / Full Drop Repeat: The motifs are placed directly next to and on top of each other with no offset, forming a perfect grid. This is the most basic arrangement.
- Half Drop Repeat: Every other column of motifs is offset by half the height of a motif. This creates a staggered effect where the top edge of one motif aligns with the center of the motif next to it.
- Brick-by-Brick Repeat: Similar to Half Drop, but every other row is offset by half the width of a motif. This resembles the arrangement of bricks in a wall.
- Diamond Repeat: The entire block is rotated by 45 degrees and repeated diagonally. This can make motifs appear closer together and is often seen in patterns like polka dots.
- Mirrored Repeat: Every other column or row is mirrored or reversed. This is a quick way to create variety without needing to worry as much about edge alignment.
- Stripe Repeat: Motifs are tiled along only one axis (horizontal or vertical). Tiling across the top and bottom creates a vertical stripe, while tiling across the sides creates a horizontal stripe.
- Toss Pattern: Motifs are scattered or randomly placed within the tile. This creates an unstructured, organic look with a lot of visual interest and is a favorite for many surface designers due to its natural feel.
Testing Your Patterns
Once you've created a pattern in Procreate, it's crucial to test how it repeats seamlessly. This ensures there are no unwanted gaps or misalignments.
Recommended Testing Tool:
A highly recommended tool for testing patterns is available online. You can use this in a split-screen view with Procreate and a web browser (Safari or Chrome).
How to Use the Tester Tool:
- Access the Tool: Navigate to
bardotbrush.com/repeat. - Prepare Your Procreate File: Ensure your pattern is on a single layer, or flatten it to a single layer if necessary.
- Drag and Drop: Directly drag that single layer from your Procreate canvas onto the tester page in your browser.
- Instant Preview: The tool will instantly show you how your pattern repeats. You can adjust the scale to see how it looks at different sizes.
This method provides immediate visual feedback, allowing you to catch any errors and refine your design before committing to further use.
How to Make Repeating Patterns in Procreate
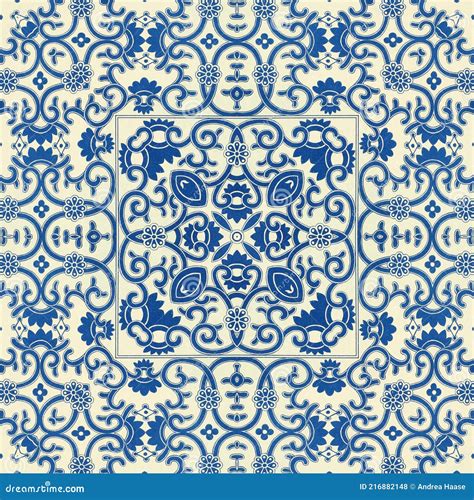
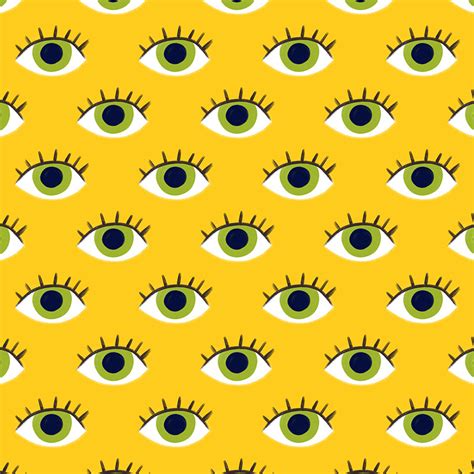
Pattern Design Inspiration and Common Motifs
Finding inspiration is a vital part of the creative process. Pinterest boards curated with amazing pattern designs can offer a wealth of ideas for different types of patterns and motifs.
Common Pattern Motifs Include:
- Floral
- Geometric
- Animal print
- Paisley
- Checkered
- Gingham
- Novelty
- Plaid
- Herringbone
- Houndstooth
- Chevron
- Argyle
- Stripes
- Polka dot
- Ikat
Exploring these motifs and experimenting with different repeat types can lead to unique and captivating designs.
Utilizing Your Repeating Patterns: From Screen to Product
The applications for seamless repeating patterns are virtually limitless. Once you've perfected your design in Procreate, you can bring it into the physical world through various printing services.
Printing Considerations: Resolution is Key
The first crucial consideration for printing your patterns is image resolution. The size and quality of your Procreate canvas directly impact how large you can print your artwork without losing detail.
- Resolution Calculator: Utilize online tools, like those often provided by print vendors, to determine the appropriate canvas size for your desired print dimensions.
- Vendor Specifications: Always check with your chosen print vendor to confirm their specific image resolution requirements.
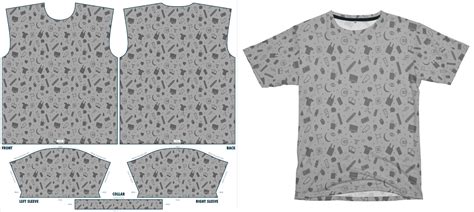
Printing on Apparel
Many companies offer all-over printing services, making them perfect for showcasing your repeating patterns on clothing.
Places to print patterns on t-shirts and apparel:
- Printful
- Contrado
- Print All Over Me
- BagsofLove
- Threadless
Personally testing services like Printful can provide confidence in quality. For instance, patterns printed on t-shirts can range from subtle accents to full-garment designs.
Printing on Home Decor Items
Home decor is another excellent area where repeating patterns can shine. Think of blankets, pillows, bedding, curtains, rugs, tableware, and even furniture.
Places to print patterns on home decor items:
- Printful
- Contrado
- Spoonflower
- Zazzle
- BagsofLove
- Threadless
Other Applications
The possibilities extend far beyond apparel and home goods. Consider these other creative uses for your repeating patterns:
- Phone and laptop cases
- Face masks
- Stationery and notebooks
- Mugs and coasters
- Wallpaper
- Tapestries
- Water bottles
- Clocks
Many of the companies listed above offer a wide range of these product types.
Getting Started with Surface Design
Surface design is an accessible and rewarding field, and Procreate is an excellent tool for beginners. With its intuitive interface and powerful features, you can learn to create professional-quality repeating patterns.
Beginner Tutorial Example:
For those new to surface design, step-by-step tutorials can guide you through creating your first seamless repeat. A common workflow involves working on a square canvas, keeping artwork within the borders, and then using Procreate's Transform and Snapping tools to offset and mirror elements.
Procreate's Snapping Tool for Pattern Making:
While Procreate does not have a dedicated "offset" feature like some desktop software, its Snapping tool is instrumental in creating seamless repeats. By enabling Snapping and setting specific distances and velocities, you can precisely move and align duplicated layers to the edges of the canvas, ensuring perfect matches for your repeating pattern.
Workflow Summary for Seamless Repeats:
- Canvas Setup: Work on a square canvas, typically at 300 dpi.
- Initial Artwork: Create your motifs within the canvas borders.
- Layer Management: Use layers effectively. Adding a dark layer underneath your artwork can help visualize edges and alignments. Grouping and duplicating layers is essential.
- Offsetting with Snapping: Utilize the Transform tool with Snapping ON. Set values for Distance and Velocity (e.g., 25 for Distance, 5 for Velocity) to guide precise movement. Drag elements to the edges until orange guides appear.
- Mirroring: Repeat the offsetting process for all edges (left, right, top, bottom).
- Adding Detail: After establishing the basic repeat, you can add more motifs or refine existing ones, always mindful of staying within the canvas boundaries and repeating the offset process as needed for new elements.
- Testing: Export your design as a JPG and test it using an online pattern repeat tester tool.
- Printing: Upload your tested pattern to a print-on-demand service like Spoonflower, ensuring you select the "Basic Repeat" option for seamless tiling.
By following these steps and experimenting with different methods, you can master the art of creating repeating patterns in Procreate and unlock a world of creative possibilities for your artwork.
Frequently Asked Questions
- Can I make repeating patterns in Procreate? Yes, Procreate is an excellent tool for creating seamless repeating patterns using various methods.
- What is surface design? Surface design is the creation of artwork intended for application to physical surfaces, such as fabric, wallpaper, or products.
- How do I ensure my pattern repeats seamlessly? Precise alignment of elements at the edges of your canvas tile is key. Tools like Procreate's Snapping and online pattern testers are invaluable.
- What resolution should I use for printing? A resolution of 300 dpi is generally recommended for high-quality printing. Always check with your print vendor for their specific requirements.
Want to Learn More Surface Design Skills?
Exploring resources, tutorials by industry professionals, and the work of fellow artists can significantly enhance your surface design journey. Many platforms offer courses and guidance on creating various types of patterns and understanding the business side of surface design.