Creating compelling visuals in Photoshop often hinges on the effective use of backgrounds. Whether you're aiming to make a subject "pop" more, seamlessly integrate an element into an existing scene, or simply craft a unique aesthetic for your images, understanding how to manipulate and create backgrounds is a crucial skill. This tutorial will guide you through various techniques, from straightforward background generation to more intricate compositing, empowering you to elevate your photographic and design projects.
The Power of a Well-Chosen Background
The background of an image plays a pivotal role in its overall impact. A plain, black background, for instance, when used for studio headshots, can be surprisingly effective in making your subjects stand out. This technique is handy in a number of situations, offering a clean and focused presentation. However, the versatility of Photoshop allows for much more than just a simple solid color. You might find yourself with an existing file that you wish to enhance by adding a new backdrop, or you may have captured a subject against a seamless background, like gray Savage paper, with the specific intention of cutting them out and placing them onto a different backdrop later. The key takeaway is that a simple background is often recommended if you know beforehand that you intend to cut out the photo for compositing purposes.
Creating Dynamic Backgrounds with Lighting Effects
One of the most accessible and impactful ways to generate interesting backgrounds directly within Photoshop is by using the "Lighting Effects" filter. This method is particularly useful when you want to add depth and texture to a flat background, or even create entirely new ones from scratch.
To begin this process, you'll first need to ensure you have a new layer set up. If you already have an existing file you would like to add your backdrop to, create a new layer that sits on top of your existing layers. This new layer will serve as the canvas for your background creation.
Next, you need to define the colors that will influence your backdrop. This is determined by your foreground and background color selections. For this particular technique, setting your foreground color to a dark gray and your background color to black can yield dramatic results, creating a rich, dark base for your lighting effects.
Once your colors are set and your new layer is ready, navigate to the "Filter" menu. From there, select "Render" and then choose "Lighting Effects." Within the Lighting Effects options, select the "Point Light" option. This will apply a light source to your canvas. You have control over the position and intensity of this light. If you desire the applied light to be a different color than what your foreground/background colors suggest, you can easily select the small color box within the Lighting Effects dialog and choose your preferred color from the color picker. When you are satisfied with the placement and appearance of the light, press "Return" (or "Enter" on some systems). And there you have it - a dynamically lit background layer.
For those seeking an even more dramatic effect, you can take this same layer and apply the "Lighting Effects" filter process again. This can add further depth, complexity, and interesting light interactions to your background.
If the resulting mottled appearance is too detailed or busy for your liking, you can utilize the "Free Transform" tool. This is typically accessed by pressing "Option + T" (or "Alt + T" on Windows). With the Free Transform tool active, you can stretch the layer out larger across your image. Of course, it's important to do this within reasonable limits to maintain the desired aesthetic and avoid excessive distortion.
Photoshop Magic: Create a Stunning Orange Fish Manipulation ( Beginner Friendly )
Altering Background Colors with Hue Adjustment Layers
While the Lighting Effects filter can create interesting textures and light patterns, you might also want to alter the overall color of your background. A non-destructive and highly effective way to achieve this is by adding a "Hue/Saturation Adjustment Layer" to your backdrop layer.
To implement this, create a new Hue/Saturation adjustment layer and ensure it is clipped to your backdrop layer. This clipping ensures that the color adjustments only affect the layer directly beneath it, preventing unintended changes to other elements in your composition.
Within the Hue/Saturation properties, you can now manipulate the "Hue," "Saturation," and "Lightness" sliders. The "Hue" slider will shift the entire color spectrum of your background. The "Saturation" slider controls the intensity of the colors, from vibrant and rich to muted and desaturated. The "Lightness" slider, as its name suggests, adjusts the overall brightness of the background. By experimenting with these sliders, you can achieve a vast array of color variations, from subtle shifts to complete transformations. This method offers excellent control and allows for easy modifications should you change your mind later.
The Art of Compositing: Cutting Out and Combining Images
Beyond creating backgrounds from scratch, a significant aspect of background manipulation in Photoshop involves compositing - the process of combining elements from different images into a single, cohesive picture. This is where knowing how to effectively cut out a subject and place it onto a new background becomes invaluable.
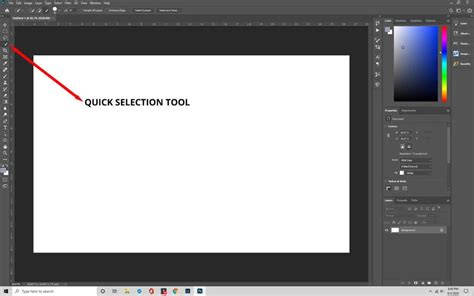
The initial step in compositing is to accurately select and isolate your subject. Photoshop offers a suite of powerful selection tools to achieve this. The "Quick Selection Tool" is a popular choice for its speed and intuitive nature. You can use the Quick Selection Tool to add to your selection by using a small brush and clicking on areas you wish to include. Conversely, if you accidentally select too much, you can hold down the "Alt" (or "Option") key while using the Quick Selection Tool to subtract from your selection.
For more intricate selections, especially around fine details like hair or fur, the "Select and Mask" workspace is indispensable. This workspace provides advanced tools for refining edges, adjusting feathering, and improving the overall accuracy of your selection. You can toggle between different view modes within Select and Mask to better assess the quality of your cutout, such as viewing your subject against a transparent background, a black background, or a white background. Edge refinement brushes within Select and Mask can intelligently detect and select edges, making it easier to achieve clean masks.
Once your subject is precisely selected, you can then copy and paste it onto your desired new background. If you have an existing file you want to add your subject to, create a new layer for your subject on top of the background layer.
The next crucial phase of compositing is ensuring that your subject looks natural within the new background. This often involves several adjustments to achieve a good match between the two images. This is called a composite. Factors to consider include:
- Lighting Consistency: Does the lighting on your subject match the direction and color of the light in the background? You might need to use adjustment layers (like Curves or Levels) to alter the brightness and contrast of your subject to harmonize with the background's lighting.
- Color Balance: The color temperature of the light in the background can significantly affect how your subject appears. Using a "Color Balance" or "Photo Filter" adjustment layer, clipped to your subject layer, can help to subtly shift the colors of your subject to better integrate with the background's palette.
- Depth of Field: If the background has a shallow depth of field (meaning it's blurred), you may need to apply a similar blur to your subject to create a sense of depth and realism. Use the "Gaussian Blur" filter or more advanced blur tools for this.
- Shadows and Highlights: Realistic shadows and highlights are key to making a composite believable. You might need to paint in subtle shadows where the subject would naturally cast them onto the background, or add subtle highlights that reflect the background's light sources.
- Scale and Perspective: Ensure your subject is scaled appropriately for the background and that its perspective aligns with the scene.
There are numerous tutorials available that can help you achieve a good match on your 2 images, which is essential for a convincing composite. Exploring resources on Photoshop's "Object Selection Tool," which has seen significant improvements in recent versions, can also streamline the selection process.
Expanding Your Skillset with Additional Tools and Resources
Photoshop's capabilities for background creation and manipulation are extensive. Beyond the techniques discussed, consider these additional points:
- Gradient Tool: For smooth, multi-tonal backgrounds, the Gradient tool is invaluable. You can create linear, radial, or angled gradients with a wide range of color combinations.
- Pattern Overlay: Applying patterns can add texture and visual interest. Photoshop offers a library of default patterns, and you can also create and import your own.
- Brushes: Custom brushes can be used to paint textures, add atmospheric effects, or even create complex background elements.
- Smart Objects: When applying filters or transformations, converting your layer to a Smart Object allows for non-destructive editing. This means you can go back and readjust filter settings or transformations at any time without degrading the image quality.

For those who prefer video-based learning, there are countless tutorials available online. Subscribing to reputable Photoshop tutorial channels on YouTube can provide a wealth of knowledge, from beginner techniques to advanced workflows.
The evolution of Photoshop itself also brings new tools and enhancements. For instance, new features in recent updates, such as those found in Lightroom Classic or advancements in Photoshop's Object Selection tool, continually offer faster and more efficient ways to achieve desired results. Staying updated with these new features can significantly boost your workflow and creative potential.
Ultimately, the ability to create and manipulate backgrounds in Photoshop is a skill that develops with practice and exploration. By understanding the fundamental tools and techniques, and by continuously seeking out new methods and resources, you can transform ordinary images into extraordinary visual narratives. The five minutes of work it might take to create a custom background can, for the occasional photo, be quite feasible and yield remarkable results.
tags: #how #to #make #background #photoshop