Shapes are fundamental building blocks in graphic design, acting as the visual language that designers employ to construct more complex and impactful creations. In Adobe Photoshop, the ability to draw and manipulate shapes is a cornerstone skill, empowering users to craft everything from simple icons and social media graphics to intricate illustrations and design elements. This tutorial delves deep into the world of Photoshop's shape tools, providing a step-by-step walkthrough of how to create, customize, and leverage these versatile vector objects.
Understanding Photoshop Shapes: Vector Versus Raster
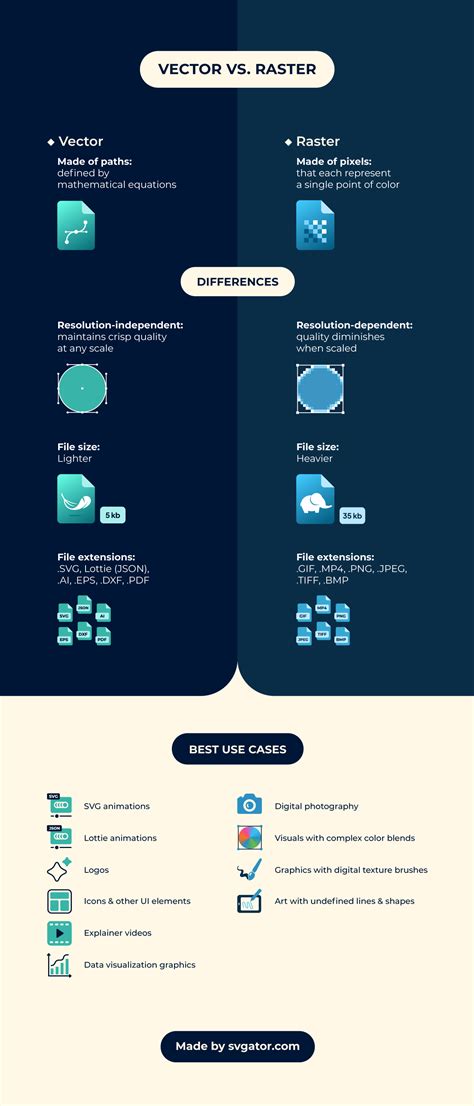
Before diving into the practical application of shape tools, it's crucial to grasp a fundamental concept: Photoshop shapes are vector objects by default. This means their edges are defined by mathematical equations, essentially lines and points, rather than a fixed grid of pixels. This inherent characteristic offers a significant advantage: scalability. Vector shapes can be scaled up or down to any size without any loss of quality, ensuring that their edges remain crisp and smooth, regardless of whether they are a tiny icon or a large banner. This is a stark contrast to raster graphics, which are composed of pixels and can become pixelated or lose detail when enlarged.
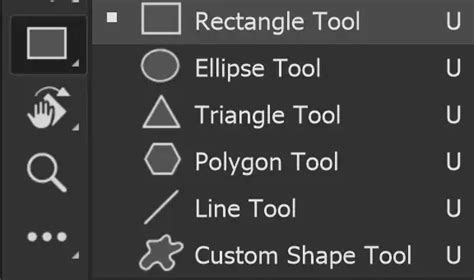
To create a shape in Photoshop, the primary action involves selecting a shape tool from the toolbar. The universal hotkey for accessing the most recently used shape tool is pressing the 'U' key. Once a shape tool is active, the process of drawing is as simple as clicking and dragging on the canvas to render the desired shape. While creating vector shapes is the default and most advantageous method, Photoshop also offers the option to create "Pixels" for a raster shape. When this option is chosen, a layer must be selected prior to drawing, as the shape will be rendered directly onto that pixel-based layer.
Exploring the Core Shape Tools: Rectangles, Ellipses, and Triangles
Photoshop offers a suite of dedicated tools for drawing common geometric forms. Each tool, when selected, presents a range of options in the Options bar that govern how the shape is created.
The Rectangle Tool: From Basic Rectangles to Rounded Corners
The Rectangle Tool is your go-to for creating rectangular and square shapes. When the Rectangle Tool is selected, the Options bar provides several modes for drawing:
- Unconstrained: This is the default setting, offering the utmost freedom. With 'Unconstrained' checked, you can click and drag on the canvas to create a rectangle of any dimension.
- Square: Checking the 'Square' box, typically found within the 'Fixed Size' or 'Proportional' settings depending on the Photoshop version, allows for the easy creation of perfect squares.
- Fixed Size: This option enables you to define precise dimensions for your rectangle by entering specific values for Width and Height.
- Proportional: When 'Proportional' is selected, the aspect ratio of the rectangle is maintained. You can set initial Width and Height values, and Photoshop will scale them proportionally as you draw.
- From Center: If you wish to draw a rectangle with its center point originating from where you click on the canvas, this option is invaluable.
Beyond basic rectangles, the Rectangle Tool also allows for the creation of shapes with rounded corners. Once a rectangle with rounded corners is drawn, its roundness can be fine-tuned in two primary ways:
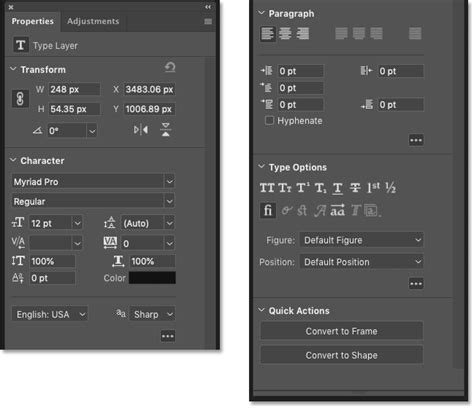
- Properties Panel: Navigate to
Window > Properties. With the shape layer selected, you'll find options to adjust the 'Radius' values for the corners. - Path Selection Tool: Select the Path Selection Tool, focus on your created shape, and you will notice small circular icons at each corner. Clicking and dragging these icons directly adjusts the roundness of the corners.
A convenient method for precise shape creation is to simply click on the canvas with the Rectangle Tool selected. This action opens the "Create Rectangle" window, where you can pre-set the size of the shape, the Corner Radius, and whether the shape should be drawn 'From Center'.
The Ellipse Tool: Perfect Circles and Proportional Ovals
Similar to the Rectangle Tool, the Ellipse Tool is designed for creating circular and oval shapes. The drawing modes available are analogous:
- Unconstrained: Allows for the freeform drawing of ellipses of any size.
- Circle: Selecting the 'Circle' option (often found within the 'Fixed Size' or 'Proportional' settings) ensures the creation of a perfect circle.
- Fixed Size: As with rectangles, this lets you specify exact Width and Height values for your ellipse.
- Proportional: Maintains the aspect ratio of the ellipse as you draw.
- From Center: Draws the ellipse with its center point at the click location.
To create an ellipse with pre-defined parameters, select the Ellipse Tool, click once on the canvas, and the "Create Ellipse" window will appear. Here, you can set the desired size, and the 'From Center' option.
How to Draw Cylinders and Ellipses
The Triangle Tool: Equilateral and Rounded Triangles
The Triangle Tool enables the creation of triangular shapes. The available drawing options mirror those of the Rectangle and Ellipse tools:
- Unconstrained: For creating triangles of any size and proportion.
- Equilateral: Ensures that all sides of the triangle are equal in length, resulting in a perfectly equilateral triangle.
- Fixed Size: Allows you to define specific dimensions for the triangle.
- Proportional: Maintains the aspect ratio of the triangle.
- From Center: Draws the triangle with its center at the click point.
The Triangle Tool also supports the creation of triangles with rounded corners. You can adjust the 'Corner Radius' directly in the Options bar before drawing, or click and drag to create a rounded triangle. Similar to other shape tools, clicking on the canvas with the Triangle Tool selected will open the "Create Triangle" window, offering options to set size, Corner Radius, and the 'From Center' attribute.
Advanced Shape Creation: Polygons and Custom Shapes
Beyond the basic geometric forms, Photoshop offers tools for more complex shapes.
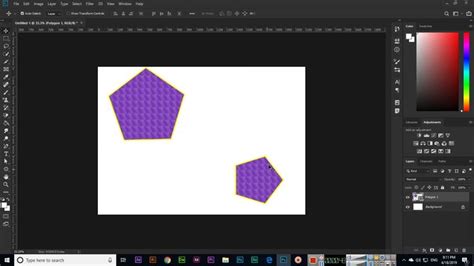
The Polygon Tool: Versatile Polygons and Stars
The Polygon Tool is incredibly versatile, allowing for the creation of multi-sided shapes. The standard drawing modes apply here as well: 'Unconstrained', 'Fixed Size', 'Proportional', and 'From Center'. Additionally, the Polygon Tool introduces specific options for its unique functionality:
- Symmetric: When checked, this option ensures that all sides of the polygon are of equal length and all angles are equal, creating a regular polygon.
- Smooth Star Indents: This option is particularly useful when creating star shapes. It softens the sharp points of the star's inner indents, giving them a more rounded appearance.
Clicking on the canvas with the Polygon Tool selected opens the "Create Polygon" window. This window provides controls for setting the size, the 'Number of Sides', 'Corner Radius', and 'Star Ratio' (which determines the depth of the star points). You can also check the 'Symmetric' box here.
The Line Tool: Simple Strokes and Thickness Control
While not a closed shape in the same vein as rectangles or polygons, the Line Tool is essential for creating straight lines. The primary control for the Line Tool is found in the Options bar:
- Weight: This setting directly controls the thickness of the line. You can input a specific pixel value for precise control over the line's width.
The Custom Shape Tool: Accessing a Library of Presets
The Custom Shape Tool opens up a vast world of pre-designed shapes. When this tool is selected, the Options bar displays a dropdown menu of available custom shapes, ranging from arrows and symbols to animal silhouettes and more.
To create a custom shape:
- Select the Custom Shape Tool.
- Click on the canvas. This action opens the "Create Custom Shape" window.
- From the dropdown menu in the Options bar, choose the desired custom shape.
- Click and drag on the canvas to draw the selected custom shape.
The "Create Custom Shape" window, much like the windows for other shape tools, allows for setting the size of the shape and can also include options for 'Corner Radius' and 'Star Ratio' if the selected custom shape is star-based.
Customization and Integration: Taking Shapes to the Next Level
Once you've mastered the art of drawing shapes in Photoshop, the next logical step is to stylize them and integrate them into your designs. This involves adding color, adjusting stroke properties, and applying various layer effects.
Adding Color: Shapes created with the shape tools are vector objects, and they can be easily filled with color. With a shape layer selected, you can use the 'Fill' option in the Properties panel or the Options bar to choose a solid color, gradient, or pattern.
Outlining Shapes: To add an outline or stroke to a shape, you can utilize the 'Stroke' option in the Properties panel or the Options bar. Here, you can define the color, thickness, and style of the outline.
Adjusting Path Options: For advanced control over shape paths, click the gear icon in the Options bar when a shape tool is active. This will reveal 'Path Options' which can influence how shapes are drawn and manipulated.
Leveraging the Properties Panel: The Window > Properties panel is an indispensable tool for shape customization. It provides a centralized location to adjust fill color, stroke properties, corner radii, and other attributes of selected shape layers.
Resources for Further Exploration
The journey of mastering Photoshop shapes doesn't end with this tutorial. To truly elevate your design skills, consider exploring resources that offer inspiration and advanced techniques. Envato Elements is an excellent platform where you can find a vast library of design assets, including templates, fonts, and graphics, that can help you take your designs to the next level. Furthermore, Envato Tuts+ offers a wealth of tutorials, from beginner to intermediate levels, covering a wide array of Photoshop techniques and design principles.
Learning to draw shapes in Photoshop is a foundational skill that unlocks a world of creative possibilities. By understanding the nuances of each shape tool and exploring the available customization options, you can effectively incorporate these essential design elements into your projects, making your visuals more impactful and professional.
As Shari Fairclough, a Social Media & Graphic Design Expert, highlights, "Shapes are one of the key Elements â an integral building block used by designers to create something much larger than the sum of its parts." Embracing the power of Photoshop's shape tools is a crucial step in becoming a proficient and versatile designer.