Creating realistic facial hair in Photoshop can be a daunting yet rewarding endeavor. The intricate details, natural variations in density, direction, and color make it one of the most challenging elements to replicate convincingly. However, with the right techniques and tools, you can achieve results that appear as if they've grown naturally. This guide delves into various methods, from defining shapes to painting individual strands, ensuring your digital creations possess an authentic, photo-realistic quality.
Defining the Foundation: Shape and Selection
Before any hair can be painted or generated, it's crucial to establish the desired shape and form. Whether you're aiming for a meticulously groomed beard or a rugged stubble, a well-defined outline is paramount. For achieving clean edges and precise curves, the Pen Tool is an invaluable asset. While this tutorial doesn't extensively cover its intricacies, understanding its capability for creating accurate paths is key. These paths serve as the blueprint for your selections, ensuring the facial hair adheres to the intended silhouette.
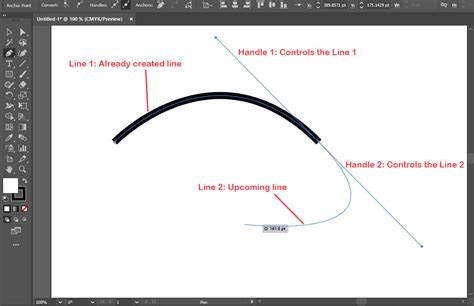
The Pen Tool allows for incredibly accurate selections, but to truly achieve realism, these hard edges require softening. In photographs, even with high-end equipment, there's an inherent subtle blur at the edges of objects. Leaving a selection made with the Pen Tool as a sharp, defined line will almost certainly result in an image that looks overtly "Photoshopped." To counteract this, a touch of blur is essential for creating a natural transition between the hair and the skin. This can be effectively achieved by utilizing the Quick Mask mode in conjunction with a Blur Filter. By highlighting your selection in red within Quick Mask, you can then apply a blur, yielding a more organic blend. The correct amount of blur will create a seamless transition, making the facial hair appear integrated with the skin rather than superimposed upon it.
The Power of Custom Brushes for Organic Texture
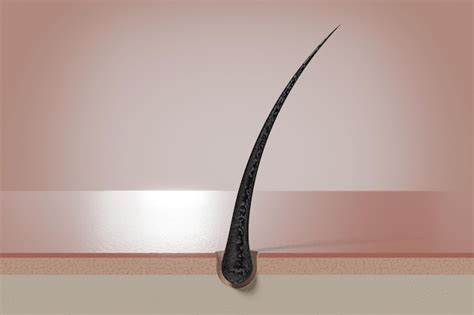
Custom brushes are a game-changer when it comes to creating ultra-realistic hair effects. This method is remarkably versatile and can be adapted to suit any hair type. The process begins with creating a Pen path that mirrors the length and shape of a single strand of hair you wish to replicate. Using the Brush Tool, you then stroke this path in black, simulating pen pressure to imbue the stroke with realistic shape and contour. The result is a solid base that can be transformed into a custom brush. To prepare this for brush creation, place the stroked path on a white background and make a selection around it using the Marquee Tool.
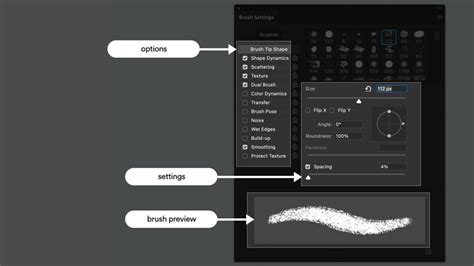
Once your custom brush is defined, painting with it directly might initially yield results that lack realism. The key to convincingly painting new hair lies in mimicking the natural variance and inherent randomness of real hair. This is where the Brush Settings panel becomes indispensable. By activating specific settings, you can introduce much-needed variety and unpredictability into your strokes. For realistic hair, activating "Shape Dynamics" and adjusting "Flip X Jitter," "Flip Y Jitter," and adding a degree of "Angle Jitter" are highly recommended. Furthermore, enabling "Scattering" and increasing the "Scattering Slider" allows for a more dispersed and natural distribution of hairs. The "Spacing" setting under the "Brush Tip Shape" tab can be adjusted to control the density of the hair. Finally, activating "Color Dynamics" introduces variations in lightness and darkness, further enhancing the organic feel.
It's important to remember that every hair type is unique and may require different brush settings to achieve the desired match. If your newly painted hair appears too perfect, it will likely betray the editing process.
Refining for Photo-Realism: Blending and Noise
Even with meticulously crafted custom brushes, a final layer of refinement is necessary to ensure the facial hair looks truly photo-realistic. Grouping or merging all layers containing painted hair is a crucial step. Subsequently, applying both a Box Blur and some Noise to these merged layers will help them blend seamlessly with the original image. This step mimics the naturally occurring noise and subtle blur present in any photograph, making the digital addition indistinguishable from the real thing.
Addressing Specific Facial Hair Challenges
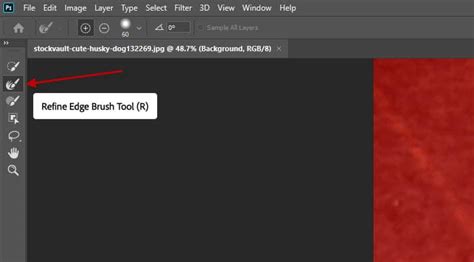
The common struggle with sparse or uneven facial hair growth is a relatable one. For those who don't naturally possess a full beard, Photoshop offers a powerful solution. The techniques described above can be employed to add density and fullness where it's lacking. The process of extracting existing facial hair from one image and blending it onto another is also a viable and often effective strategy. When undertaking this, it's beneficial to source a beard from an image with similar lighting and angles to the target photo, simplifying the blending process. Tools like the Lasso Tool or Quick Selection Tool can be used for initial extraction, followed by the Refine Edge Brush within the "Select and Mask" workspace to clean up the edges. Outputting the selection to a "New Layer with Layer Mask" provides a non-destructive workflow.
Advanced Techniques for Depth and Detail
To further enhance the realism of digitally created facial hair, consider implementing advanced techniques. After establishing a base layer of hair, creating a "Detailed Hair" layer and painting with your custom brush can add individual strands and fine-tune the texture. Paying close attention to the direction in which facial hair grows in different areas of the face is paramount. Adjusting the "Angle" and "Shape" settings in the Brush Settings panel for each area will contribute significantly to a natural appearance. Duplicating layers and using layer masks, along with tools like the Soft Round brush, can help in creating subtle variations in density and revealing finer hairs around the edges.
Realistic Photoshop Beards – This AI Method WORKS!
The addition of stubble, using a dedicated "Stubble brush" with adjusted "Angle" and "Roundness" settings, can add another layer of authenticity, especially for styles that aren't fully grown. Shading the beard, by adjusting Hue/Saturation to lower lightness and increase saturation, can create convincing shadows and add depth. Finally, remember that subtle adjustments to layer opacity, painting on masks to remove hair from specific areas, or adding more hair are ongoing processes that contribute to the overall believability of the final image.
The Importance of Variance and Imperfection
A common pitfall in digital art is striving for an overly perfect outcome. Real hair, by its very nature, is imperfect. It grows in clumps, has varying lengths, and is subject to environmental factors. When creating facial hair in Photoshop, embracing this imperfection is key to achieving realism. This means not every strand needs to be meticulously placed, and subtle inconsistencies can actually enhance the natural look. The variation in color, density, and direction, driven by the careful adjustment of brush settings, is what elevates a graphic element into a believable feature.
Tools and Resources for Enhanced Realism
Beyond the core Photoshop tools, several resources can aid in creating realistic facial hair. Many artists and educators offer downloadable custom brush packs specifically designed for hair and beard creation. While these can be time-savers, the true learning experience often comes from understanding the principles behind their creation and adapting them to your specific needs. Following tutorials by experts like Aaron Nace from Phlearn, who breaks down the process of creating custom brushes from scratch and adjusting their parameters, can provide invaluable insights into the nuances of hair simulation. Courses on selections and masking mastery can also equip you with foundational skills that are transferable to complex compositing tasks, including the creation of realistic facial hair.
The process of creating facial hair in Photoshop is an exercise in understanding both the technical capabilities of the software and the organic nature of hair itself. By mastering the art of selection, custom brush creation, and strategic application of filters and adjustments, you can transform portraits with confidence, adding a touch of ruggedness or refinement with convincing digital facial hair.