Creating seamless repeating patterns is a foundational skill for anyone venturing into surface design, from crafting unique fabric prints to designing digital assets. While Procreate, an iPad-based drawing application, doesn't feature a dedicated "offset" tool, it offers powerful built-in functionalities that, when utilized correctly, enable the creation of flawless repeating designs. This tutorial will guide you through the process, allowing you to design intricate patterns comfortably from your own space.
Setting Up Your Canvas for Success
The initial step in any design process is establishing the right working environment. For seamless pattern creation in Procreate, a consistent canvas size and resolution are paramount.
- Canvas Dimensions: It is highly recommended to work within an 8” x 8″ square canvas. This consistent size simplifies the repetition process and ensures predictable results when tiling your pattern.
- Resolution: Maintaining a resolution of 300 dpi (dots per inch) is crucial for print quality. This density of pixels ensures that your design will appear crisp and clear when printed, whether on fabric, paper, or other materials.
- Content Containment: To avoid complications during the seamless tiling process, it is advisable to keep all elements of your design within the canvas borders. Allowing artwork to extend beyond the edges can lead to unintended cut-offs or visual breaks in the repeating pattern.
- Design Inspiration: If you are new to drawing or unsure about what to incorporate into your design, remember that your canvas is a playground for creativity. You can experiment with various elements, including patterns, abstract lines, shapes, or even representational motifs like friendly tigers, as demonstrated in one example. The key is to explore and find what resonates with you.
Building Your Pattern: Layer by Layer
The magic of Procreate lies in its robust layering system, which is essential for constructing complex repeating patterns.
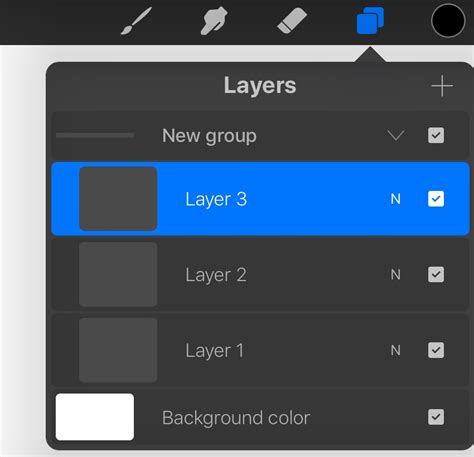
- Initiate a New Layer: Begin by tapping the "+" sign in the layer panel to create a fresh layer. This ensures that your new element is separate from your existing artwork, allowing for easier manipulation and adjustments.
- Color Fill and Opacity Adjustment: Select a dark color from your palette and tap on the newly created layer in the layers panel to fill it with that color. Next, access the "Opacity" setting within the tools panel (or by performing a two-finger tap on the layer itself) and reduce it to approximately 50%. This semi-transparent layer will serve as a guide for aligning your design elements.
- Grouping for Organization: To manage your design elements efficiently, it's beneficial to group them. Open the Layers panel again, and swipe right on each layer you wish to include in the group. Once selected, tap "Group" to consolidate them. Alternatively, you can select "Combine Down" to merge selected layers into one. This step is crucial for moving and transforming multiple elements simultaneously.
The Core of Seamlessness: Snapping and Transformation
Procreate's "Snapping" feature is the key to achieving a perfect repeat. By understanding and utilizing this tool, you can precisely align your design elements to create a seamless illusion.
- Duplicate and Prepare for Snapping: Swipe left on your grouped layer and select "Duplicate." This creates an identical copy of your design group, which will be used for the mirroring effect essential for seamless patterns.
- Enabling Snapping and Transformation: With one of the duplicated groups selected in the Layers panel, tap "Transform" in the top left corner (represented by an arrow icon). At the bottom left of the Transform menu, you will find the "Snapping" option. Turn "Snapping" ON.
- Configuring Snapping Settings: Once Snapping is active, adjust the "Distance" to 25 and the "Velocity" to 5. These settings allow Procreate to recognize when an element is precisely aligned to a grid or the canvas edges.
- First Alignment (Left Side): With the Snapping settings configured, tap and hold the selection on your screen. Drag the entire selected image to the left until it is exactly halfway off the canvas. You will observe orange guides appearing, indicating that the element is precisely snapping into place, confirming it's perfectly centered horizontally.
- Second Alignment (Right Side): Now, select the second duplicated group in the Layers panel. Click "Transform" again. In the same manner, drag this image to the right side of the screen, again looking for the orange guides to confirm it snaps perfectly into place halfway off the canvas.
- Checking for Center Lines: After aligning both groups, examine your canvas. If you notice a faint grey line appearing in the exact center of your canvas, it signifies that the second layer has not been moved far enough to the edge. To correct this, you can either select the layer again and tap the right side of the screen (off the canvas) to nudge the image one pixel at a time, or, for a quicker fix, you can tap "Undo" and repeat the snapping process.
- Vertical Alignment Check: Pinch to zoom in and meticulously check the top and bottom edges of your canvas. Ensure there are no visible lines or gaps where the background color is showing. This indicates that your horizontal mirroring is perfect.
Iterative Design and Refinement
The beauty of digital pattern design lies in its iterative nature. You can continuously add detail and refine your composition.
- Adding More Details: Once you are satisfied with the basic mirrored structure, you can begin adding more elements or refining existing ones.
- Repeating the Process: After you have added more details, repeat steps 4-9 (grouping, duplicating, transforming, and snapping), but this time, focus on aligning the groups to the top and bottom edges of the canvas. This process effectively mirrors your design vertically.
- Maintaining Canvas Integrity: As you continue to draw, move elements, or add new motifs, always ensure that everything remains within the borders of your canvas. This is paramount for maintaining the seamless quality of your pattern.
- Infinite Possibilities: The beauty of this technique is its scalability. You can repeat these mirroring and alignment steps multiple times, creating increasingly complex and dynamic patterns by adding layers of detail and reflection. The more you experiment, the more sophisticated your designs will become.
Learn the Secret to Making Perfect Pattern Repeats with Procreate on iPad!
Finalizing and Exporting Your Design
Once your pattern has reached a state of completion that you are happy with, the next step is to prepare it for use.
- Exporting the Design: Navigate to the "Share" option within the tool panel and select "JPG" as the export format. This will save a flattened image of your design to your device.
- Testing the Repeat: Before uploading your design to a platform like Spoonflower, it's a good practice to test its repeatability. You can use various apps for this purpose. For instance, "Layout from Instagram" is a convenient tool that allows you to arrange your design in a 4- or 16-square grid, giving you a visual representation of how it will tile.
- Uploading to Spoonflower (or similar platforms): If your pattern tiles correctly and you are satisfied with the result, you can now upload it to your chosen platform. Open Spoonflower (or a similar fabric printing service) in your device's browser, select "Photo Library" to access your saved design, and upload the image.
- Selecting the Repeat Type: When configuring your fabric on the "Edit Fabric" page, it is crucial to select "Basic Repeat." This setting ensures that the platform understands your design is intended to tile seamlessly.
Exploring Advanced Techniques and Alternatives
While the core method described above is highly effective, there are other approaches and tools that can enhance your pattern-making workflow.
Diamond Repeat Patterns
An alternative to the standard square repeat is the diamond repeat. This technique involves rotating your base tile by 45 degrees.
- Understanding the Concept: In a diamond repeat, the entire tile still functions within a grid repeat style, but its orientation changes.
- Benefits of Diamond Repeats:
- Visible Seams: A significant advantage is that all the "seams" of the pattern are contained within the canvas. This makes it easier to visualize how motifs will interact with adjacent tiles.
- Illustrative Efficiency: You primarily need to illustrate the central motifs, as the mirroring and tiling are handled by the rotation.
- Refinement and Customization: This method allows for extensive refinement and customization of your sketch before finalizing the motifs. Each motif can be custom-made to fit the intended space within the tile.
Utilizing Third-Party Tools and Resources
The landscape of digital art tools is constantly evolving, offering new avenues for pattern creation.
- Pattern Maker Canvas and Brushset: Some artists offer specialized Procreate resources, such as "Pattern Maker Canvas and Brushsets." These can include pre-set canvases with textures and brushes designed to streamline the pattern-making process. These resources often come with accompanying video tutorials demonstrating their use on platforms like YouTube.
- Recraft.AI and AI Art Generators: For those looking for an even more streamlined approach, AI art generators can be a powerful tool. Recraft.AI, for example, offers a way to generate seamless patterns that can then be converted into Procreate pattern brushes.
- Generating Patterns with AI:
- New Project: Initiate a new project, ensuring it has a square aspect ratio.
- Image Style: Select "RASTER" for your image style. While vector formats can be used, raster designs often offer more complexity for pattern brushes.
- Artistic Style: Switch from "Photorealistic" to "ILLUSTRATION."
- Seamless Style: Crucially, select the "SEAMLESS" style option.
- Descriptive Prompt: In the provided box, input a clear description of your desired pattern. Simpler descriptions tend to yield better results. Including phrases like "a flat white background" is beneficial for creating Procreate brushes.
- Detail Reduction: Consider reducing the "DETAILS" to simplify the generated pattern. You can also specify the number of images to generate; picking two is often a good starting point.
- Generate and Review: Click "RECRAFT." After a short processing time, your pattern will appear. Below the main image, you'll find smaller thumbnails of all generated variations. If thumbnails aren't visible, click on the main image box to select it.
- Downloading AI-Generated Images: Ensure your desired image is selected. The "Export" button should appear in the top left corner. Choose "JPG image" to view or download.
- Generating Patterns with AI:
Creating Pattern Brushes in Procreate
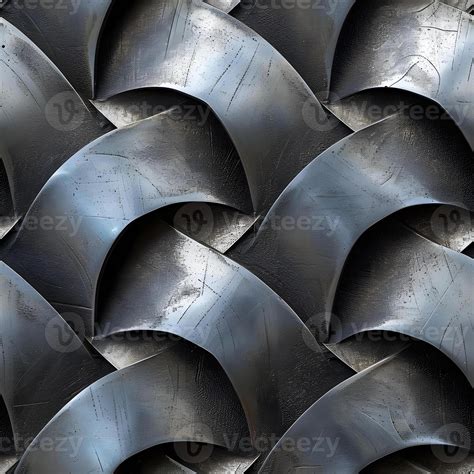
Once you have a seamless pattern image, you can transform it into a custom Procreate brush for even more dynamic design possibilities.
- Access Brushes: Tap the "BRUSH" icon to open your brush library.
- Create New Brush: Tap the "+" icon to create a new brush.
- Grain Settings: In the left-hand column, navigate to "GRAIN."
- Textured Grain: Select "TEXTURED."
- Edit Grain: Tap "EDIT."
- Import Pattern: Tap "IMPORT" and then "IMPORT A PHOTO." Select the seamless pattern image you previously saved.
- Invert Image (Optional but Recommended): It is often advisable to invert your pattern image. You can do this by tapping the uploaded image with two fingers. Refer to accompanying video tutorials for a visual demonstration of this step.
- Finalize Brush: Tap "DONE." You can now select a color and test your new pattern brush. Adjustments can be made by returning to the brush settings and tapping on your newly created brush.
Tayasui Sketches Pro Alternative
For those seeking an alternative workflow, the Tayasui Sketches Pro app offers a more integrated way to create pattern brushes. However, it requires you to save your seamless pattern image in your device's "FILES" beforehand, as it does not directly import from your photo library.