Photopea, a powerful browser-based image editor, offers a robust suite of tools for creative professionals and hobbyists alike. Among its most valuable features are layer masks, which enable non-destructive editing workflows. This tutorial delves into the intricacies of using masks in Photopea, from basic application to advanced techniques, empowering you to manipulate images with precision and flexibility. We will explore how to clip elements, refine selections, and apply adjustments selectively, transforming your images in ways previously only achievable with desktop software.
Understanding the Fundamentals of Layer Masks
At its core, a layer mask is an additional image attached to a layer, acting as a stencil to control the layer's visibility. This extra image is exclusively black and white. The principle is straightforward: white areas of the mask reveal the corresponding pixels of the layer, while black areas hide them. This black and white dichotomy is crucial to grasp for effective masking.
Photopea supports two primary types of masks: raster masks and vector masks.
Raster Masks: Pixel-Based Precision
A raster mask is a grayscale image composed of pixels. Any tool that can be applied to a regular layer, such as the Brush tool, can also be applied to a raster mask. The Brush tool, a fundamental artistic tool, allows you to draw strokes with a foreground color onto an existing layer. When working with a raster mask, painting with black conceals parts of the layer, while painting with white reveals them. The Pencil tool, similar to the Brush tool, creates sharp edges, which can be useful for precise masking. The Eraser tool, conversely, erases pixels from a layer, but when used on a mask, it effectively paints with white, revealing the underlying content.
The Clone Stamp tool is another essential editing tool. To use it, you first hold the Alt key and click on the layer to choose the source of cloning. This allows you to copy content from one part of the layer to another, filling areas with content from the chosen source.
Each layer in Photopea can have at most one raster mask and one vector mask. These masks can be enabled or disabled, and their visibility can be restored at any time. Importantly, any changes made to the layer, such as drawing or rotation, can also be applied to the mask. Masks can be linked to the main content of the layer, meaning that when the layer content is moved, the mask moves with it.
Vector Masks: Shape-Based Smoothness
A vector mask, on the other hand, is constructed from vector shapes defined by Bézier curves. Editing a vector mask involves manipulating these curves, allowing for smooth, scalable edges. While this tutorial focuses primarily on raster masks, vector masks operate on similar principles and offer a different approach to achieving precise and clean masking.
Setting Up Your Workspace in Photopea
Before diving into masking techniques, it's essential to set up your workspace. For this tutorial, we will create a 12x12 inch workspace with a resolution of 300 DPI.
- Create a New Project: Navigate to
File > New Project. In the New Project box, you can set a name for your project (e.g., "New Project"). Select "inches" from the dropdown menu for dimensions, and enter "12" for both width and height. Photopea will automatically add the decimals. In the DPI box, set the value to 300. Click the "Create" button. - Import Your Photo Mask: Go to
File > Open & Place. This action opens a dialog box allowing you to browse your hard drive. Select your desired photo mask and click "Open." Your photo mask will now be placed onto your 12x12 workspace.
Navigating the Layers Panel
The Layers panel is central to all masking operations. If you cannot see it, navigate to Window in the menu bar and select Layers. A checkbox will appear, allowing you to unhide the Layers panel. The arrow in the application interface points to the Layers panel, and the photo mask layer is circled for clarity.

Clipping a Photo to a Photo Mask
This section details how to clip an image or element to a photo mask, a common technique for integrating photos within designed elements.
- Add Your Photo: Similar to importing the mask, go to
File > Open & Place. Browse your hard drive and select the photo you wish to clip. - Resize and Scale: Upon placement, your photo might appear smaller than its original size. Locate the bar above your project that displays image dimensions. Ensure the link icon (represented by three small lines) between the W (width) and H (height) boxes is clicked to enable scaling. Then, type "100" into the W box. The H box should automatically update to 100 as well. If not, re-verify that the link icon is active.
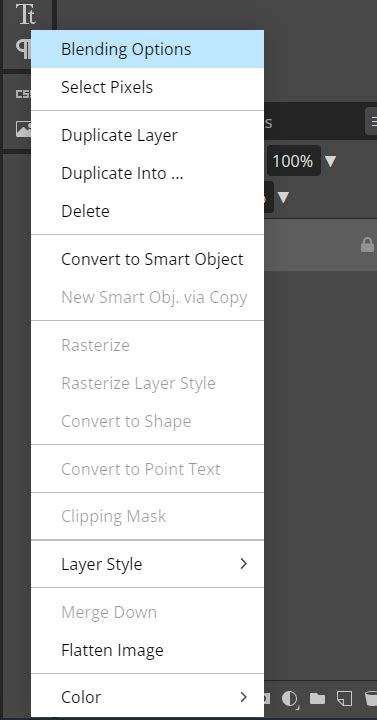
- Create the Clipping Mask: In the Layers panel, ensure your photo layer is selected. Right-click on the selected photo layer. A context menu will appear; select "Clipping Mask."
- Confirmation: A bent arrow will appear next to the clipped layer in the Layers panel, indicating that it is clipped to the layer below (your photo mask). This action effectively clips your photo to the mask.
Adjusting Clipped Content
If the clipped photo isn't positioned as desired, you can easily reposition it.
- Select the Photo Layer: Ensure the photo layer (the one you just clipped) is selected in the Layers panel.
- Use the Move Tool: Select the Move tool from the toolbox on the left side of the application.
- Drag and Adjust: Click and drag the photo within the photo mask until you are satisfied with its placement.
Saving Your Work in Photopea
Saving your project correctly is crucial to preserve your edits.
- Save as PSD: A standard method is to go to
File > Save as PSD. This will open a dialog box to save the file to your hard drive. However, it's been noted that files saved this way might encounter issues when reopened in other software like Adobe Photoshop. - Recommended Save Method: A more reliable method is
File > Save as PSD/PSB. Ensure "PSD" is selected in the pop-up box, and then click "Save." The file (e.g., "New Project.psd") will be downloaded to your browser's default download folder. This method generally ensures better compatibility.
Non-Destructive Editing with Layer Masks
Layer masks are the cornerstone of non-destructive editing, allowing you to make changes without permanently altering the original pixel data. This means you can always revert, adjust, or refine your edits at any time.
The "White Reveals, Black Hides" Principle
The fundamental rule of layer masks is simple: white reveals the layer content, and black conceals it. If you have a selection and add a mask, the mask will typically hide everything outside the selection, leaving only the selected area visible.
Practical Application: Hiding and Revealing Pixels
Let's illustrate with an example. Suppose you have an image of a man walking on a beach with a blue sky.
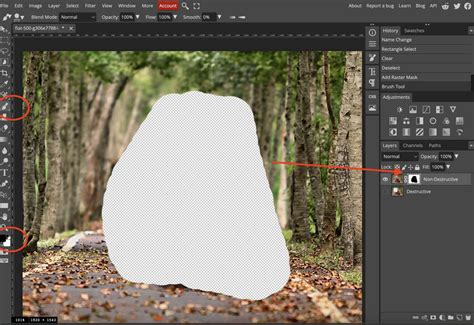
- Import and Duplicate: Import your image into Photopea. Duplicate the background layer and rename the original to "Destructive" and the duplicate to "Non-Destructive." Hide the "Destructive" layer for now.
- Demonstrating Destructive Editing: To show the limitations of destructive editing, select a portion of the image using the Rectangle Select tool and press "Delete." The selected area is permanently removed. If you need to undo this, you can use
Ctrl+Z, but if multiple edits have been made, recovering specific changes becomes difficult. - Introducing Non-Destructive Masking: Now, hide the "Destructive" layer and unhide and select the "Non-Destructive" layer.
- Adding a Raster Mask: In the Layers panel, click the "Add Raster Mask" button at the bottom. Alternatively, you can go to
Layer > Raster Mask > Add Raster Mask. A mask thumbnail will appear next to your layer thumbnail. - Viewing the Mask: To see what the mask looks like, hold down the
Altkey and click on the mask thumbnail. The canvas will now display the mask itself. - Painting on the Mask: Switch to the Brush tool. Anywhere you paint with black on the mask, the image will be hidden. To bring parts of the image back, switch your foreground color to white and paint. This allows you to selectively hide or reveal parts of your layer at will, at any time.
- Revisiting the Mask:
Alt-clicking the mask thumbnail again will return you to viewing the image. You can also delete a mask byAlt-clicking it and then selecting delete.
Mask Properties: Density and Feather
The mask thumbnail in the Layers panel offers controls for refining the mask's appearance.
- Density: The Density slider controls the opacity of the mask. A setting of 0% means no masking, while 100% (or a value of 255 in some contexts) means full masking. Values in between allow for semi-transparent masking effects.
- Feather: The Feather option slightly blurs the edges of masked regions. This is invaluable for creating natural-looking transitions between masked and unmasked areas, avoiding harsh, pixelated cutouts.
Masking from Selections
Masks can also be created directly from selections, offering a powerful way to isolate specific parts of an image.
- Delete Existing Mask: If a mask is already present on the layer, right-click on the mask thumbnail and select "Delete Raster Mask."
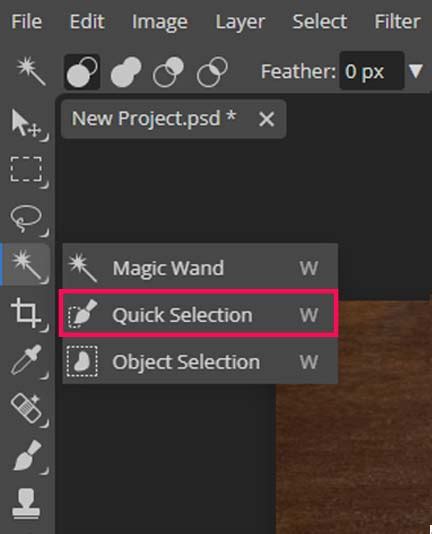
- Make a Selection: Use a selection tool, such as the Quick Selection tool, to select the desired area of your image (e.g., a car). While the selection might not be perfect for this example, it demonstrates the principle.
- Add Mask from Selection: With the selection active, go to
Layer > Raster Mask. You will see two options: "Add Reveal All" and "Add Hide All."- Add Reveal All: This option creates a mask that reveals the selected area and hides everything else. This is typically the default behavior when adding a mask from the Layers panel.
- Add Hide All: This option does the opposite; it hides the selected area and reveals everything else.
- Applying the Mask: Choose "Add Reveal All" to see just the selected portion of the image.
Advanced Masking Techniques
Working with a Black Layer Background
To better visualize masking, especially when working with "Add Hide All" or when you want to see what's being masked out, adding a solid color layer underneath is beneficial.
- Add a Color Fill Layer: In the Layers panel, click the "New Adjustment Layer" icon and select "Color Fill." Choose a solid black color. This black layer will serve as a backdrop to clearly see which parts of the upper layer are hidden by the mask.
Unlinking and Moving Masks
By default, layer content and its mask are linked. Moving the layer also moves the mask, and vice versa. To move them independently:
- Unlink Mask: In the Layers panel, locate the chain icon to the left of the mask thumbnail. Click this icon to unlink the mask from its layer.
- Independent Movement: Now, you can select the mask thumbnail and move it independently using the Move tool, or select the layer content and move only that. Dragging the mask to the left, for instance, can place it behind the subject, effectively changing what is revealed or hidden.
Copying and Deleting Masks
You can easily copy a mask by dragging it from one layer to another in the Layers panel while holding down the Alt key. To delete a mask, Alt-click on the mask thumbnail and select delete.
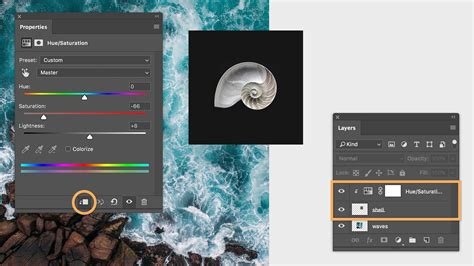
Masks on Adjustment Layers
One of the most powerful applications of masks is their use with Adjustment Layers. This allows you to apply adjustments like Hue/Saturation, Curves, or Levels to specific areas of your image.
- Add an Adjustment Layer: Switch back to your main image. Add a new Adjustment Layer by clicking the "New Adjustment Layer" icon in the Layers panel and selecting an option like "Hue/Saturation."
- Masked Adjustments: The Hue/Saturation Adjustment Layer automatically comes with its own mask. Initially, any changes to hue or saturation will affect the entire image.
- Targeted Adjustments: To apply the adjustment to a specific area, select the mask associated with the Adjustment Layer. You can then use selection tools and paint black onto this mask to define the areas that will not be affected by the adjustment, or paint white onto areas you want to be affected. For example, to change only the background color, you would select the background, fill the Hue/Saturation mask with black (masking out the foreground), and then adjust the hue and saturation. This way, you can change the hue and saturation without altering the rest of the image.
Conclusion: The Power of Photopea Masking
Layer masks are an indispensable tool for anyone looking to enhance their images in Photopea. They provide a flexible, non-destructive method for editing, allowing for intricate control over visibility and adjustments. While removing backgrounds or isolating elements might initially seem daunting, consistent practice with layer masks reveals their functional scalability and immense power. Mastering these techniques will undoubtedly elevate your image editing capabilities and allow you to achieve your creative visions with greater ease and precision. The ability to hide or reveal anything at any time, coupled with the precision offered by tools like the Brush and selection tools, makes masking a fundamental skill for effective digital image manipulation.