Procreate offers a powerful suite of tools designed to enhance artistic precision and streamline the creative process. Among these, Drawing Guides stand out as invaluable assets for artists seeking to plan and execute their work with enhanced accuracy. These guides are not intended to stifle creativity but rather to serve as a flexible framework, empowering artists to achieve specific visual goals, from precise measurements to complex perspective renderings. This comprehensive exploration delves into the functionalities of Procreate's Drawing Guides, with a particular focus on the versatile 2D Grid, its practical applications, and how to effectively integrate it into your workflow.
Unveiling the Drawing Guides: A Gateway to Precision
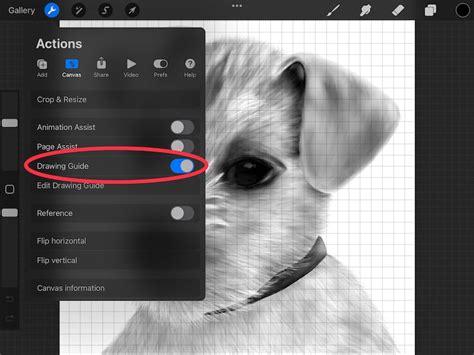
To begin harnessing the power of Procreate's Drawing Guides, the initial step involves enabling them within your project. This is achieved through the Actions menu, accessible via the wrench icon. Navigate to the "Canvas" tab, where you will discover the "Drawing Guide" option. Toggling the switch next to it will activate the guide for your current artwork. If this is your first time utilizing a Drawing Guide on a particular canvas, you will need to enable it first, followed by tapping "Edit Drawing Guide" to access its customization options.
Once enabled, Procreate presents a variety of Drawing Guide modes to suit diverse artistic needs. These include the 2D Grid, Isometric, Perspective, and Symmetry guides. By tapping the buttons in the top toolbar, you can seamlessly switch between these modes, while the bottom toolbar provides granular control for customizing the appearance and behavior of your chosen guidelines.
The 2D Grid: Measuring Your World in Pixels and Inches
While Procreate may not yet feature a dedicated ruler tool, the 2D Grid offers a robust solution for measuring and defining your canvas space. This guide is particularly adept at assisting with real-world scenarios and measurements, allowing you to work with precision that translates effectively to physical mediums or specific digital requirements.
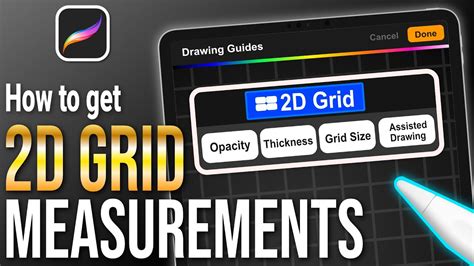
The 2D Grid enables you to visualize your canvas divided into uniform squares. You can customize the size of these squares by dragging a slider or by inputting an exact value. This functionality is crucial for creating pixel-perfect designs, especially when preparing artwork for printing. For instance, if your canvas is set to 4000 x 4000 pixels, you can configure the 2D Grid to display squares of 250 pixels. This configuration would result in a grid of 16x16 squares across and up, providing a clear visual reference for scale and proportion.
The flexibility of the 2D Grid extends to its unit of measurement. You can adjust the spacing of the guidelines not only in pixels but also in inches, centimeters, or millimeters. This feature is particularly beneficial for artists working with specific print dimensions. For example, an A4 canvas preset, which is a standard international paper size, can be utilized. When this canvas is rotated to a landscape orientation and a 2D Grid is applied with 1-inch squares, it provides a clear visual representation of the artwork's dimensions in a familiar unit. For those in North America and other regions, the 'US Letter' size serves as the closest equivalent to 'A4', offering comparable functionality for inch-based measurements.
The ability to tap on the measurement readout allows for the input of an exact value, ensuring that your grid precisely matches your intended dimensions. This meticulous control over grid sizing, when used in conjunction with custom canvas creation, empowers artists to produce pixel-perfect designs that are optimized for printing.
Beyond the Grid: Exploring Other Drawing Guides
While the 2D Grid offers exceptional utility for measurement and spatial planning, Procreate's Drawing Guides encompass other powerful modes designed for different artistic objectives.
Perspective Guide: Crafting Depth and Realism
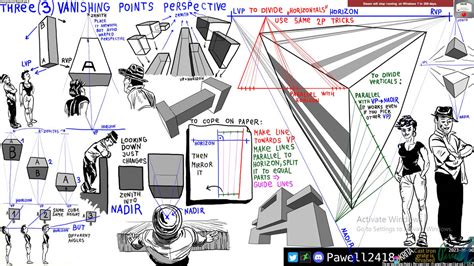
The Perspective Guide has been a cornerstone of Procreate's drawing assistance since its initial introduction. In subsequent updates, this functionality has been significantly expanded to include three potent new modes, all accessible within the Drawing Guides feature. This guide is instrumental in creating artworks that convey depth and realism, accurately depicting how objects recede into the distance.
When using the Perspective Guide, you have the ability to define one, two, or even three vanishing points by simply tapping on your canvas. These vanishing points are crucial for establishing the lines of sight and the convergence of parallel lines, essential elements in creating convincing perspective.
Isometric Guide: A Unique Spatial Representation
The Isometric guide offers a distinct approach to representing three-dimensional space. Unlike perspective, isometric projection maintains the scale of objects regardless of their distance from the viewer. This results in a depiction where parallel lines remain parallel, and all three axes (length, width, and height) are equally foreshortened. This guide is often favored for technical illustrations, architectural renderings, and game art where a clear, consistent spatial representation is paramount.
Symmetry Guide: Perfect Mirroring and Rotational Balance
The Symmetry guide is a remarkably intuitive tool for creating symmetrical designs. It allows you to mirror your strokes across a chosen axis, ensuring perfect balance and repetition. This is invaluable for tasks such as drawing mandalas, creating intricate patterns, or designing symmetrical characters and objects.
A particularly powerful enhancement within the Symmetry guide is the option for 'Rotational Symmetry'. When this feature is activated, your strokes are not only mirrored across a central axis but also flipped and rotated to adjacent segments. This creates a dynamic and complex symmetrical pattern with a single stroke, opening up a world of creative possibilities for intricate and mesmerizing designs.
Procreate Symmetry Guide For Begginers
Customizing Your Guidelines: Tailoring the Visual Experience
Procreate provides extensive options for customizing the appearance of your chosen guidelines, ensuring they are both functional and aesthetically pleasing within your workflow.
Appearance Customization
You can fine-tune the visual characteristics of your guidelines using sliders for "Thickness" and "Opacity" on the bottom toolbar. The "Hue" slider on the top toolbar allows you to select the color of the grid lines, enabling you to choose a color that offers sufficient contrast against your artwork without being distracting.
Positional and Rotational Control
The position of your guidelines can be adjusted using a blue node, offering flexibility in aligning them with specific elements of your artwork. Similarly, a green node allows for the rotation of the guidelines, providing even greater control over their orientation.
The Power of Drawing Assist: Guided Strokes
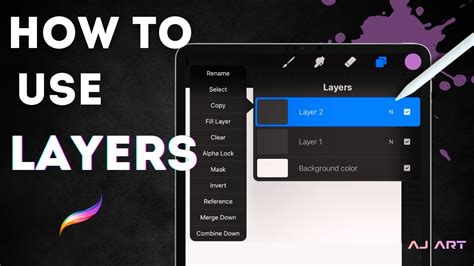
Each Drawing Guide mode is equipped with an "Assisted Drawing" toggle. Activating this toggle for a specific layer will enable Drawing Assist on that layer. This is visually indicated by an "Assisted" tag appearing next to the layer's name in the Layers menu.
When Drawing Assist is enabled, any paint strokes you make on that layer are automatically guided to follow the established guidelines. This means that your brush strokes will snap to the grid lines, align with perspective lines, or mirror according to the symmetry settings. This feature is incredibly powerful for achieving clean lines, precise shapes, and consistent perspective, especially for artists who are still developing their freehand skills or for those working on highly technical pieces.
However, if your creative process involves a more organic, freehand approach, you can easily toggle Drawing Assist off. This allows you to utilize the visual framework of the guides without being constrained by their guiding influence. For even finer control over Drawing Assist, you can explore the "Gesture Controls" found within your Actions > Preferences menu, which offer additional customization options for how assisted drawing functions.
Integrating Drawing Guides into Your Workflow
Once you have configured your Drawing Guides and are satisfied with their appearance and functionality, simply tap "Done" in the upper right corner of the screen. Your guidelines will then appear as an overlay on your canvas. It is important to note that these guidelines are non-destructive; they do not affect the content of your layers and will not appear in your Time-lapse Replay. This means you can freely experiment with your guides, adjust them as needed, or even create entirely new ones at any point during your creative process.
The true value of Procreate's Drawing Guides lies in their adaptability. Don't feel compelled to strictly adhere to them if doing so stifles your creative flow. They are tools designed to enhance your art, not to impose limitations. Whether you are meticulously planning architectural structures with the Perspective Guide, ensuring perfect symmetry in a mandala with the Symmetry Guide, or precisely measuring elements with the 2D Grid, these guides empower you to achieve your artistic vision with greater confidence and control.
The introduction of features like the Perspective Guide and the subsequent expansion of Drawing Guides in Procreate 4.1 have significantly broadened the toolset available to digital artists. By understanding and effectively utilizing these guides, artists can elevate their work, pushing the boundaries of precision and creativity within the Procreate ecosystem. Remember to experiment, adapt, and integrate these powerful tools into your unique artistic process.